Showing posts with label Firelands. Show all posts

Tuesday, 13 September 2011

Healing and Battling the Firelord, Heroic Ragnaros!


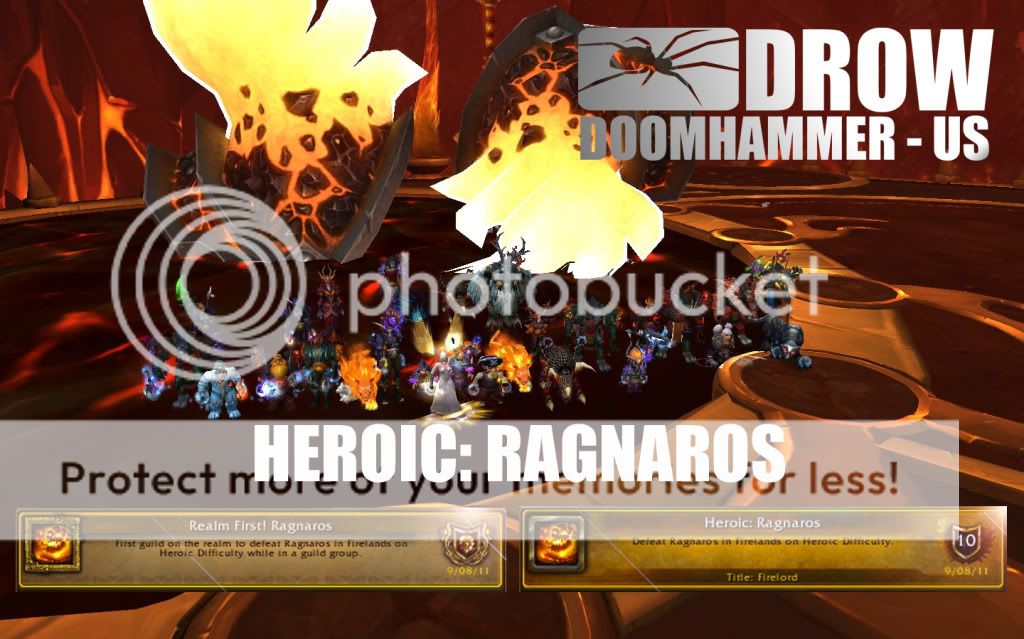
417 pulls later, the Firelord has been vanquished! Last Wednesday we finally killed Heroic Ragnaros! A big congratulations to all my fellow guildies in Drow, it was 7 long weeks of hard work but we pulled through and got him down! A bit unfortunately, the inevitable nerfbat hit the night before we killed it, which was rather disappointing. We had been getting deep into phase 4 the week before and were on our way to a pre-nerf kill, so it felt a little like the rug had been pulled from under us there. But, life goes on, and all the work we put in up to that week was certainly a big deal! We were very happy to get our kill, and we finished up with a US 11th 25man kill, which was a great achievement for the guild. Now, we prep for 4.3 and Deathwing!
Reesi of The Inconspicuous Bear put together a great video of our kill, featuring the PoVs of one of our DPS warriors and one of our Boomkins. I’ll share that with you all below, then I thought I’d talk a bit about the fight and healing it!


Hands down this was one of the most challenging fights I’ve ever encountered, and quite likely the most challenging encounter ever placed in the game so far. There were a lot of mechanics to learn, abilities to dodge, adds to control... on and on! all while meeting tight DPS checks. 
Like much of this tier, the high DPS requirements for the fight required running fewer healers. Some of the first Heroic kills used only three healers, though for our work and comp we settled on using four healers. We did do a night of work three healing late on (when one of our healers was out for the night), which was a fun additional challenge, but our kill used four. We used a resto druid (me), two paladins, and a holy priest.
The fight has a lot of phases and is very long (our kill was around 13 minutes), with damage varying from light to heavy throughout the fight. Mana management and careful planning of cooldowns and heals used is crucial on this fight to ensure you’re maximising your healing done, your mana saved, and your cooldown usage.
Because of the importance of mana in this long of a fight, it’s important to ensure you’re making the most of all your heals and not wasting any. Careful thought of when and where to place abilities like Efflorescence, Wild Growth, Tranqs, etc, go a long way in this fight. While there’ll definitely be times where someone way out of group absolutely needs a Swiftmend, and should get one, as much as possible Efflos are good on groups to max the healing done. Similarly with a spell like Wild Growth, times when a misplaced cast hits someone who’s off on their own so no one else gets ticks can be costly.
The first phase is fairly light healing wise - you have to heal up raid members after Wrath and Hand of Ragnaros and after each Magma Trap explosion, but you have a fair bit of time between each of these abilities, so you can generally afford to use more mana efficient heals to top people up. Tanks do take a lot of damage in this phase though. Popping Tranquility after the first Magma Trap explosion is actually a nice time to use the cooldown - it will heal up raid members very efficiently, and the cooldown will be available in later phases should you need it.
The two Intermission phases are quite interesting to heal, and how I decided to handle them actually prompted me to change my spec. I save my Tree of Life cooldown for the two Intermission phases - the entire raid is getting wrecked and is usually quite spread out at first due to stunning and killing the Sons of Flame. So quick heals, good raid coverage, and mobility are all extremely helpful in these phases. Mana efficiency is also huge, especially before Phase 2 and eventually Phase 4, where raid damage is quite intense. Bring in Tree of Life! 
Popping tree form in the Intermissions allows me to cover the raid with Lifeblooms to help manage raid healing, free instant Regrowths on all the Omen of Clarity procs (and without OoC when necessary) to top off raid members who dip very low, and of course Wild Growths and any Rejuvs or Swiftmends as needed. The raid gets hit very hard in the Intermissions and, especially when running few healers, it’s crucial the raid is getting healed up. ToL is great to pop in these phases on normal mode as well! Covering the raid in this way with ToL is great for mana efficiency and allowed me to go into our phase 2 and phase 3 and 4 with a good amount of mana ready for the heavy raid damage incoming.
I changed my spec slightly largely due to the Intermissions and any quick top-ups I was doing with Regrowth on OoC procs in the other phases. Normally I like running 3/3 in Living Seed, however, I found myself using Regrowth a lot more than usual while healing the raid, especially in those Intermission phases in Tree of Life form. I decided to change my spec and pick up 2/3 in Nature’s Bounty for the increased Regrowth crit chance. I opted not to go 3/3 as I preferred to keep Nature’s Cure for the magic dispel (Lava Waves aren’t necessarily deadly, but the dot is, so having a dispel ready for any raid member who accidentally got clipped was very helpful). I also kept points in Moonglow and Furor to maximise my mana pool and savings. My spec looked like this (8/2/31):


I must admit I enjoyed the reduced Nourish cast time from Nature’s Bounty as well. This ability feels much more like a nice tool for when we’re focussed on raid healing - as we spread Rejuvs, it makes it easier for us to cast a quick but mana efficient heal in the form of the hasted Nourish. We can either use that Nourish to perhaps small top up a raid member, top up a tank, refresh Lifebloom on a tank, or simply ensure our Harmony mastery buff remains up. This talent really doesn’t seem great for dedicated tank healing, though, as spreading 3 Rejuvs just to gain the hasted Nourish seems like a waste of globals and mana.
I generally ended up using my second Tranq on the second intermission phase - I could have used it during the Molten Seeds in phase 2, however, as everyone was stacked up for portions of it, topping the raid up wasn’t usually too difficult. The second intermission phase, though, there’s additional heavy damage on the tanks, who are picking up the Scions. This can make balancing healing the tanks and raid challenging, and it ended up being more helpful having the Tranq ready for the raid in this phase to catch raid healing back up in between the large hits on the tanks.
Phase 2 is an interesting phase. There are various strategies for dealing with the Molten Seeds, ours involved essentially a stack and run method for each wave. This was a fairly challenging phase to heal as well, mostly as there is heavy raid damage and a fair bit of movement. The seed explosions (and any remaining magma trap explosions) cause heavy raid damage which needs to be topped up fairly quickly. There’s also potential damage from World in Flames - while this damage is 100% avoidable, there are always instances when people take a tick, whether due to lag, getting into an awkward spot, etc. Generally it’s best to ensure people are topped off as the flames start to go off to give that leeway in case someone eats a tick by mistake. Tanks are also getting hit during these phases, particularly when on the run from the Seeds. I usually tried to save either my Swiftmends or a Nature’s Swiftness with Healing Touch for these times - they made some crucial saves on the move!
Phase 3 is primarily a DPS burn with a lot of avoidable damage. You basically must beat the third meteor spawn - the third spawn drops two meteors, and having four meteors up in phase 4 is just... a guaranteed wipe pretty much! This phase has World in Flames again but it’s easily avoidable, so the majority of the damage is just on the tanks in this phase. Because the DPS is so tight, I actually get to chill by the tanks and be on meteor knockback duty along with helping on the tanks. 
Phase 4 is a mix of heavy damage on the tanks and alternating heavy and light damage on the raid. There’s a bit of time before the first Frost Breadth spawn when Superheated starts stacking up on the raid, so the overall raid damage ramps up quite quickly. Once the raid is settled in the Breadth, though, damage drops dramatically (at least until you have to move to a new Breadth). Tank damage remains high and you have to keep an eye on any raid members who might have to kite a meteor out of the breadth spawn. Keep it together, though, and you’ll get him down!
One frustrating thing I found over the course of this fight was keeping my Lifebloomx3 stack on the tank. There are quick tank swaps in this fight due to the stacking dot Ragnaros places on the tank. This makes for a bit of an awkward decision - do I spend 3 globals applying a stack to the taunting tank, or leave it on the previous tank while healing the new one? The non-tanking tank will still take some damage from the dot, so it’s not necessarily a waste, but it is frustrating. I know our Pallies stopped switching beacons on every tank swap as they found it inefficient. 
I ended up mostly planning my Lifebloom stacks in advance some. For example, in the seeds phase in Phase 2, the tank during the stage in which we had to run from the seed spawn would take a lot of damage from Rag while we were on the move, so I’d stack my LB on her to help increase the healing on her. Meanwhile the tank who taunted after the movement piece didn’t get hit as hard, due to Ragnaros stopping melees briefly while casting World in Flames. Going into the second intermission phase I placed LB on the tank I was healing for the Scion spawns. In phase 3 I kept my LB primarily on our warrior tank as he tanked the majority of p3 - a combination of avoidance and World in Flames casts meant the dot generally didn’t get too high on him, which also allowed our bear (Reesi!) to go cat form and add in some more damage.
This does highlight the bit of frustration with fights such as this though, as swapping our Lifebloom stacks between tanks in quick tank swap fights can be very inefficient and frustrating. I commented on this the other day in the Druid Class Feedback Blizzard had posted the other day (you can see links to the post and also my feedback in my post yesterday, viewable here: Resto Class Feedback).
Another good thing this fight especially highlights is Barkskin is your best friend! Every druid should really have this on their bars if they don’t have it already, as it’s such an amazing damage mitigation cooldown. I actually ended up planning out a lot of its use as well on this fight to maximise its effectiveness - I was generally able to use it every Magma Trap explosion, every Seed Explosion, and have it up for emergencies in World in Flames phases. It’s such a great ability both for this fight an others!
Overall impressions: It was a very long haul but it certainly feels like an accomplishment, especially working with 24+ other people to execute all the coordination to down this boss. It was undoubtedly a team effort and I can’t praise my guildies enough for all the hard work put in. 
Healing the fight was a lot of fun, especially planning when I wanted to use cooldowns, managing my mana throughout the fight, and even planning which heals I preferred to use and when to ensure I was getting the most out of my heals and keeping my mastery buff up.
Druids especially shine on this fight I think, as our hots and raid healing abilities are extremely helpful for some of the movement portions of the fight, particularly when it coincides with heavy raid damage. We also can do an excellent job on tank healing - certainly a strong portion of my healing was on tanks as well as raid, but in particular I always feel Resto druids fit a nice niche of tank healing/support while being able to maintain good coverage on the raid. Paladin’s Hand of Sacrifice was of course very helpful on the tanks, which is a bit unfortunate that Druid’s cannot match that ability. Shaman get a bit of the short end of the stick with all the movement in this fight, however they can perform very well if focussing on tanks. Priests of both specs seem to perform well - Holy’s Lightwells are extremely useful (provided your raid uses them of course!) and Guardian Spirit can be great for tanks on the move in Phase 2 and for the heavy damage in Phase 4. Discipline can also do well, though Power Word: barrier seems more useful for reducing trap or seed explosions in phase 2 and potentially in phase 4 when the raid is actually stacked up.
Now to prepare for patch 4.3 and the battles with Deathwing! I have a bunch of ideas for other posts too so now with some extra free time as we get back to a farm schedule, I'll try to get some more posts up soon. 

Happy raiding!

Wednesday, 3 August 2011

Fire Nyan Kitty!

So I haven't posted in way too long (my apologies!), but thought this deserved a post because it's amazing(ly fun). Our bearcat Reesi (of The Inconspicuous Bear) got a firekitty staff a couple of weeks ago (Fandral's Flamescythe) which gives her the incredibly fun ability to turn into a firecat while in cat form! Sadly we've only seen two of these drop so far so I don't have one yet, but hopefully will soon!

Fortunately we can have pretend firekitty fun with Potions of Illusion!

Also, many druids out there will have discovered that you can shift into bird form without losing your illusion, which leads to amazing floating kitties...


Which, in turn, led to the following video of pure awesome:


:D Best thing ever amirite?!

At any rate! Again, apologies for the lack of posts lately, we've been full on into progression content in-game and out of game has been pretty busy as well! I would like to do some posts about the current content and I have some ideas in the works, just need to set aside some time to get them posted up. I'm excited for the final fight of the tier though - we're working on Heroic Ragnaros now and it's shaping up to be a very challenging (and long) fight! The world first kills have started rolling in now, and a big congratulations to all the guilds who have taken him down so far! With some solid work ahead for this week hopefully it won't be too long before we see a kill as well.

Enjoy the video!

Monday, 27 June 2011

4.2 Resto Changes and You!

Patch 4.2 is finally upon us and should be landing this week! There are plenty of changes and new content coming, including the new Firelands raid zone! For the latest news and updates I suggest checking out MMO-Champion.

I'll be updating my Resto and Feral guides over the course of this week. For the moment though I'd like to focus on two important changes for Resto: The Innervate changes and the new Mastery.

Innervate in 4.2


Innervate is undergoing a change in 4.2, but it's important to fully understand this change.


Innervate used on oneself is unchanged.

When the casting druid uses Innervate on his or herself, the druid will still receive 20% of their maximum mana.

The change to Innervate is when it's cast on other targets, eg, the druid casts an Innervate on a Pally. In 4.2, an Innervate will cause a target to receive 5% of their maximum mana pool - so, in the example of a druid casting their innervate on a Pally, the Innervate will give the Pally 5% of the Pally's maximum mana pool. This is a substantial nerf to Resto and Balance druid Innervates (though it's technically a slight buff to Feral Innervates), as apparently sharing Innervates was accounting for too much mana savings, especially at higher gear levels.

So what does this mean for us? Well, you'll be much less likely to be giving your Innervates away, and overall Innervate will be a bit less desired by other healers. An important thing to note is trading Innervates with another Resto druid will no longer be a mana gain - the Innervate you give to the other druid will be substantially less and vice versa, so this is no longer a viable strategy for mana return. For maximum mana gains, you'll want to be Innervating yourself.

Glyph of Innervate
It's very very important this is understood - Glyph of Innervate is unchanged in 4.2. The tooltip has been updated to reflect what this actually means - the casting druid will receive half of their Innervate when they cast Innervate on another target, ie half of 20% of their maximum mana pool, that is to say 10%. This means you will still receive 10% of your maximum mana pool when you cast your Innervate on another target while glyphed.

With that in mind, Glyph of Innervate is still a useful glyph in 4.2. While your Innervate won't be as valuable to others as it is currently, it can still be extremely useful for people, especially if a fellow healer is out of mana (or perhaps was just battle rezzed), or even for a DPS that could use it. Balance druids can also still help out their healers with an Innervate. The nice thing about continuing to use this Glyph is it gives you the flexibility to share your Innervate with someone else should they need it while still receiving some of the mana return yourself.

New Resto Mastery


I discussed the new Resto Mastery some already in an earlier post, but I wanted to refresh on it with 4.2 finally going live. Our new mastery is the following:

Harmony: Increases direct healing by 10% and your direct healing spells grant you a 10% bonus to your periodic healing for 10 sec. Each point of mastery increases each bonus by an additional 1.25%.

This is a really nice change for Resto druids, increasing our direct healing and making a nice interaction between our direct heals and our HoTs. Every time we cast a direct heal (Healing Touch, Nourish, Regrowth, and also Swiftmend), we will gain the buff Harmony which increases the healing done by our HoTs.

We ideally want to maintain as close to 100% uptime on the buff as possible. It will be very important for raid healers to make sure they're maintaining the buff to increase their HoTs as well as the tank healers. Swiftmend will proc the buff, but the cooldown on Swiftmend is 15 seconds and the buff remains active for 10 seconds, so you'll be losing uptime on the buff if you only refresh it with Swiftmend. It's reasonable, but ideally you won't be losing any uptime at all. If you're largely raid healing, you're still likely keeping your Lifebloom rolling on the tank or another person, so refreshing it with a Nourish or other direct heal should help you maintain the buff. Tank healers and those who watch both shouldn't have too much issue maintaining the buff.

Keeping track of the Harmony buff will go a long way to helping you maintain good uptime on it. For those that use the addon Power Auras (an excellent addon which I highly recommend), the following is a code I made which is helpful for keeping track of the mastery buff. It will show you the buff is active and the time remaining on it so you can see when you need to refresh it.

The import code is this:
Version:4.19; b:0.0549; g:0.4863; icon:Spell_Nature_HealingWay; buffname:Harmony; r:0.1843; x:-85; customname:Harmony; texture:23; alpha:1; inVehicle:0; wowtex:true; combat:true; size:0.25; y:-160; ismounted:0; timer.b:0.9294; timer.h:2; timer.Texture:WhiteRabbit; timer.enabled:true; timer.r:0.9882; timer.cents:false; timer.Relative:CENTER; timer.UseOwnColor:true

The Aura itself looks like this (seen with my full Resto power aura setup):

The Harmony aura is the leaf on the left hand side with the timer.

My full set of power aura codes are available in my post here: My User Interface / Addons.

Happy patch day! Don't forget to update your addons!

Friday, 13 May 2011

4.2 Mastery change, Innervate nerf, and PTR Raid Testing


Patch 4.2 is under testing on the PTR and the news keeps rolling in! While everything is still very much subject to change, there are some interesting changes slated for Druids already, including a new Mastery for Resto and a very significant change to how Innervate works. We've also had two of the new Firelands bosses up for testing and I've got some cool screenshots of those as well! As you can see in my screenshot above, the new Firelands zone looks awesome. That shot is actually taken inside the instance - it's a massive zone, and you can mount up to ride to each boss.

New Resto Mastery
There was a recent blue post with 4.2 patch notes which included this gem:

'Symbiosis (Mastery) has been removed and replaced with Harmony. Harmony increases direct healing by an additional 10%, and casting direct healing spells grants an additional 10% bonus to periodic healing for 10 seconds. Each point of mastery increases each bonus by an additional 1.25%. Healing Touch, Nourish, Swiftmend, and the initial heal from Regrowth are considered direct healing spells for the purposes of this Mastery. All other healing from druid spells is considered periodic.'

This is looking like a really great change, so hopefully it'll make it through testing to live. The old / current Mastery has some issues; though it's not too bad, it's much stronger in 5- and 10-mans, where HoTs can more easily line up with other heals. Probably the most frequent question I get is 'Should I be putting Rejuvs on my Wild Growth targets to activate the Mastery?', which really shouldn't be done unnecessarily (ie, on targets that don't need all that healing), so it likely ends up just encouraging spamming.

The new Mastery not only will boost our direct heals and encourage more direct healing, it's also a great boost to our direct heals and hence our tank healing as well as our raid healing. The mastery will proc off of Swiftmend too, so even if you're focussing on raid healing, you'll still be gaining the Mastery through your Swiftmends.

By the sound of it, it seems like it may proc a buff (increases periodic healing for 10 seconds), which would be nice if an actual buff comes up as that can be easily tracked with something like a Power Aura to make sure we maintain it, but we'll have to see. Either way, a very positive change!

Innervate changes
The Innervate changes slated for 4.2 so far are mostly nerfing Innervate's effect for OTHER healers. The effect when used on oneself will be the same - a 20% mana return. The change is when we cast our Innervate on someone else, it will now cause them to regenerate 5% of THEIR maximum mana.

Innervate: now causes the target to regenerate 5% of their maximum mana over 10 sec. Still regenerates 20% of maximum mana on self cast.

So this is basically just a nerf to Innervate trading. The Glyph of Innervate will be unchanged - if we cast it on someone else, we'll still receive half of our own Innervate (so 10%), but the other person will only get the 5% of their maximum mana rather than our 20%. If this change goes live, Innervate trading will basically be worthless as a mana strategy. It's still certainly viable for helping other healers when they're in need of mana, but trading the Innervates around won't be anywhere near as powerful as it is currently.

This is a slight buff to Feral innervates, though, as the Innervate on someone else will amount to 5% of the target's maximum mana (assuming that it is based on the target's maximum mana, which it appears to be), so Feral innervates will be slightly more useful now.

PTR Testing!
I've been hopping on the PTR for some of the raid testing. The new Firelands zone looks awesome inside - it's a massive space and it just looks great. We've tried out two of the bosses so far, Beth'tilac the spider boss and Lord Rhyolith. I won't go into too much detail on the fights yet, particularly as they're still subject to changing and tuning, but this should whet the tastebuds!

This is Beth'tilac. The fight itself looks like it will be pretty interesting, though it may be yet another fight that's bad for melee (and Rhyolith seemed bad for melee too, to be honest). The fight itself was ridiculously overtuned (mostly in Phase 2, where outgoing damage was ridiculous). The boss itself retreats up on top of her web when you engage. Some of the adds you deal with lower themselves down on webs, and you kill them to get a web vehicle which will transport raid members up on top of the web to engage the boss. Fortunately the web area is a normal platform - when I first heard about going into the webs in the Blizzard previews, I had a sudden fear that we'd be hanging upside down or something ridiculous. The upper web area though is a normal, fairly flat surface, though, so there aren't any weird swimming mechanics or camera angle quirks to it, which is great.

This is Lord Rhyolith. This will be a fight that ultimately requires a lot of coordination. He doesn't have a threat table (tanks will be busy rounding up adds), instead you attack his Left or Right Foot. DPSing either foot will cause him to turn in that direction, so you steer him around the area by DPSing the Left or Right foot, whichever way you want him to turn. He starts with an 80 stack of armour, which reduces his damage taken by 80%, so you have to steer him over volcanoes to melt the armour off and increase his damage taken. It looked like both feet share a healthpool, and supposedly his body will not be targetable (or at least not damageable) when this goes live - we were able to target it on the PTR, but it was obviously unnecessary to do so.

I'll leave it at that for now! As there may not be many screenshots of these bosses and Firelands things around yet, people are welcome to use my screenshots, but I ask that if you do so please link back to the blog for crediting. :)