A bit of a quick post, I decided to try out a slightly different spec picking up Swift Rejuvenation again. I had already dropped points in Nature's Bounty to get some points into Furor to max out mana pool. Regrowth is simply feeling too expensive mana-wise and lacking the healing punch to use it too frequently, so losing the increased chance to crit doesn't seem like a loss. I do still use Regrowth on OoC procs when warranted (especially when in Tree of Life and they're instant) and also for the haste buff with Nature's Grace, but it's not one of my go-to spells otherwise.
I've decided, then, to try out a spec which completely drops Nature's Bounty and instead picks Swift Rejuvenation up again. This talent is potentially a debatable one - mainly as the high mana cost of Rejuv can make it difficult for this talent to feel worthwhile when people can't use Rejuv as frequently. This specific issue will ease up as you pick up more gear, though, and your mana pool and regen increases.
There are a few nice reasons for picking up SR though. For one, in the starting tier our Haste will simply not reach high enough levels to bring our GCD down to one second, so having a talent that essentially brings our Rejuvs to a one second GCD is very valuable.
Having the faster GCD on Rejuv will also help us get to our other spells more quickly, whether it be another Rejuv or a spell like Nourish. I think this talent gets skipped some as people think only of the Rejuv spam of Wrath, which isn't feasible in Cataclysm, and so forego it. We don't need to be spamming only Rejuvs for this talent to be valuable.
One of the big things I've noticed that this talent will be helpful on is our Swiftmends. As Rejuv's duration is shorter now, we can't preemptively HoT targets to prepare them for later Swiftmends. Quite frequently you will have to Rejuv your target immediately in order to Swiftmend, as they won't have had the HoT on them before needing the SM. The shorter Rejuv GCD will make getting that SM off quicker, even if only slightly. Every second (and even half second) is crucial, and that half second can save someone in a raid or heroic.
All that being said, here is the spec I'm trying out! 8/2/31
So we shall see how this goes! I think that little change will be a good difference. I'm hoping to eventually be able to get some points into Genesis, whether from Moonglow or Furor, but I don't see that being feasible anytime in the near future with mana conservation still being important.
I've updated the Resto Guide as well to include the notes on that spec, for those still checking on the guide!
We did it! We killed the Whale Shark! Clearly, the biggest achievement a guild can accomplish, and I do mean biggest. There were many corpse runs and, amazingly, one of our tanks who had joined in the kill survived a hit (through Shield Wall plus a block) - only one hit, though. He didn't make it through the next hit.
While you could solo it, you'll likely have best luck doing it in a group (it won't take as long, at least). You'll definitely need to kite him, staying between 5 and 20 yards the entire time. 5 yards will keep you from getting eaten, but if you go beyond 20 yards he'll disengage and evade away. Conveniently for your DPS, swimming 20 yards away should reset threat as you'll drop combat. For your kiter, an addon that shows range would be very useful to ensure you remain in that range. There are specific addons that will check range, and others that have it as a built-in option (IceHUD has one). Have a look around Curse or WoWInterface for some of the range check addons. To kite him, simply swim backwards, keeping him in that range.
For DPS, you can swim alongside him and pew pew, but keep a close eye on your threat - if he turns to bite you, you're done! You won't need any healers for this as anyone who gets nommed on will be dead. You will find you have some Line of Sight issues as well, so you need to position yourself at the right height alongside or in front of him. The line seemed to be about in line with his mouth.
Good luck!
In other news, we got our first heroic kill last night, Halfus Wyrmbreaker! The most difficult part seemed to be Halfus' last 50%, as he does a Roar every 30 seconds which does a knockdown to the raid which is both annoying and difficult to heal through. I think I preferred his bonestorm-esque whirlwinding from Beta! It seems they've taken that out completely, though. We ended up BoPing myself, our other druid, and then a priest for each stun to pop Tranq/Tranq/Hymn, which helped us get the raid through that phase, and also rotated cooldowns on the tanks (who were still tanking Halfus and the dragons through the knockdowns).
The screenshot above was only remembered after we had started to clear the trash on the way to Theralion and Valiona, so no corpse there, but here's a little achievement shot to go along with it.
We managed to get Nefarian and Al'akir down on 10s as well to keep our progression up through the holiday attendance lull (all other kills on 25 though), so I think this week we may try some more hardmodes and also finish up those two kills on 25 to round that out. Some good progression so far, which should pick up even more once the holiday season wraps up!
In fun news, the bug with the stone drake models is actually pretty excellent with the Sandstone Drake, as it looks like you're carrying your prey off to your lair! Works especially well with gnomes (as above).
Still digging for my Tyrande's Favourite Doll trinket, 119 Night Elf artifacts (and 6/7 rares) solved and still no luck! Just have to keep telling myself 'It'll be the next one...'
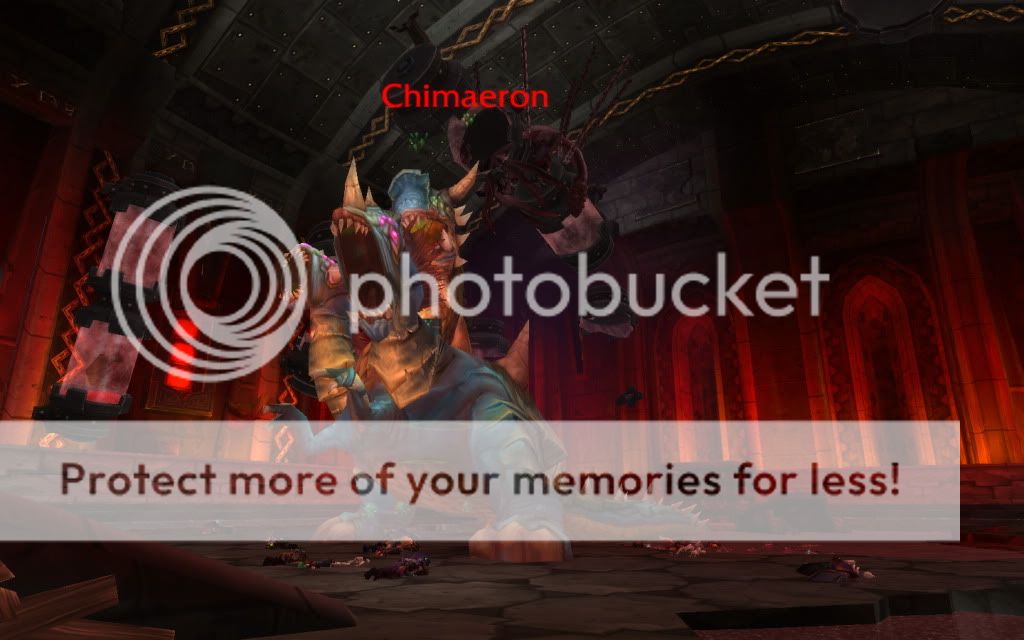
I'm working on getting some new guides up (though the information on the Beta Raid Previews pages are still relevant) and thought I'd kick it off with Chimaeron in Blackwing Descent.
Video: One of our Chimaeron 25 man Heroic kills. Details on the Heroic mode are towards the end of this post after the normal mode description.
Chimaeron is one of the three bosses inside Blackwing Descent beyond the entry gate - after defeating the Omnitron Defense System and Magmaw, the portcullis will open and allow you to face Chimaeron, Maloriak, and Atramedes before facing the final boss, Nefarian.
Chimaeron is a mix of simplicity and difficulty - the concept and strategy to the fight is straightforward, but the actual execution can be quite challenging. While DPS have a fairly straightforward burn throughout this fight, tanking and healing have some unique challenges which I'll cover after the ability and strategy breakdown.
Let's start by taking a look at Chimaeron's abilities. (source)
Finkle's Mixture - Damage taken while above 10,000 health cannot reduce your health below 1.
Phase 1
(100%-20%) Caustic Slime - Deals 280,000 Nature damage and reduces chance to hit for all enemies in an area. Damage is split between all enemies with 6 yards of impact. Massacre - Inflicts maximum damage to all enemy players. Double Attack - Chimaeron will strike twice on his next attack. Feud - Chimaeron's heads are fighting each other and are unable to perform melee attacks. Break - Increases Physical damage taken by 25% and reduces healing by 15% for 1 min on the target, stacks.
Phase 2
(20%-0%) Mortality - Chimaeron goes into a rage, becoming immune to Taunts, increasing his damage taken by 20%, and reducing healing effects for all enemy players by 99%. Double Attack - Chimaeron will strike twice on his next attack.
The key mechanic in this fight is Finkle's Mixture. This is a raid-wide debuff that is enabled when you activate the Bile-o-Tron by speaking to Finkle Einhorn, the gnome in the cage at the back of the room. Once you speak to Finkle, the Bile-o-Tron will switch on and begin moving around the room. Chimaeron will begin to wake up, however, you can speed things up by engaging him directly.
Phase 1
It is extremely important to spread out at least 6 yards apart for all of phase 1. This should ideally include melee, who can spread out around the boss' hitbox. This is to prevent Caustic Slime hitting more than one target at a time, as the splash damage can kill even if the initial hit doesn't. While the Bile-o-Tron is active, Finkle's Mixture will prevent everyone in the raid from dropping below 1 health if they are at or above 10,000 health. This allows the raid to survive the Caustic Slimes and Massacre.
The Bile-o-Tron will periodically be knocked offline during phase 1. When the Bile-o-Tron is knocked offline, the raid is no longer protected by Finkle's Mixture, so the raid needs to stack up and be healed fully. There will still be Caustic Slimes and without the Bile-o-Tron raiders can die from it, so they must be healed up. It is also extremely important the raid is tightly stacked - this will mitigate the damage from Caustic Slime on the raid.
As soon as the Bile-o-Tron is back online, the raid needs to immediately spread back out to again avoid splash damage from Caustic Slimes.
Phase 2
Phase 2 begins when Chimaeron hits 20% health. At this point, it is simply a DPS burn. Chimaeron becomes immune to taunts but takes additional damage. Healing is reduced by 99%, so basically no one will be getting healed during this part of the fight and people will die. He moves slowly, so he can be kited, but he needs to be burned before raid members begin dying. The Bile-o-Tron will still be active, so you'll have the Finkle's Mixture buff, but you won't be able to heal anyone back up above 10,000 health once they fall below it.
Tanking Chimaeron
You'll need two tanks for this fight on normal mode to deal with two of Chimaeron's abilities: Break and Double Attack. These two abilities affect Chimaeron's targets and specific tank taunts will effectively deal with this.
You can use the Finkle's Mixture to your advantage here. The Main Tank can tank Chimaeron and take the Break debuff. So long as the MT is kept above 10,000 health, if the Bile-o-Tron is online the MT will not die. The MT only needs to be kept above 10,000 health. Even with multiple stacks of the debuff, if he's above 10,000 health, he won't die while the Bile-o-Tron is active.
The key here is the Off-Tank. The OT will be taunting Chimaeron in order to take the Double Attack only. The OT must be kept topped off at full health. Because the Double Attack is two strikes, even if the first hit doesn't kill the OT, the second one can easily kill if the OT falls below 10,000 health.
In normal mode, Chimaeron will Feud while the Bile-o-Tron is offline and will not deal any melee attacks, so your tanks should be healed up along with the rest of the raid but won't require special attention until after Feud is over when the Bile-o-Tron is back online.
Chimaeron deals massive strikes to the tanks, so it is important both tanks and healers be ready for these hits and rotate cooldowns as needed. Good avoidance and mitigation for tanks is great on this fight - dodging one of Chimaeron's big hits is fairly obvious.
Healing Chimaeron
I've touched on one aspect of healing this fight above in the tanking section. This fight is fairly specific in terms of healing strategy and hinges on the use of Finkle's Mixture.
While Finkle's Mixture is active when the Bile-o-Tron is online, the raid will not drop below 1 health - as long as they are above 10,000 health. The entire raid needs to be kept at 10,000 health minimum and, ideally, maximum. Do NOT waste mana trying to heal everyone up to full in these phases - you will burn yourself OoM.
When players are below 10,000 health, they will gain a debuff called 'Low Health'. For those of you using addons such as Vuhdo and Grid, you can enter this debuff into your customizable debuffs and it will show up on players below 10,000 health. (You can see this debuff indicator on my Vuhdo frames in my video at the beginning of this post).
At lower gear levels, our cheap heals (Nourish for druids, Heal for priests, etc) will likely not heal targets up over 10,000 hp unless they crit (most will hit for around 8k), so you will likely have to try different heals to get targets healed quickly enough. You'll have about 5 seconds between the different abilities (Slimes and Massacre). You may want to try heals like Healing Touch, Rejuvs, etc.
It is extremely helpful to assign healers to groups to prioritise targets hit by Caustic Slime and Massacre and to avoid missing some raid members when you have overlaps on other targets. Having healers prioritise certain groups or targets first and assisting other targets/groups when they can is useful. Also be aware of healers who can heal themselves while healing others, such as Priest's Binding Heal. You may also find it helpful to run extra healers, especially for early attempts and kills, as adapting to the healing strategy will likely be the most challenging part of this fight for many raids.
When the Bile-o-Tron is knocked offline, the raid is no longer protected by Finkle's Mixture. It is imperative the entire raid stacks up tightly to mitigate the Caustic Slime damage. During this phase, the entire raid needs to be healed to full - AE heals like Efflorescence, Wild Growth, and other class abilities like Holy Word: Sanctuary, Healing Rain, etc are extremely useful in this phase. If you have several druids, you may find rotating Tranquility in each collapse is helpful. DPS classes can also throw out a quick AE heal if they have it to help (such as ele and enhance shamans throwing out a Healing Rain). Once you top the raid up fully the first time after Massacre hits, you can likely heal the raid up to about 85% and on downwards from there for the remaining hits to conserve a bit of mana, as there will be a only a few Caustic Slimes hitting the raid before the next Massacre and the Bile-o-Tron coming back online.
When the Bile-o-Tron is back online, the raid should spread back out and again be kept only at 10,000 health.
As mentioned in the Tanking section, the Main Tank tanking Chimaeron can be kept just above 10,000 health. The Off-tank taking the Double Attack hits must be kept at full health, though, in order to prevent him from dying to the Double Attack.
Once you hit Phase 2, all healing is reduced by 99%, so any heals are pretty futile at this stage. You'd likely be most useful by helping with the DPS burn. For Druids, using Tree Form as a DPS cooldown in Phase 2 can be helpful in the DPS burn.
And that is it for the fight! It's fairly simple in concept - spread out, collapse, repeat, and pewpew, really - but it will likely be a gear-check for many and will test tanks and healers as well as DPS, who need to burn him at a decent pace (especially if sacrificing some DPS for additional healers).
Heroic Chimaeron
There are two significant changes from normal mode to Heroic mode.
The first extremely important difference is Chimaeron no longer does Feud - Nefarian appears and interrupts it, allowing Chimaeron to attack.
This means Chimaeron willmelee the tanks while the Bile-o-Tron is offline.
Your tank rotation for Break and Double Attack become of much greater importance on hard mode.
There are several ways to manage this change, all involving important tank rotations in addition to solid healing and damage mitigation cooldowns.
It is easiest, especially in 25 mans, to run three tanks for this fight on Heroic. One tank will continue to be the Double Attack tank only - he will only taunt Chimaeron to take the Double Attack strikes. This tank needs to be topped off at full health throughout the fight and should never get the Break debuff.
Your other two tanks will be your Break tanks. It is crucial to survival that the person tanking Chimaeron while the Bile-o-Tron is offline not have any stacks of Break when they taunt - they will die very quickly if they are taking melee hits from Chimaeron while the Bile-o-Tron is offline. A simple way to handle this, then, is to have one of your Break tanks begin the fight tanking Chimaeron. They will continue to do so up until the first Feud, which generally leads to about 4 stacks of Break. The second Break tank then taunts Chimaeron at the start of Feud. The second tank can continue to hold Chimaeron when the Bile-o-Tron comes back online until the next Feud, by which time the first tank's stack of Break will have cleared, allowing the first tank to taunt Chimaeron for the following Feud.
In summary, you have your Double Attack Tank (DA Tank), offtank 1, and offtank 2.
OT 1 begins the fight, DA Tank taunts for all Double Attack hits.
Feud - OT 2 taunts, DA Tank taunting as needed for Double Attack still.
2nd Feud - OT 1 taunts, DA Tank again taking Double Attack strikes.
3rd Feud - OT 2 taunts, DA Tank taking Double Attack.
and so forth. This sort of rotation should ensure your tanks are clear of the Break debuff when they are tanking Chimaeron while the Bile-o-Tron is offline.
The tanks will need to be topped off during Feud in addition to the normal raid healing, and the tanks must be quickly topped off after the Massacre before Feud in preparation for Chimaeron's first strike. A cooldown such as Guardian Spirit, Pain Suppression, or Hand of Sacrifice is also crucial when the OT taunts to help mitigate the incoming damage. You can see in the Heroic video at the top of this post (where I am tank-healing) how quickly we're working to get the tanks topped off for those phases.
Note: I have not tried the following strategy suggestion for 10 mans (as I'm currently doing primarily 25 man raids) - if any have used this strategy or a similar one, please do let me know and I can update this suggestion. :)
10 mans may feel a bit pressed to get 3 tanks into their raid, and it may be feasible to work out a tanking rotation that utilises a DPS class (Plate would likely be preferable) as their third tank. The DPS would only feasibly be able to tank while the Bile-o-Tron is online (as they will not have the mitigation or crit immunity to survive melee hits while it is offline). It may be possible, then, to have the DPS be the dedicated Break tank and always tank Chimaeron while the Bile-o-Tron is online. The Off Tank (an actual tank) would then always (and only) tank Chimaeron during Feud while the Bile-o-Tron is offline. The Double Attack tank remains the same and only taunts for Double Attack. This should theoretically provide time for the Off Tank to clear the Break stacks obtained during Feud stages. The Feud timer is slightly different and more random in Heroic mode, though, which may pose issues. Playing with rotations to find what works best for your raid is recommended!
There will still be Caustic Slime damage incoming to the raid during Feud while the Bile-o-Tron is offline, so raid cooldowns such as Power Word: Barrier and AoE heals like Efflorescence and Healing Rain are extremely helpful.
The other main difference in the Heroic mode is in Phase 2. Nefarian again appears to spice things up a bit.
Throughout Phase 2 (Chimaeron sub-20% health), Nefarian will cast Mocking Shadows which inflicts 1000 Shadow damage to all raid members every second.
This ability is, of course, combined with the normal Phase 2 debuff Mortality, which reduces all healing by 99%. It is essential the entire raid is topped off as you push into Phase 2. This gives crucial extra time to burn Chimaeron before too many raid members begin to die. Timing the push into Phase 2 is also important, and it is generally best to do so after healing the raid up to full immediately after a Massacre. After Massacre hits you will have about 5 seconds to top up the raid and push him into Phase 2 before Caustic Slime hits the raid and reduces raid member's health. Healthstones are best saved for this part just before Phase 2, and personal damage mitigation cooldowns (Anti-Magic Shell, Barkskin, etc) are best used in Phase 2 to reduce damage taken from Mocking Shadows. Disc Priests can be very helpful in Phase 2 as well as their Power Word: Shields will absorb much of the damage, helping mitigate raiders' damage taken rather than futilely attempting to heal through Mortality.
Happy Holidays everyone! I hope you all have a happy and safe holiday season and Greatfather Winter leaves you some nice gifts for Winter Veil!
I've got some posts lined up (and some days off from raids because of the holiday, so hopefully a bit of extra time to actually write!) so I'll be trying to get those up ASAP. Most of my spare time recently has been spent in-game, working on gear, profs, etc, and getting my priest up to 85 for alt usage in raids. After which, of course, I'll again have the gear and rep grind. It never ends!
Raids have been going well despite the bit of craziness from the holiday season. We're 11/12 at the moment with only Nefarian left to kill, and we made some excellent progress on Thursday on heroic Halfus despite a less-than-ideal comp, so we should get him down in the week. I'll be working on some new guides to the raid encounters as some have changed a bit since beta (though for the most part the beta preview pages are still pretty accurate and useful).
Resto druids are in a bit of an odd place at the moment. As mentioned in my last post, we're definitely feeling a fair bit behind Paladins and Priests. Paladins have been a bit OP since beta, and though they did have some nerfs they're still quite strong. Priests got a lot of much-needed buffs (they were ridiculously behind the other healers on beta) so now they're looking almost too strong, and I won't be surprised to see most progression guilds stacking priests and pallies for some early kills. A bit of a problem with druids at the moment is our AE heals were scaled back quite a bit - Wild Growth isn't hitting as hard as it used to, Efflorescence is strong but not as much as it was, and Rejuv is very mana intensive, so you have to be careful with its use. It's definitely still strong for heals, but you absolutely cannot waste them on overheals or you risk going OoM. Our tank heals are stronger now with Lifebloom and Nourish and Healing Touch, but it's more likely Paladins will still be preferred as tank healers due to all the cooldowns they have, whether a Hand of Sacrifice or Lay on Hands, etc. In terms of actual HPS numbers, druids can hit some of the numbers priests and pallies are reaching, but it seems to be at a greater mana cost and harder to reach, even when the toons themselves are about equal in terms of gear and skill. Pallies and Priests are pretty easily hitting the top numbers with druids and shamans trailing behind a bit. Overall, it's just feeling quite imbalanced at the moment, and I really think either druids and shamans could do with some boosts or pallies and priests need to be scaled back a bit. We won't see anything til after the holidays, I'm sure, as Blizz needs their holiday too! But hopefully there'll be some changes upcoming.
Otherwise, things have been fun around the game. The new raids are fun and pretty interesting. I still think Atramedes is one of my favourite fights, as it was in Beta... As ever, I'm a sucker for a good dragon fight, and I find the concept of a blind dragon and how his attacks are sound-based is interesting. Ascendant Council is also a fun fight due to its mechanics and how you're supposed to use them, and is proving to be one of the harder fights for many - the soft enrage in the final phase is definitely a strong push (you need to burn him down before you all die to the damage, basically).
I've been plugging away at Archaeology as well, though it's starting to wear on me now! I did get very lucky and found a Ring of the Boy Emperor, but no luck yet with Tyrande's Favourite Doll. I finally had to take a break and get back to working on other stuff as it was just going on too long. I had also been trying to get the Vial of the Sands recipe to drop, but after many Tol'vir items and yet another common that wasn't a Canopic Jar, I gave in and found someone with the recipe. Fortunately I had already saved up the mats (transmute master proccing on Truegold is amazing), and now that the mount's BOE, I was able to find someone to craft it for me without charging a ridiculous tip. So now I can turn into a dragon! /Squee! I'll likely get back to looking for the recipe, but I won't be spending ridiculous amounts of time on it.
Anyhow, I hope you all are enjoying the new content so far! I'm looking forward to doing some levelling again with my little worgen warrior after my priest gets sorted out at 85. He's all equipped with BoA gear and sitting out in Darkshore (Withers pet!), I had fun romping through the starting zone already. Worgen starting zone is definitely worth a look! I'll have to check out the Goblin zone at some point too, but that can wait.
More posts to come soon! In the meantime, enjoy the holidays and enjoy the game!
Well, it's just over one week on now and yes, I am still alive! It's been an interesting and busy week. I was right in on the quick pursuit of level 85, followed immediately by heroics and, starting last Thursday, our first raids. We've already pushed to 7/12 (technically 8 with a 10s Chimaeron kill before the reset on Monday night), and back in again tonight. We should have an Ascendant Council kill with a bit better execution, and reports are Cho'gall has been easy on 25, so hopefully a kill on him right after.
Many have jumped in to the new Cataclysm dungeons and heroics. They're certainly quite different from the Wrath dungeons, and not just in the scenery! Trash hits hard and CC is almost a must on many mobs, and bosses have new and varied mechanics. Dungeons take time, require attention and awareness, and also a lot of patience. If you haven't been in them yet (especially in PuGs), be prepared for wipes and learning curves.
Don't be afraid to ask for CC! It can make a huge difference on how hard mobs end up beating on your tank and the group. Tanks too, don't be afraid to CC and set target orders, it helps a ton in controlling mobs.
DPS, be aware of how you can help your group out. I've added a new section in the Feral guide with some suggestions of how to help. Ferals have a great arsenal of off-heals which can help your healer, whether with a timely Tranquility or perhaps a Healing Touch with a Predator's Swiftness proc.
We do have some good CC as well as druids, whether it be simply rooting a target in place or perhaps a quick Cyclone on a target. The most useful CC in the Cataclysm content, though, is definitely Hibernate, which can sleep Dragonkin and Beasts.
Druids are looking alright so far at 85. Ferals, certainly, are doing some great damage (though there was a recent hotfix to stop Rake from benefitting twice from Mastery (source)). I can't decide so far whether Restos could do with a little boost or simply the healing classes are still a little off-balance. Pallies are still a bit OP, though the recent hotfixes to them may help to bring them a bit more in-line with the other healers. The buffs to priests seems to have done them well too, at least for Holy priests, as they're doing pretty well now (especially after being quite low on beta). Druids and Shamans are looking quite equal, possibly a bit behind Holy priests though we'll see how it continues to play out as gear levels rise, more data gets out there, and as Blizz adjusts the balance more.
I've been trying to feel out just how aggressive with heals we can be given mana concerns, particularly on raid healing. Rejuv and Wild Growth are mana expensive but crucial on raid heals, so effective placement of those is important. Hopping into Tree of Life form to spread Lifeblooms out on the raid can also be effective as well as cheap in terms of mana, as well as providing more chances to proc Omen of Clarity with Malfurion's Gift. Wild Growth could use a bit of a boost, I think, to put it more on par with priest's Prayer of Healing and Circle of Healing abilities. Our tank healing tools are pretty strong and, with Empowered Touch, you can actually maintain Lifebloom on more than one target outside of ToL. Check out the Resto Guide for a full description on it, but essentially; if you go into ToL form, stack Lifebloom on two (or more) targets, you can then maintain the additional stacks through the Empowered Touch talent. By healing the additional targets with Nourish or Healing Touch, those spells will refresh the Lifebloom stacks, even outside of ToL form! So it's very feasible (and, if primarily tank healing, recommended) to keep LB stacks rolling on two tanks.
Lifebloom should always be up on a target, whether you're tank healing or raid healing. It's generally best used on the tank, but don't be afraid to throw it on another target or even yourself if needed. It increases our chance to proc Omen of Clarity if you've picked up Malfurion's Gift, provides Replenishment and mana regen with Revitalize, and is a nice strong heal. Be aware too of when it would be better to refresh a Lifebloom stack or let it bloom - a 3-stack can provide a really big heal if allowed to bloom (I've seen it crit for 30k+).
As awesome as some of the new ground effects look, I must admit they can get to be a bit of a mess and can really obscure some key mechanics in fights that are signified by yet more ground effects. Melee in particular tend to get tons of the new AE heals on their pile, making it difficult to see things like the magma pillar on Magmaw, or even distinguishing between the fire strikes by the fire elementals in Bastion of Twilight (they look just like the priest's AE heal but with a bit of a red tinge to it).
I've been debating some specs and gemming choices in raids. Intellect is definitely the best stat for Druids as it increases our spellpower, mana pool, regen, and spell crit, but, mana regen is still low, especially at entry gear levels, so Spirit is valuable. Gear, definitely, should have spirit on, and if it doesn't, I highly recommend reforging it on (Crit and Mastery are good stats to reduce to turn into Spirit - I don't recommend turning Haste into Spirit as Haste is also an excellent stat for us to push those HoT tick break points). I've been gemming a mix so far of Intellect, Spirit, and Haste. I've also picked up the following spec to reduce mana costs (with 3/3 in Moonglow) and increase mana pool a bit more (with 2/3 Furor). The points I sacrificed to get those two talents were 2 points out of Nature's Bounty. I did this largely due to Regrowth's high mana cost - because it is such an expensive spell, I'm not using Regrowth constantly, so the increased crit chance isn't such a big loss.
A quick note for gear: With the new enchant for Off-hands (+100 Int), a Main Hand + Off-hand pairing is generally stronger than using a 2-hander. That 100 Int is a big boost to our mana and spellpower.
I'll try to get some more updates up soon, along with some info on gear (particularly what pieces to be looking out for in raids and heroics). But I'm balancing this with still being busy in-game and the usual real-life goings on, so apologies in advance if some of the newer posts are a bit slow in rolling out! I am always updating my Resto and Feral guides, though, so do keep an eye on those, and feel free to get in touch with any questions or comments!
I've finished my Resto Guide for Cataclysm and it is now up and running!
You can find the new guide here: Cataclysm Resto Druid Guide. ETA: I've posted the guide again to a NEW url, so please update your links and bookmarks! It is at the same URL as the previous guide, so your links and bookmarks should still work, though check to ensure they're updated. I took down the old guide completely to start fresh for the xpac. Everything there is for Cataclysm.
As ever, I will be keeping the guide updated through changes and patches and adding any additional useful information that arises.
In other Cata preparations, there were a couple of great posts over on the MMO-Champion forums which are definitely worth a look.
Cataclysm Preparation Compilation by tunnland There is a ton of useful information in this post, from suggestions of what to do before launch day, a full list of the new food, flasks, elixirs, and other buffs, to suggested dailies and their XP rewards to complete before launch day and turn in for quick easy XP at launch. There is also information on loot, strategy, and videos for the new 5-man instances.
What Wrath players need to know to not suck at Cata! by Daetur
This post has some great info for everyone on what to expect in the new Cataclysm dungeons and raids and, in particular, what you need to start thinking about for the changes from the Wrath style of dungeons. There's general advice and more specific advice for DPS, Healers, and Tanks.
As that's quite a lot to look at and read, I'll cut this post off here. Enjoy! :D
It's been an interesting week! The Shattering has come at last and I must say, I've been really impressed with the results. I've been checking out some of the revamped zones, both on alts and on my main, and the new quests are really impressive (not to mention the landscape changes!).
The levelling experience has been improved dramatically. Certainly it seems to have sped up a lot (that or you really do just get caught up so don't notice the time going by!). Each zone feels much more coordinated now - story and quest lines all flow together, leading you logically from one area to the next. There are still some little quests around which you can either skip or come back to later, but the majority seem to be interconnected, often starting with one or two quests to introduce you to the zone which develop into a whole host of additional quests.
For those who will be working on Loremaster in this expansion, the new zone objectives will make it a lot easier, and it's also very easy (and fun) to get all the quests in each zone to get them. Many friends and myself checking out the new zones on alts found it very easy to get the achievements by simply following all the quest lines, completing the zone and moving on to the next.
The quests themselves are a ton of fun. There's a mix of old and new quests as far as I've seen - most all have been revamped in some way, but there are still ones that are unchanged (the two children in Redridge are still losing their necklace in the Lake, for example). The quests are really interesting and fun, and though there are still the 'kill x amount of creatures' and 'collect y amount of items', they're mixed in with a lot of unique tasks and mechanics and just all around fun. I highly recommend reading the quest text! You're definitely missing out if you don't.
I haven't had a chance yet to check out all the zones (some guildies I know have been working quite quickly through all the Loremaster achievements), but I've really enjoyed the ones I've seen so far, and thought I'd share some (...many) screenshots of some of the highlights so far!
Spoiler alert: The screenshots and text below may contain some spoilers if you haven't yet done the zones. I'll try not to give away too much, but just in case, read on with caution!
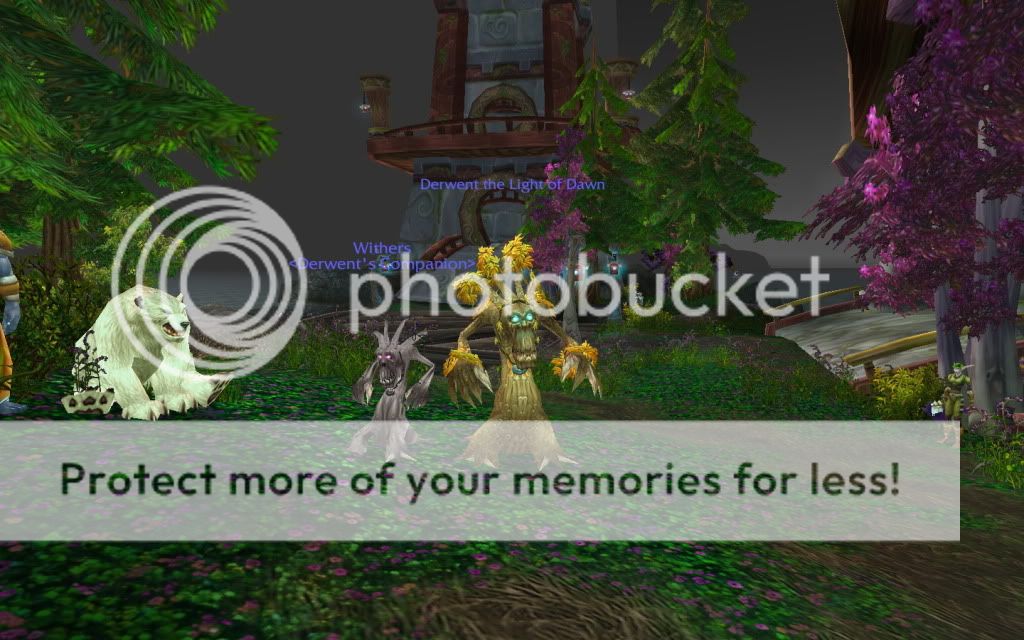
More treants!
I'll start with Darkshore, as that is where I went to first. I was particularly keen to find Withers, who is a new quest reward (I believe he's also available via an NPC purchase for horde). At first I was a bit disappointed that the quest wasn't available right away, but I'm now very glad it wasn't, as it gave me a chance to do all the Darkshore quests. It was incredibly fun and felt like a great place to start on my druid, who likely would have been home in Teldrassil following the long adventure in Northrend and would of course go to help his fellow Night Elves following the devastation to Auberdine and Darkshore.
Surveying the ruins of Auberdine.
The opening quests have you helping the survivors and plunge you straight into the aftermath of the Cataclysm. You begin closer to Lor'danel, the new base, and gradually expand outward into the zone. Eventually you'll be sent all the way down to Auberdine. The devastation to the town is quite staggering and many of the quests are tinged with the tragedy that has befallen the Night Elves and other inhabitants of Darkshore. I think the saddest thing I picked up was this: Broken Timepiece. It's earned a permanent spot in my bags as a memory to those lost. There are some very sad quests especially in Auberdine, and those familiar with the zone may recognise some of the NPCs lost in the wreckage. It's not all sad, though, and there are plenty of funny moments as well (in particular a rather senile Dwarf).
I was very excited to find Shan'do Stormrage in Darkshore, who had not yet travelled to Mount Hyjal. There are some fun quests as you travel around gathering help for him to repair the land.
A very sad Moonkin.
Assistance from the Green Dragonflight.
Protecting Darkshore from trolls.
If the new Tree of Life form looked like this, I might not have glyphed Treant form.
Finally I returned to Lor'danel and got little Withers.
I really enjoyed questing around Darkshore. The new quest lines really get you wrapped up and involved in the stories. It takes a little bit longer when reading all the quest texts but it's definitely worth it (and for those levelling, XP rewards are really quite good, so it shouldn't slow down your actual levelling too much). There are a lot of new mechanics too, of vehicles and disguises and tasks (don't assume you need to just kill mobs, some require that you don't kill things!), but they're all done very well so they're fun rather than annoying.
After Darkshore I made a quick swing by Alterac Mountains to check out one of the other new pets, the Singing Sunflower. There's also Mr Grubbs from the Eastern Plaguelands, who's not as long a grind as I had first thought (I found him quite quickly). The Sunflower is from the Plants vs Zombies game and quests, which was quite a lot of fun. I'd never played PvZ before so it was an interesting experience!
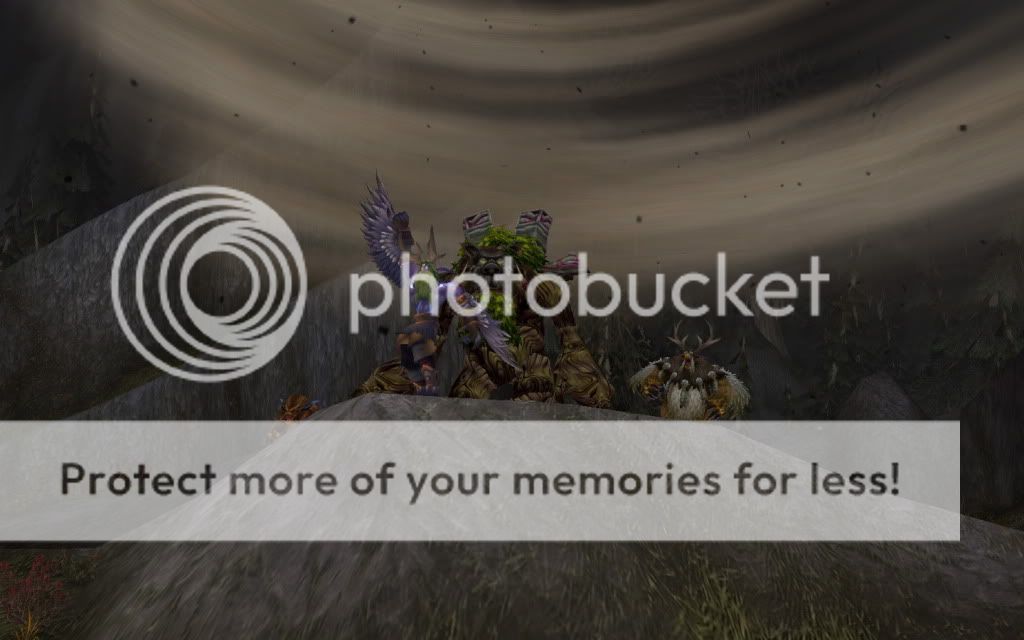
I then went to the Badlands. There were a ton of great quests here, including a nice long chain involving dragons and some fun little riddles and games. By far though the best quests were the three 'The Day that Deathwing Came' quests. They take place just by Dragon's Mouth at the Scar of the Worldbreaker.
As you can tell just from those screenshots, this is an amazing quest! One of the best quests I've done. I won't include the screenshots from all three of the quests here, as they're definitely best as a surprise, but if there's any quests you make sure to do, these three are it. The only thing I'd change is to implement an option for you to go back and speak to the NPCs and ask to see their stories again, so that you could repeat the little quests over and over (without any XP gain though). I'll be going back on all my alts! I'll include this last shot as the red sky just looks amazing behind Deathwing.
That is really just the smallest sample of some of the amazing new quests out there, and even just those two zones there are a ton of great quests. I've gone through all of Westfall and Redridge now as well, and Alliance (and even Horde who wouldn't mind levelling up a toon 1-20 Alliance-side) should definitely check these zones out.
Playing in the tornadoes in Westfall.
Epic battles in Redridge.
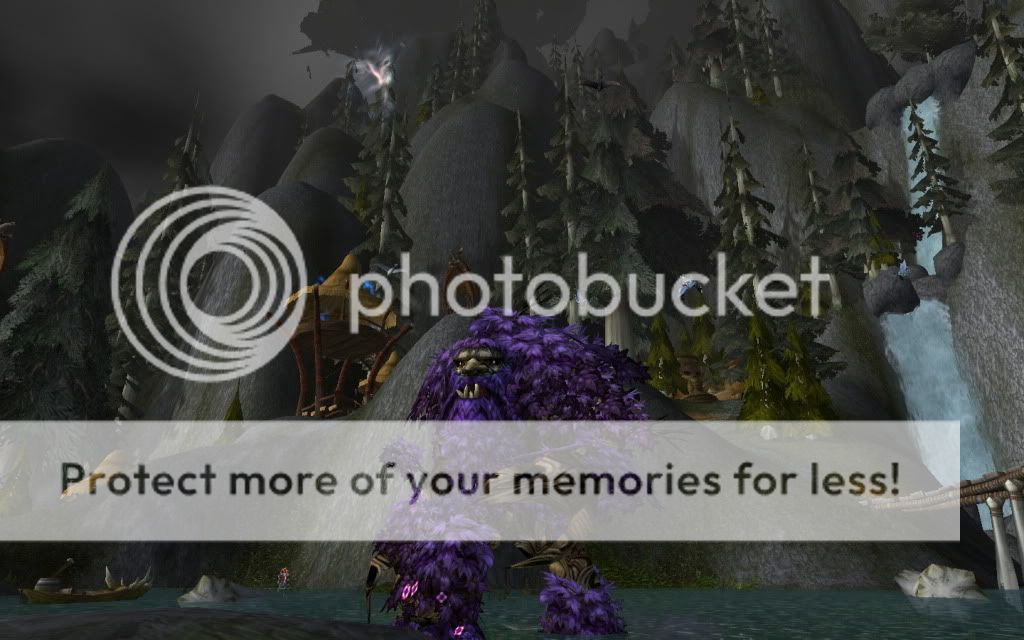
I was also lucky (or unlucky) enough to get the following:
Unfortunately I don't have a good screenshot of that as it was incredibly unexpected! I was running through the Burning Steppes to Blackrock Mountain, so the sky was already quite red, and had just noticed something large in the sky in the distance and was thinking 'What is that?' when BAM. Dead druid.
I'm looking forward to checking out all the other zones and working on Loremaster. I'm very glad I didn't bother trying to complete it before 4.0, as going through all the new zones is going to be great. I'm also looking forward to levelling a new toon, though I think I'll be waiting for Cata to land so I can roll a Worgen warrior. I just might even level another druid at some point (troll perhaps?) but we'll see!
Also, for those who don't play with the in-game music on, I definitely suggest turning it on! The new music is really great and definitely adds to the atmosphere in the zones.
I'll leave this here for now. Just over a week now until Cataclysm arrives! I can't believe it's almost December already. I'm working on getting the guides updated so they'll be ready for the launch and the push to 85. I imagine they'll be getting many little updates over the initial weeks and months of Cataclysm as well, as I'm sure Blizz will be making adjustments and changes as everything goes live and much more data than they had on Beta starts to flood in.
Thought I'd do a quick post with some updates from the 4.0.3a patch.
- I finally found out how to train Glyph of the Treant - it can be learned through a Minor Inscription Research discovery. Rather less convenient than learning it from a trainer, especially now when very few will know it (and with the long cooldown on the Research), so Auction House gouging will likely take place over this week. It only requires 3 Jadefire Ink and a Common Parchment, though, so cheapest would likely be to find someone who's learned it and see if they'll make it for mats+tip.
- Nitro Boosts are now a belt tinker (rather than a boot tinker), so be sure to update your items. As far as I know this is an intended change (I'd seen a post asking if it was or was not). They will overwrite the Frag Belt and other belt tinkers. The Nitro Boosts seem to be bugged, though, and are malfunctioning much more frequently than they used to, including in raids. A large portion of our raiders are engineers and all last night they were exploding in every fight. I had a rather nice one during HMLK, at least I had my parachute at the ready.
- Meta gem requirements for some gems were changed to 'require more blue gems than red gems', however, Blizzard has already said they will be reverting the gems to their original requirements. This cannot be hotfixed, though, so will be addressed in an upcoming patch. (source)
- There are some new quests which reward pets, one is the Plants vs Zombies quest which rewards a flower. Another is the Remembrance of Auberdine quest which rewards a withered treant named Withers. I'll be setting to work on that one, appears as though you need to do most of the zone to open up the quest though! There's some info on WoWhead on how to get to the quest - check out the comments for the quests you need to complete to open it. Here. Should be a nice way to see the new Darkshore though. The opening quest regarding the destroyed Auberdine is quite sad as you search for survivors. ETA: Been working on the quests in the zone, and am very glad I did! The new quests are brilliant, loving Darkshore. Think this will swing it for me in which race to level a mage, nelf! Looking forward to checking out all the new zones... may give a go at Loremaster.
- The change in Rejuvenation mana cost does seem noticeable following a night's raiding, my mana bar was actually moving all tonight! Cata has landed officially. Though I do wonder whether a little bit may be due to me opting for Purified Lunar Dust over my Solace of the Defeated, as I believe Solace still returns better mana (I switched for the spellpower gain), however it was too large a difference from last week to be solely a trinket swap. You have been warned!
- I was very happy healing Valithria Dreamwalker last night now that the revamped Empowered Touch was on live. Throw on a Rejuv, Swiftmend her for Efflorescence, 3 stacks of LB and Healing Touch away! No longer wasting GCDs refreshing the stack after each cast, it was great. Some nice throughput doing that throughout the fight, though I'm undecided just when and how to use Tree of Life best on that fight. It would seem saving ToL for the end with max stacks is best for the additional healing boost. The instant-Regrowths seem like they edge out Healing Touch at that point, as you're getting two Regrowths out in about the same time as one Healing Touch cast (assuming 2 GCD's ~ 2 seconds for 2 instant Regrowths, vs ~2-second cast time HT), which tends to end up about being the same amount of healing done in that time frame. Nature's Bounty may be what pushes it, as the increased critical effect, especially then with the bonus to heals from portal stacks + ToL increased healing really adds up. I'd be interested in hearing what some other's strategies are. Though I suppose it doesn't matter too much at this point! Still, interesting.
- I was disappointed to find that my Mimiron's Head mount seems to be bugged, he makes noise when he's sat on the ground idling, but when I try flying forwards or strafing he goes silent. The little chopper-y noises the mount makes is one of my favourite things about it so I'm hoping that gets fixed soon!
- For those who don't know, there is now an Auction House and Bank in the Dwarven District of Stormwind (so you can avoid the more congested area in the Trade District). There's also an Auction House by the Justice Point vendors in Dalaran.
That's all for now! Enjoy the new zones and do some exploring! There are lots of new flypoints and tons of new quests to do. The new class/race combos are up too, along with the new starting zones for gnomes and trolls.
MMO-Champ is reporting that patch 4.0.3a is landing on live servers this week! We're only two weeks away from Cataclysm's launch (where did the time go??), and this patch will bring about all the landscape, zone and quest changes as well as new class/race combinations (though Worgen and Goblin characters are only available with Cataclysm). There will also no longer be portals in Dalaran or Shattrath, so I suggest resetting your hearthstones to places like Stormwind/Orgrimmar or else placing your toons at places with convenient transport to major cities (Valiance Keep and Warsong Hold in Borean Tundra are decent ideas, with transport direct to SW/Org).
For those in Stormwind, there will be a new auction house and bank in the Dwarven District (along with additional innkeepers), so you don't have to be stuck in the busy Trade District if you don't want to. I think there are similar changes in Orgrimmar, but I don't know the specific details.
There are a lot of Druid changes in this patch, which is basically just bringing us in line with Beta and ultimately Cataclysm.
Bear Form now provides 10% bonus health, down from 20%.
Nourish no longer consumes Omen of Clarity.
Rejuvenation has had its mana cost increased by 30%.
Soothe now has a 1.5-second cast time.
Swipe (Cat Form) can now be used even if the druid does not have a primary target selected.
Thorns: beginner tooltip revised to no longer imply the spell could be kept up at all times. In addition, Thorns damage has been reduced by 60%.
Feral
Brutal Impact now increases the mana cost of spells on the victim by 5/10% for 10 seconds, down from 15/30%.
Leader of the Pack now heals for 4%, down from 8%.
Survival Instincts now provides 50% damage reduction, down from 60%, and its cooldown has been lowered from 5 minutes to 3 minutes.
Swipe (Bear Form) damage has been reduced by 20%.
Vengeance is no longer cleared on exiting Bear Form, and instead is cleared upon entering Cat Form.
Restoration
Empowered Touch now procs from Healing Touch as well as Nourish.
Heart of the Wild: the Bear Form Stamina bonus from this talent is now 2/4/6%, down from 3/7/10%.
Malfurion's Gift no longer has Fury of Stormrage as a prerequisite talent.
Natural Shapeshifter now also increases Tree of Life duration by 5/10 seconds.
Revitalize is now a 2-point talent, down from 3. It provides a 20% chance to return 1/2% of the druid's total mana on periodic heals from Lifebloom or Rejuvenation. This effect cannot occur more than once every 12 seconds.
Swift Rejuvenation is now a 1-point talent, down from 2. The global cooldown reduction this talent provides to Rejuvenation remains 0.5 seconds.
Symbiosis: heal-over-time spells (Rejuvenation, Regrowth, Lifebloom) can no longer benefit from this Mastery merely by refreshing themselves. A different heal-over-time spell must be present.
Glyphs
Glyph of Healing Touch now reduces the cooldown on Nature's Swiftness by 10 seconds after using Healing Touch, up from 5 seconds.
Glyph of the Treant (new) allows druids to keep the original treant Tree of Life look... if they must. Must they?
Bug Fixes
Blood in the Water now refreshes Rip to the correct value.
Flight Form now properly appears in the trainer window before Expert Riding is learned.
A lot of changes in there. Some nerfs in there, but overall it's nothing too massive. You'll likely feel a bit of a hit at level 80, but at 85 things balance back out again. Not mentioned in there is also the change to Efflorescence, where it now has a diminished effect when healing more than 6 players at once. There's been some debate over just how this is working now (if it's healing 6 for full and less for the additional people in, if it's healing only 6, if it's healing everyone stood in for less... etc) and, as far as I'm aware, no official confirmation/clarification yet on it (someone let me know please if you've seen something). I'd like to state, though, this is NOT restricted to Druids - ALL healing classes are having their AE spells reduced in exactly the same way. Shammy Healing Rain, Priest Holy Word: Sanctuary, and Holy Radiance all have the same changes. So don't panic!
There are some nice changes for the Resto talent tree with this patch which finally bring us in line with Beta. Empowered Touch now allows both Nourish and Healing Touch to refresh Lifebloom stacks, which is an excellent change. Revitalize is now a 2-point talent, which is nice as it frees up a talent point to put elsewhere and, in a similar vein, Swift Rejuvenation is now only a 1-point talent. Another very nice change is Malfurion's Gift no longer requires Fury of Stormrage, so if you either cannot afford the points or simply don't wish to spec it, you can still pick up Malfurion's Gift.
With those changes in mind, I suggest picking up the following spec at level 80, which should carry you nicely into levelling from 80-85 in Cata 2/0/34.
Largely this is picking up Malfurion's Gift, though if you don't feel you need the extra Omen of Clarity proc chance at 80, you can opt to put one or no points into this talent. I opted for Malfurion's Gift over Blessing of the Grove for both 80 and eventual 85 spec. OoC with Regrowths (especially when in ToL form using instant-regrowths and being able to cast Lifeblooms on multiple targets) will be extremely helpful for mana management both now and especially at 85. Though, you can move points into there if you like, especially at 80 where Rejuv-spamming is still doable with little mana consequence. If you're having mana problems or simply want a larger mana pool you can still move some points over into Furor as well.
ETA: I've updated my Resto guide to include the above 4.0.3a changes: Resto Guide.
The Feral tree is largely unchanged. For kitty I suggest sticking with the 0/33/3 spec, as this picks up the max DPS talents as well as some nice survivability talents.
This can be a nice spec to begin the levelling process at 80 as well, as picking up Thick Hide will make you uncrittable. Brutal Impact is a very useful talent but will likely be less useful while levelling, and you can easily pop two points in there as you hit 81 and 82. The point in Survival Instincts could be moved around as well, I personally like it for emergencies, especially if I ended up pulling too many mobs.
It also looks like the new Tree of Life model will be coming with 4.0.3a (much to my dismay), but the Glyph of the Treant should be available if you want to keep your old Tree-form. I'll be hunting down an Inscriptionist to get that made! I'm hoping it's just trainable at the Inscriptionist trainers.
Otherwise, enjoy the last moments of the old world! Grab any last screenshots, head through any last ZG runs (no raptor for me!), take a stroll through the Park in Stormwind one last time, and so forth!
Cataclysm is less than three weeks away! Time is really flying by. I've been quite busy this week so I've fallen behind a bit on getting some posts up. There's still a couple more bosses I've yet to cover in Blackwing Descent, though, so I thought I'd get a post up on one more of them. The deceptively simple but very hard-hitting Chimaeron.
Chimaeron
The Chimaeron encounter isn't too difficult conceptually, but the fight itself can be quite rough and will likely be a harsh gear-check for raids.
Essentially the fight is a tank-and-spank, with one key mechanic - the Bile-o-Tron. When you walk into the room, Chimaeron will be asleep in the centre. Behind him is a gnome in a cage, Finkle, who you must speak with before engaging Chimaeron. He activates the Bile-o-Tron which spews forth Finkle's Mixture - this mixture will buff all raiders so that anyone above 10,000 health cannot have their health reduced below 1. As long as the Bile-o-Tron is active (and this is key), if raid members are above 10,000 health, they won't die from Chimaeron's other two key abilities. Let's touch on his abilities now (source).
Caustic Slime: Deals 280,000 Nature damage and briefly reduces the chance to hit for all enemies in an area. Damage is split between all enemies within 6 yards of the impact crater. Massacre: Inflicts maximum damage to all enemy players. Feud: Chimaeron's heads are fighting amongst themselves, and so Chimaeron cannot perform melee attacks. Double Attack: Chimaeron will strike twice on his next attack. Break: Chimaeron breaks through his target's defenses, increasing physical damage taken by 25% for one minute. This ability stacks.
In phase 2 (which begins once Chimaeron reaches 20% health), Chimaeron keeps his Double Attack and also Mortality: Chimaeron goes into a rage, becoming immune to Taunt effects, increasing his damage taken by 20%, and reducing healing effects for all enemies by 99%.
Basically, you enter into the room, and do NOT attack Chimaeron. If anyone strikes him, he'll instantly engage (and if anyone but a tank strikes him, they'll probably be one-shot). You must talk with Finkle to get the Bile-o-Tron active. After that, you can either wait for Chimaeron to wake up (he will eventually once the machine's come online) or have your tanks start up the fight by engaging him. There is a stacking debuff placed on the tanks (Break), so you'll likely need two to taunt off each other. The tanks will be taking big hits (particularly the Double Attack, which will likely be helpful for the tanks to call it out when it's coming to help the healers). The tanks must warn before doing their tank swaps so the healers are ready.
The rest of the raid should be spread around the room. There are basically two parts to the fight in the first phase - when the Bile-o-Tron is Active and when it is Inactive. When the Bile-o-Tron is active, the raid will be buffed by Finkle's Mixture, and the raid need only be kept above 10,000 health each. Do not fall into the trap of trying to top everyone off - there's no need to do so and you'll only be wasting mana. Raiders should be prepared to use healthstones or health pots if needed. Caustic Slime and Massacre will not kill anyone above 10,000 health while the Bile-o-Tron is active.
The tricky moments will come when the Bile-o-Tron goes offline. The entire raid should collapse and stack up on melee (excluding the tanks) and healed up to full - all the new AE healing spells are wonderful here, throwing on Healing Rains, Efflorescences, Holy Word: Sanctuary, etc. On normal mode, Feud will temporarily stop Chimaeron's melee attacks on the tanks during this time, so healing on them should be easier to manage as you top up the raid. Stacking up will spread the Caustic Slime damage (which will still be cast during Feud) amongst the entire raid, so as long as everyone is stacked and getting those heals, no one should die during this phase. The moment the Bile-o-Tron comes back online, the raid should spread back out so new Caustic Slimes don't splash.
Phase 2, which begins when Chimaeron hits 20% health, turns into something of a burn phase. Chimaeron will take 20% more damage, however he is immune to taunt at this stage and your tanks may likely end up dying to him at some point during this stage (he hits hard). He does move fairly slowly, though, so if you've reached this stage and a tank goes down, it's not an instant-wipe - if necessary, kite him while continuing to DPS. The Mortality debuff also reduces all healing received by raid members by 99%. Watching his health percentage will be extremely helpful in order to try to maximise people's remaining health before he transitions into phase 2. While healing won't be useless in phase 2, it will be drastically reduced, and this may be a time for some healers to assist in DPSing along with healing.
Again, the fight is fairly simple in its overall strategy and execution. The big hits on the tanks and dealing effectively with the damage from Caustic Slime and Massacre will be the most challenging aspects to the fight (as well as, as ever, laying in decent DPS). It's crucial healers resist the urge to try to top up everyone in the raid while the Bile-o-Tron is on-line. It's unnecessary and will waste mana. As long as everyone remains above 10,000 health in those phases, they should be fine. (There have been some bugs on beta where players above 10,000 health have been killed, but, it is a bug).
Overall, most will likely find this a challenging fight. The general simplicity of it may be nice after many more complex fights involving target switches or de/buff watching. DPS should certainly be doing what they can to help keep themselves alive, though (or at least above the 10,000 health) and healers should be concerned with keeping the raid above that point but no more while the Bile-o-Tron is active. Topping the healing meters in this fight will mean nothing if you're out of mana within a minute.
There are plenty of new factions in Cataclysm, all with useful items for Resto and Feral druids available from their quartermasters with rep. I still need to go through more of the items from dungeons and heroics to see the full extent of items available and start building early BiS lists, however, this should give you a good idea of what's available through rep and which reps you'll need to work on as you level up. I'm also including the faction items available before level 85, as you will likely find them useful while leveling and first encountering heroics while you work on getting more upgrades. All factions have tabards which will raise your reputation with that faction in Level 85 dungeons.
Firstly, your helm and shoulder enchant reps! Regardless of what gear you have or how you obtain it, you will need these enchants. It appears the helm enchants are still Account-bound, but not the Shoulder enchants.
Shoulder Enchants - Therazane (Deepholm)
All shoulder enchants are available with Therazane rep. You begin hated with Therazane and completion of the full questline in Deepholm should bring you to Honoured with Therazane. Dailies or wearing their Tabard will get you to Exalted.
I'll organise this as Factions - Spec - Items. For Resto items, I'm listing both items with Spirit and without, as both are viable, though in some cases items with Spirit may be preferred for mana regen. I have not listed any caster items with +hit or damaging spell procs.
Each item is listed as follows:
Name - iLvl - Level Required - Rep Required - Item Slot - Item Stats
Justice Point Vendors
There are also many items available to purchase with Justice Points. This is why it will be very helpful to cap your Justice Points on your toons before Cataclysm launches (the cap is currently at 4000JP) - you will be able to buy 1-2 pieces of blue 85 (iLvl 346) gear from the Justice Point vendors if you have 4000JP saved. You'll be able to earn more Justice Points at 85 in the heroic dungeons.
I'll leave the list at that for now. Hopefully it will give you a better idea of where to look for upgrades and enchants and help you plan your levelling route to get as much rep as you can as you quest and level up.