Showing posts with label Cataclysm. Show all posts

Wednesday, 5 October 2011

Harmony, Lifebloom, and You! (with logs!)

My doodle of how I imagine my tree healing :D
Inspired by the ever funny Allie Brosh from Hyperbole & a Half

I wanted to devote a post to Harmony (our Mastery) and Lifebloom as I’ve found many druids (whether mains, offspecs, or alts) were not realising the value of these things, not maintaining good uptime on them, or both. These two things are extremely important to druid healing. Lifebloom especially is crucial to our mana regen (from Revitalise procs), to our clearcasting (as, for Resto druids, Lifebloom is our only ability which grants Omen of Clarity for our healing spells), and to our groups, as Lifebloom provides Replenishment for our party or raid.
For anyone wondering what I mean by uptime - uptime is referring to how much the ability or buff is active throughout a fight. So, for a quick example, if you maintain Lifebloom up perfectly through an entire fight, the uptime would be 100%. If you only had it up for half the fight, it would be 50%. 
Ideally, both Lifebloom and Harmony will have an uptime of 100%. In actuality, it will vary a little bit; for example, on the Alysrazor encounter, when Alysrazor crash lands there is no damage going out until she takes off again. Healers in this period are all DPSing both to help damage her and also for the mana return from DPSing her in this phase. During that period you won’t be maintaining Lifebloom or Harmony as you’ll be busy DPSing. The end uptime percentage on these abilities for that fight will be below 100% as it simply isn’t in the mechanics of the fight. Now, compare that fight to, say, Baleroc, where the primary healing is all big direct heals on the tanks and Shards of Torment soakers. This is a fight where it’s pretty easy to get 98%+ uptime on both Lifebloom and Harmony.
Keeping context of the specific fights in mind, a practical uptime for both Lifebloom and Harmony should be between 80% and 100%. You should always aim to be as close to 100% as possible.
Harmony 
Harmony, the Resto Mastery: Your direct healing is increased by an additional x% and casting your direct healing spells grants you an additional x% bonus to your periodic healing for 10 seconds.
Your direct healing spells (Nourish, Healing Touch, Regrowth, and Swiftmend) proc a buff called Harmony - this buff lasts for 10 seconds and boosts your HoTs by x% (based on how much mastery you have).
This is extremely important to maintain as it strengthens your HoTs. This is especially important while raid healing - many druids simply fall into the Rejuv, Rejuv, Rejuv, Wild Growth! spam while raid healing and forget about their direct heals entirely, or just think that because they’re on raid they shouldn’t use any other spells. Unfortunately this results in you gimping your own HoTs (as well as wasting an arsenal of useful healing spells). If that buff isn’t active, your HoTs have no benefit from your Mastery (and yes, that buff needs to be active before you cast the HoTs). Harmony needs to be active for your HoTs to be as strong as possible.
As I mentioned above, fights like Baleroc or Shannox with a lot of single-target healing focus are a bit easier to maintain good Harmony uptime. Fights with heavier raid damage such as Beth’tilac or Lord Rhyolith tend to be more difficult to maintain good uptimes for as you have to balance weaving in your direct heals with your raid healing.
Swiftmend counts as a direct heal and will proc Harmony, so if you’re really pressed to maintain the buff you can use Swiftmends to help activate the buff and, while SM is still on cooldown, through in a quick Nourish, Healing Touch, or Regrowth to keep Harmony active until SM is ready to use again.
5 man dungeons are probably the easiest place to maintain good Harmony (and Lifebloom) uptimes, as there’s plenty of direct healing to do on the tank (and sometimes on the DPS as well!). You can easily keep it active even when the tank isn’t taking much (or any) damage - simply toss a Nourish on him; it will refresh your Lifebloom stack and activate Harmony for next to no mana cost.
Using Nourish to activate Harmony and refresh Lifebloom is also a great thing to do pre-pull, whether in 5 mans or in raids. The mana cost is negligible and both the Replenishment and Revitalize procs from your Lifebloom will restore the mana quickly. It ensures you go into the start of the fight with Harmony active (which is especially helpful if AoE damage starts right away, so you can spread some HoTs immediately). 
Lifebloom
Lifebloom! Lifebloom is one of our most important spells. It is crucial to keep Lifebloom up whether you’re healing a 5 man dungeon, a 10 or 25 man raid, a heroic raid, or PvP.
Lifebloom in Cataclysm plays a central role in our mana regen and management as well as being a healing tool.


Lifebloom procs Revitalize, which grants us mana. 
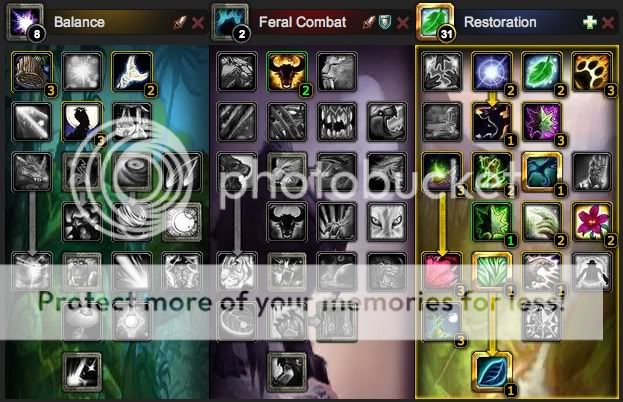
Lifebloom also is the ONLY way to get Omen of Clarity procs for healing. None of our other healing spells will proc OoC/Clearcasting. We have to spec into Malfurion’s Gift in order to enable our Lifeblooms to provide OoC. If your Lifebloom uptime is low, you won’t have as many clearcasting procs from Omen of Clarity, which means you won’t be able to cast spells with no mana cost. This will seriously hamper your mana over the course of a fight!
Lifebloom also supplies Replenishment for you and your party or raid - Replenishment grants up to 10 party or raid members mana regeneration equal to 1% of their maximum mana per 10 seconds. This is important both for you and your group! Replenishment helps your fellow healers and your casters. This also makes maintaining Lifebloom even more important in 10 and 25 man raids if you only have a few classes in your group who can provide Replenishment. if you are the only person in your 10 man group who can provide Replenishment and your Lifebloom uptime (and hence, Replenishment procs) is low, you are severely limiting Replenishment for your fellow raiders. Similarly in a 25 man group, if there are only a few of you providing Replenishment, you can be preventing your fellow raiders from having Replenishment, as each class’ replenishment only affects up to 10 people. So a Resto druid could provide Replen for an entire 10 man raid but you would need 2 or 3 Replen providers to cover a 25 man raid (possibly only 2 as your non-mana users won’t need it).
Lifebloom tends to be a bit easier for people to maintain than Harmony, as most seem secure with having to maintain a stack of 3 on their tank. It can also be refreshed quickly if needed by simply recasting it on the tank, though it’s best to refresh it with at least a Nourish (if not Regrowth or Healing Touch) when you can while raid healing so that you activate Harmony as well.
It’s also good to get into the habit of always having Lifebloom up, and 5 mans is a great place to practice it - always keep it up, even through all the trash! Some may be surprised to hear me suggest that, but I’ve seen many druids in 5 mans only putting Lifebloom on their tank on boss fights. Keeping Lifebloom up and maintaining it, even just with lots of Nourish casts when your tank is taking little to no damage, will go a long way in helping ingrain the habit of keeping it up. It will also keep your tank topped off, especially with the Nourish casts in between heavier damage portions (and will keep Harmony active!). The Replen and Revitalize procs will also help restore your mana between trash pulls and bosses, so less time spent drinking!
Again, as suggested in the Harmony section, it’s good to get your 3 stack of Lifebloom up pre-pull, and just refresh it into the pull with Nourish to proc Harmony. Also, if you’re lucky enough to get Dark Intent, your warlock will love you as all the Lifebloom ticks will give him a full 3-stack of his Dark Intent buff pre-pull! 
I should also note: Maintaining Lifebloom is absolutely crucial as I’ve mentioned. There are times, however, when you may be unable to stack Lifebloom on your tank - you may be positioned out of range, for example. In cases like this, stack Lifebloom either on yourself or on another suitable target (if you’re focussing a specific DPS, perhaps a broodling soaker on Beth’tilac, you could stack Lifebloom on them). You can always move the stack back to the tanks when you’re back in range. You absolutely must keep Lifebloom up at all times though.
Analyzing Logs: Harmony and Lifebloom
Logs are the best place to see how you’re doing in terms of maintaining good Lifebloom and Harmony uptime. Whether you’re looking to improve on your own healing, evaluating a new app for your guild, or helping a friend, Logs are extremely helpful all around for analysing your healing.
World of Logs is where tons of Logs are uploaded by guilds for analysis. It can be a bit confusing at first if you’re not familiar with it, so here’s how to navigate to the information we’re looking for. With pictures! You may have to click the screenshots to get a better view.
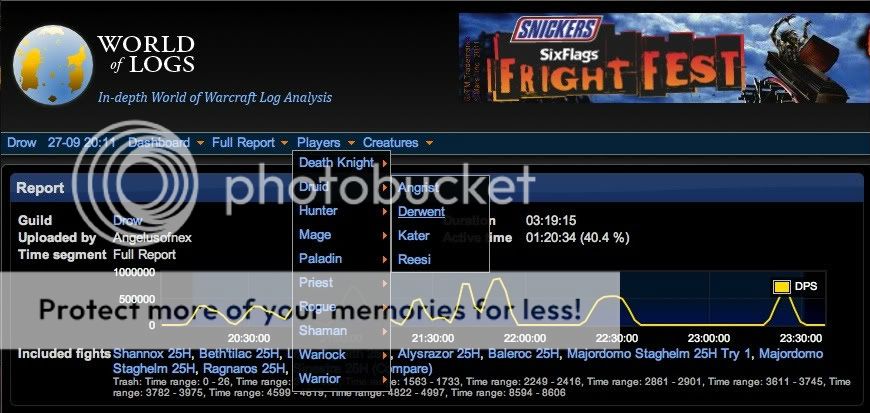
Here’s a log for one of our nights last week. This is the Dashboard page, where you’ll be brought to first when selecting a night’s logs. To look at a specific player, use the drop-down menus: Here I’ve gone to Players > Druid > Derwent.

For looking at Lifebloom and Harmony uptimes in particular, you should really look only at Boss fights during raids. Looking at the full report can really skew the data - the person you’re looking at might have been AFK or outside the instance during some of the trash mobs, or they might have been DPSing for some of the fights, or perhaps were swapped out for another raid member for some fights. It’s best to look either at Bosses (to include all of them) or to go to specific bosses and look at them one by one. The time in parenthesis by each boss name is the length of the kill, and an arrow off of any bosses will show multiple attempts/wipes on that boss if it wasn’t killed the first time.
Here I’ve gone to Full Report > Bosses > Ragnaros 25H.

Once you’ve gotten to a specific player and a specific boss, you can then go through the tabs to get more information. For Harmony and Lifebloom in particular, it’s best to look at Buffs Cast. This will bring up the following screen:

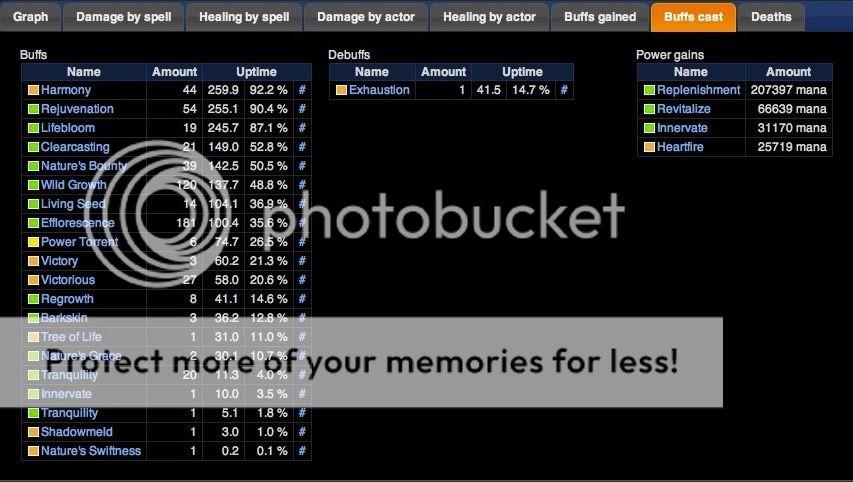
On the left are the Buffs I cast throughout the fight. You can see Mark of the Wild up at the top at 100% uptime - a static buff of course on the entire raid throughout the fight. Next up is Lifebloom, up at 87.2%, and Harmony at 82.6%. Could be higher, particularly my Harmony which I’ve maintained higher in our other kills, but still good and realistic given some of my other duties in the fight (I do meteor knockbacks in phase 3, Stampeding Roar in phase 2, plus the brief RP time before phase 4). Context is of course important, but you’re still always shooting for that ideal of 100% uptime.
For interest’s sake, we can scan down the rest of the Buffs there. My Power Torrent procced 16 times throughout the fight, giving it a 25.5% uptime. I had 27 Clearcasting procs throughout the fight from my good Lifebloom uptime. I used Tree of Life 3 times, Barkskin 8 times, Innervated myself 4 times. I used Cat Form 3 times along with 3 Nature’s Swiftness casts, and I even Shadowmelded once! (It tends to help me avoid aggro from the scion spawn in the second intermission).
Moving to the right, you can see my Debuffs cast - Exhaustion from Heroism, I cast Moonfires on the Meteors I was knocking back, and Concentration from a Concentration Pot.
Moving to the right once more, you can see Power Gains - this is the mana I gained throughout the fight. Reviltalize and Innervate gave me back the most mana. Heartfire is the Resto t12 2-piece bonus, which is a pretty good mana return throughout the course of a fight. Replenishment there is how much my Replenishment provided to the raid - to see how much you yourself gained from Replenishment, simply click the Buffs Gained tab, shown below, in which you can see the mana gained from Replen (and also from a Concentration pot). 


That all is also looking at a fight which was 12 minutes long - some numbers will be lower for shorter fights.
Some Examples
Here are just a few more examples of some logs looking at Harmony and Lifebloom uptimes.
The following log is one from a Baleroc kill. As I mentioned earlier, because of all the 
direct healing required in this fight, this is a much easier fight to maintain near-perfect Lifebloom and Harmony uptime. You can see there’s a 98% uptime for Lifebloom and 96.6% uptime for Harmony.

I also found the following two logs from kills of Lord Rhyolith - both kills were about 4:40 in length. This is a good comparison of the same encounter, the same length of time, and the effects of high and low Lifebloom uptime in particular.
If you look at this first log, you can see Harmony uptime is up at 92.2% and Lifebloom uptime is up at 87.1%, good. If you look just below that you can see Clearcasting (Omen of Clarity) procs: 21! If you look over to the right for Power Gains, you can see Revitalize restored 66,639 mana.

If we compare that with the following log, you can see Harmony uptime in this log is low at 49.5%, and Lifebloom is only at 31.4% uptime. This also resulted in significantly lower Clearcasting procs - only 8! That can really add up over the course of a fight. If you look to the right, you can see their Revitalize only provided 49,874 mana. While that’s not too low (Rejuvenation also procs Revitalize, which helps there, and the size of each druid's mana pool does factor in as well), that’s still a disparity of 16,765 mana. 

So as you can see, good Lifebloom uptime is really important for mana as well as healing!
I’ve certainly rattled on enough, so I think I'll wrap it up here. Remember, good Harmony and Lifebloom uptime is important and, as ever, practice makes perfect! Don't be discouraged if you're a bit low to start with - just keep working at it and it will improve.

A good tracker for Harmony and Lifebloom can also go a long way! I have some useful Power Auras for keeping an eye on those (full details in my My User Interface / Addons post!) which may be of help to you - the Harmony one in particular displays when the buff is active and has a timer to show you how long is left on it. Many of you likely have some means of watching your HoTs on targets to keep an eye on your Lifebloom, but if you like you can also use the little power aura to show you when your Lifebloom is active as well (this aura does NOT show stacks or timer for Lifebloom, though).


Harmony Power Aura:
Version:4.22; b:0.0549; g:0.4863; icon:Spell_Nature_HealingWay; buffname:Harmony; r:0.1843; x:-85; customname:Harmony; texture:23; alpha:1; inVehicle:0; wowtex:true; combat:true; size:0.25; y:-160; texmode:1; ismounted:0; timer.b:0.9294; timer.h:2; timer.Texture:WhiteRabbit; timer.enabled:true; timer.r:0.9882; timer.cents:false; timer.Relative:CENTER; timer.UseOwnColor:true

Lifebloom Power Aura:
Version:4.22; icon:INV_Misc_Herb_Felblossom; buffname:Lifebloom; x:-45; customname:Lifebloom; alpha:1; mine:true; inVehicle:0; groupOrSelf:true; customtex:true; combat:true; size:0.1; y:-115; ismounted:0

Simply copy, open up Power Auras, hit 'Import' and paste the code into the import bar!
Happy healing!

Friday, 4 March 2011

Tips and Tricks for the First Tier of Cata Raiding


There are a lot of useful little tips and tricks for the different bosses and encounters in the first set of Cataclysm raids, not all of which are too obvious, so I thought I'd share those that have helped me and my guildies out so far this tier! 
I'll start with some general tips before moving on to specific encounters.
Mirror of Broken Images - This trinket (attained from Tol Barad vendors for 125 TB Commendations at Exalted) is an amazingly helpful trinket for any fight this tier, normal or heroic mode (though especially heroic). Although Mastery isn't always useful for every class and spec, it can be Reforged into a more useful stat. While you may not use the trinket for every fight, it's great to have at the ready for when you need it, especially when working on a new and difficult encounter.
The biggest gain of this trinket is its /use - Increases Arcane, Fire, Frost, Nature, and Shadow resistances by 400 for 10 seconds, on a 1 minute cooldown. I highly recommend every raider pick one of these trinkets up to have ready in your bag, especially if you're looking to do heroic modes. The trinket can save your life in a fight and, for druids in particular, can be nice to alternate with Barkskin on fights with repeated large damage that occurs more frequently than every minute (e.g. Nefarian's Electrocute every 10%).
Drums of Forgotten Kings - Note: It appears this may have been hotfixed to no longer work (24 March HotfixesThis is an interesting one. Using the Drums instead of Mark of the Wild or Blessing of Kings essentially gives you a trade-off of 1% less stats (4% rather than 5%) but will get you to a solid 247 Resists across the board - Arcane, Frost, Fire, Nature, and Shadow (including other relevant raid buffs ie Shadow Protection, Nature Resist, etc) as opposed to a normal 195 resist. 
ETA: Several have asked about this, I grabbed a couple of screenshots in our last raid to show this... click: Mark/Kings with 195 Resist ; Drums of Kings with 247 Resist. Both SSs also have Resist Aura (Pally), Shadow Protection (Priest), and Nature Resist (Shaman).
Range Checker - Most Boss Mods will have a Range checker window which are immensely helpful for fights that require you to spread out or get away from other raid members.
Power Auras Classic - This is a great Addon (one I use in my normal UI setup, visible here) which allows you to put in custom Debuff alerts. This is great for setting up additional alerts for debuffs in boss fights to help warn you - they are completely customizable and can be made with various icons, colours, and even animations and sounds. I will list debuffs which are helpful to make Power Auras alerts for each boss.
Atramedes - This is an addon which measures and displays in simple percentages the amount of Sound (Atramedes) or Corrupted Blood (Cho’gall) of everyone in your raid.


Bastion of Twilight
Halfus
Quick Drake Guide
Time Warden: Grants the Proto-Behemoth the Fireball Barrage ability. Releasing slows the fireballs from the Proto-Behemoth.
Stormrider: Gives Halfus the ability to cast Shadow Nova. Releasing slows Halfus’ Shadow Nova cast time.
Nether Scion: Applies a +100% Attack Speed buff to Halfus. Releasing slows Halfus’ attack speed and reduces his damage done.
Slate Dragon: Gives Halfus Malevolent Strikes, a stacking healing debuff. Releasing occasionally paralyzes for 12 seconds. 
Whelps: Gives the Proto-Behemoth the Scorching Breath ability. Releasing reduces the Proto-Behemoth’s damage done.
As each drake dies, it causes Halfus to take 100% increased damage from all sources. Stacks.
It is generally easier to never release the Slate Dragon, as the paralysis affects everyone and the healing debuff can be handled through simple tank taunt swaps.
Furious Roar (cast by Halfus when he is sub-50% HP) is Physical damage, so Blessing of Protection will protect the target from the damage and knockdown. Useful on a healer such as a druid or priest for Tranquility / Divine Hymn in this phase.
Valiona and Theralion
Twilight Blast - If you focus Theralion, you can easily see if he’s targeting you for a Twilight Blast while he is in the air, giving you more time to move out of the way. Spread out some while he’s in the air so the Blasts don’t hit multiple people.

Important debuffs for healer’s raid frames: Blackout.
Ascendant Council
In Phase 1, the person with the Heart of Ice debuff should be near the group attacking Ignacious and the Burning Blood debuff near the group attacking Feludius for a buff to damage done before the debuffs are dispelled.
In Phase 2, the AE ability order is always Quake, Thundershock, Quake, Thundershock, so you know to alternate the tornado’s Swirling Winds buff and the Grounded buff. You can survive Thundershock without being grounded if you have a cooldown available (Barkskin, an external like Guardian Spirit, etc) but you will not survive Quake without the Swirling Winds buff.
Power Auras Debuffs: Lightning Rod. Heroic mode: Frost Beacon, Static Overload.
Important debuffs for healer’s raid frames: Gravity Crush in phase 3.
Cho’gall
Simple notes for healers: When Cho’gall summons the Fire Elemental, there will be damage focussed on the tanks. When Cho’gall summons the Shadow Lord, there will be more damage on the raid.
The Blood of the Old God (the small, oozey adds) can be stunned, slowed, and knocked back.
Good interrupts of the Worshipping channel is key in this fight. AE abilities like a Priest’s Psychic Scream, a Prot Warrior’s Shockwave, Destro Lock’s Shadowfury, etc can be extremely useful for quick interrupts while the raid is grouped up. 
Some guildies provided an excellent macro for reliable individual stuns players can use to interrupt the Worshipping channel. This macro will clear your current target (eg Cho’gall), target the nearest enemy player (a Mind Controlled raid member), cast the interrupt, then return you to your previous target (eg Cho’gall).
#showtooltip
/cleartarget
/targetenemyplayer
/cast (Name of Interrupt)
/targetlasttarget
For a cat, you could put in /cast Skull Bash(Cat Form) into the /cast line of that macro.
Displaying enemy nameplates can also help you immediately identify when players are mind controlled.
Blackwing Descent
Omnotron Defense System
Magmatron’s ability Acquiring Target can be removed by a Paladin’s Divine Shield, Rogue’s Cloak of Shadows, and a Mage’s Iceblock.
Do not do anything to drop threat on Toxitron’s adds if you are Fixated - it will cause them to find a new target and could lead to them blowing up someone in melee range. The adds can be slowed.
Position the bosses so that they pass through Toxitron’s green Chemical Cloud - the cloud causes everything to take additional damage, including the boss. Toxitron’s adds will also take additional damage if you are able to kite them through the cloud.
Stand in the Power Generator pools left by Arcanotron - they will boost your damage and mana regen!
Important debuffs for healer’s raid frames: Acquiring Target, Lightning Conductor.
Magmaw
Disable Projected Textures! Disabling Projected Textures removes the appearance of the bright green and white circles from the Druid and Priest AE healing spells, but it does not diminish the graphics for Pillar of Flame and Meteor (Heroic). This makes it immensely easier to see the fire and Pillar of Flame target spots, especially while in melee.
To disable, go to Options > Video > Projected Textures > Disabled.
I recommend turning it back on afterwards, as other fights have effects which need to be shown!
Resto Druids: Plant your Wild Mushrooms by the spike - when Magmaw is impaled, Detonate them for some nice damage!
Chimaeron
Assigning or claiming spots before the start of the fight helps ensure everyone remains spread out when they need to be and that no one crashes into each other when spreading back out after Feud.
For Boomkins: When afflicted by the Caustic Slime hit-reducing debuff, use Wild Mushrooms - they won’t miss.


A DPS can technically tank the Break attacks while the Bile-o-Tron is online; as long as they're above 10k health they won't die. The Double-Attack tank (and Feud tanks on Heroic) must be proper Tanks. (See Chimaeron Raid Guide).
Heroic: In Phase 2, Nefarian begans casting Mocking Shadows, dealing 2,000 shadow damage every second to all enemies. It is important to ensure the raid is fully topped off before Phase 2 begins in Heroic in order to help keep everyone alive to DPS the last 20%. Abilities like Power Word: Shield, Power Word: Barrier, and Aura Mastery can be helpful in mitigating or absorbing much of this damage.
Important debuffs for healer’s raid frames: Low Health, Break.
Maloriak
The Flash Freeze ability in the blue phases causes initial damage and also damages the frozen player when the freeze is broken. Be careful not to DPS the tombs too quickly before the target is healed. Druids can pop Barkskin if hit by Flash Freeze for extra protection.
Abilities like Hunter traps, Frost DK’s Howling Blast (with Chilblains), and Mage’s Ring of Frost can be helpful in slowing and stopping the adds managed by the kite tank.
Prime Subjects in the final phase fixate on a target and are immune to taunt. Blessing of Protection and other abilities are helpful on raid members targeted (especially healers or squishy DPS).
Power Auras Debuffs: Consuming Flames, Biting Chill, Dark Sludge (Heroic).
Important debuffs for healer’s raid frames: Flash Freeze, Engulfing Darkness (Heroic).
Atramedes
Melee - Atramedes has a huge hitbox, stand as far out from him as you can to give yourself more time to avoid the Sonar Pulse discs.
In air phases, the second target Atramedes chases will be whomever hits a shield/gong in the air phase. Assigning a class or player with some sort of sprint-like ability to hit the shields can be helpful as they’ll have the speed boost to kite Atramedes.
Nefarian
Disable ‘Water Collision’ effects - this effect is what causes your camera to dip below and above the surface of water/lava in the game. Turning it off will allow you to just see your character from above the surface of the lava, making it much easier to see where your pillar is and get on.
To turn it off go to Options > Interface > Camera > Un-tick ‘Water Collision’.
Do not try to lifegrip (Leap of Faith) players onto the platforms - it doesn’t work and may get them caught on the lip of the pillars.
Do not jump in and out of the lava when sitting in it (especially on Heroic mode when you need to go into it for Explosive Cinders) - it will stack the Magma debuff faster. If you need to leave the platform, simply strafe off and strafe back, saving the only jump used for getting back onto the platform.
Note: As of the 16 March Hotfixes, toggling run/walk no longer works to slow down your movement speed when Mind Controlled (Dominion). To slow players in order to give them more time to stack up the power buff, try dropping slowing abilities such as Frost Traps and Earthbind Totems. For heroic mode in Phase 1 and Phase 3, have your Toggle Walk/Run keybound and toggle the walk on for the Mind Controls (Dominion). If you are mind controlled, this slows your movement towards the portals, giving you more time to stack up the power buff before you need to release yourself from the mind control. 
If you are Mind Controlled, you will get a new bar - press 1 to release yourself from the MC, press 2 to build stacks of the Siphon Power buff.
The adds in Phase 2 which need to be interrupted are called Chromatic Prototype. These adds do not melee and do not require a tank, they just need to be interrupted while killed. On Heroic, these adds need to die at about the same time, as Nef will begin to land as soon as the first one dies.
Important debuffs for healer’s raid frames: Magma (lava), Heroic Mode: Explosive Cinders, Dominion.
Power Auras Debuffs: Explosive Cinders.
Throne of the Four Winds
Conclave of Wind
If you ever have to go to the East Platform with Rohash, I highly suggest setting him as your focus in order to see if and when he is casting Wind Blast (cutters). 
Also for East Platform, in preparation for cutters it is best to hover carefully in melee range (avoiding tornadoes) before each Wind Blast. This will position you best for moving aside from the Wind Blast. If you are too far at range, you may be unable to move out of the way in time. Zooming your camera out is also helpful as it will give you a full view of Rohash and help you see which way he is facing. If you are still having trouble seeing where he is facing (especially if you are in melee range), watch people’s pets - pets will always position themselves behind their target. 
Wind Blast always rotates in the same direction (clockwise). 
If you are on the North Platform (Nezir/frost), try to avoid standing in the centre of the platform. The raid needs to stack up there to soak the damage during the Specials, and you don’t want a Frost Patch laid down in the centre just before a Special occurs.
Al’akir
The Squall Lines (tornadoes) have a graphic when they begin to spawn, they start as gold and white swirls which pulse a couple of times before the actual tornadoes form. This allows you to see where they’re spawning and can also help you spot where the gap will be.
People can be lifegripped (Leap of Faith) out of the Squall Lines.
Be sure to have your Sit ability keybound - Phase 3 has everyone ‘swimming’ in the air and you will need to move up and down - using the ‘Sit’ / down binding makes it very easy to move straight down.
Power Auras Debuffs: Lightning Rod.


Hope some of these tips are helpful! Be sure to leave a comment with any additional tips, tricks, or ideas you've found helpful in this tier.

Saturday, 25 December 2010

Happy Holidays!


Happy Holidays everyone! I hope you all have a happy and safe holiday season and Greatfather Winter leaves you some nice gifts for Winter Veil!

I've got some posts lined up (and some days off from raids because of the holiday, so hopefully a bit of extra time to actually write!) so I'll be trying to get those up ASAP. Most of my spare time recently has been spent in-game, working on gear, profs, etc, and getting my priest up to 85 for alt usage in raids. After which, of course, I'll again have the gear and rep grind. It never ends!

Raids have been going well despite the bit of craziness from the holiday season. We're 11/12 at the moment with only Nefarian left to kill, and we made some excellent progress on Thursday on heroic Halfus despite a less-than-ideal comp, so we should get him down in the week. I'll be working on some new guides to the raid encounters as some have changed a bit since beta (though for the most part the beta preview pages are still pretty accurate and useful).

Resto druids are in a bit of an odd place at the moment. As mentioned in my last post, we're definitely feeling a fair bit behind Paladins and Priests. Paladins have been a bit OP since beta, and though they did have some nerfs they're still quite strong. Priests got a lot of much-needed buffs (they were ridiculously behind the other healers on beta) so now they're looking almost too strong, and I won't be surprised to see most progression guilds stacking priests and pallies for some early kills. A bit of a problem with druids at the moment is our AE heals were scaled back quite a bit - Wild Growth isn't hitting as hard as it used to, Efflorescence is strong but not as much as it was, and Rejuv is very mana intensive, so you have to be careful with its use. It's definitely still strong for heals, but you absolutely cannot waste them on overheals or you risk going OoM. Our tank heals are stronger now with Lifebloom and Nourish and Healing Touch, but it's more likely Paladins will still be preferred as tank healers due to all the cooldowns they have, whether a Hand of Sacrifice or Lay on Hands, etc. In terms of actual HPS numbers, druids can hit some of the numbers priests and pallies are reaching, but it seems to be at a greater mana cost and harder to reach, even when the toons themselves are about equal in terms of gear and skill. Pallies and Priests are pretty easily hitting the top numbers with druids and shamans trailing behind a bit. Overall, it's just feeling quite imbalanced at the moment, and I really think either druids and shamans could do with some boosts or pallies and priests need to be scaled back a bit. We won't see anything til after the holidays, I'm sure, as Blizz needs their holiday too! But hopefully there'll be some changes upcoming.

Otherwise, things have been fun around the game. The new raids are fun and pretty interesting. I still think Atramedes is one of my favourite fights, as it was in Beta... As ever, I'm a sucker for a good dragon fight, and I find the concept of a blind dragon and how his attacks are sound-based is interesting. Ascendant Council is also a fun fight due to its mechanics and how you're supposed to use them, and is proving to be one of the harder fights for many - the soft enrage in the final phase is definitely a strong push (you need to burn him down before you all die to the damage, basically).


I've been plugging away at Archaeology as well, though it's starting to wear on me now! I did get very lucky and found a Ring of the Boy Emperor, but no luck yet with Tyrande's Favourite Doll. I finally had to take a break and get back to working on other stuff as it was just going on too long. I had also been trying to get the Vial of the Sands recipe to drop, but after many Tol'vir items and yet another common that wasn't a Canopic Jar, I gave in and found someone with the recipe. Fortunately I had already saved up the mats (transmute master proccing on Truegold is amazing), and now that the mount's BOE, I was able to find someone to craft it for me without charging a ridiculous tip. So now I can turn into a dragon! /Squee! I'll likely get back to looking for the recipe, but I won't be spending ridiculous amounts of time on it.


Anyhow, I hope you all are enjoying the new content so far! I'm looking forward to doing some levelling again with my little worgen warrior after my priest gets sorted out at 85. He's all equipped with BoA gear and sitting out in Darkshore (Withers pet!), I had fun romping through the starting zone already. Worgen starting zone is definitely worth a look! I'll have to check out the Goblin zone at some point too, but that can wait.

More posts to come soon! In the meantime, enjoy the holidays and enjoy the game!

Thursday, 16 December 2010

I survived the Cataclysm!


Well, it's just over one week on now and yes, I am still alive! It's been an interesting and busy week. I was right in on the quick pursuit of level 85, followed immediately by heroics and, starting last Thursday, our first raids. We've already pushed to 7/12 (technically 8 with a 10s Chimaeron kill before the reset on Monday night), and back in again tonight. We should have an Ascendant Council kill with a bit better execution, and reports are Cho'gall has been easy on 25, so hopefully a kill on him right after.

Many have jumped in to the new Cataclysm dungeons and heroics. They're certainly quite different from the Wrath dungeons, and not just in the scenery! Trash hits hard and CC is almost a must on many mobs, and bosses have new and varied mechanics. Dungeons take time, require attention and awareness, and also a lot of patience. If you haven't been in them yet (especially in PuGs), be prepared for wipes and learning curves.

Don't be afraid to ask for CC! It can make a huge difference on how hard mobs end up beating on your tank and the group. Tanks too, don't be afraid to CC and set target orders, it helps a ton in controlling mobs.

DPS, be aware of how you can help your group out. I've added a new section in the Feral guide with some suggestions of how to help. Ferals have a great arsenal of off-heals which can help your healer, whether with a timely Tranquility or perhaps a Healing Touch with a Predator's Swiftness proc.

We do have some good CC as well as druids, whether it be simply rooting a target in place or perhaps a quick Cyclone on a target. The most useful CC in the Cataclysm content, though, is definitely Hibernate, which can sleep Dragonkin and Beasts.


Druids are looking alright so far at 85. Ferals, certainly, are doing some great damage (though there was a recent hotfix to stop Rake from benefitting twice from Mastery (source)). I can't decide so far whether Restos could do with a little boost or simply the healing classes are still a little off-balance. Pallies are still  a bit OP, though the recent hotfixes to them may help to bring them a bit more in-line with the other healers. The buffs to priests seems to have done them well too, at least for Holy priests, as they're doing pretty well now (especially after being quite low on beta). Druids and Shamans are looking quite equal, possibly a bit behind Holy priests though we'll see how it continues to play out as gear levels rise, more data gets out there, and as Blizz adjusts the balance more.

I've been trying to feel out just how aggressive with heals we can be given mana concerns, particularly on raid healing. Rejuv and Wild Growth are mana expensive but crucial on raid heals, so effective placement of those is important. Hopping into Tree of Life form to spread Lifeblooms out on the raid can also be effective as well as cheap in terms of mana, as well as providing more chances to proc Omen of Clarity with Malfurion's Gift. Wild Growth could use a bit of a boost, I think, to put it more on par with priest's Prayer of Healing and Circle of Healing abilities. Our tank healing tools are pretty strong and, with Empowered Touch, you can actually maintain Lifebloom on more than one target outside of ToL. Check out the Resto Guide for a full description on it, but essentially; if you go into ToL form, stack Lifebloom on two (or more) targets, you can then maintain the additional stacks through the Empowered Touch talent. By healing the additional targets with Nourish or Healing Touch, those spells will refresh the Lifebloom stacks, even outside of ToL form! So it's very feasible (and, if primarily tank healing, recommended) to keep LB stacks rolling on two tanks.

Lifebloom should always be up on a target, whether you're tank healing or raid healing. It's generally best used on the tank, but don't be afraid to throw it on another target or even yourself if needed. It increases our chance to proc Omen of Clarity if you've picked up Malfurion's Gift, provides Replenishment and mana regen with Revitalize, and is a nice strong heal. Be aware too of when it would be better to refresh a Lifebloom stack or let it bloom - a 3-stack can provide a really big heal if allowed to bloom (I've seen it crit for 30k+).


As awesome as some of the new ground effects look, I must admit they can get to be a bit of a mess and can really obscure some key mechanics in fights that are signified by yet more ground effects. Melee in particular tend to get tons of the new AE heals on their pile, making it difficult to see things like the magma pillar on Magmaw, or even distinguishing between the fire strikes by the fire elementals in Bastion of Twilight (they look just like the priest's AE heal but with a bit of a red tinge to it).

I've been debating some specs and gemming choices in raids. Intellect is definitely the best stat for Druids as it increases our spellpower, mana pool, regen, and spell crit, but, mana regen is still low, especially at entry gear levels, so Spirit is valuable. Gear, definitely, should have spirit on, and if it doesn't, I highly recommend reforging it on (Crit and Mastery are good stats to reduce to turn into Spirit - I don't recommend turning Haste into Spirit as Haste is also an excellent stat for us to push those HoT tick break points). I've been gemming a mix so far of Intellect, Spirit, and Haste. I've also picked up the following spec to reduce mana costs (with 3/3 in Moonglow) and increase mana pool a bit more (with 2/3 Furor). The points I sacrificed to get those two talents were 2 points out of Nature's Bounty. I did this largely due to Regrowth's high mana cost - because it is such an expensive spell, I'm not using Regrowth constantly, so the increased crit chance isn't such a big loss.


A quick note for gear: With the new enchant for Off-hands (+100 Int), a Main Hand + Off-hand pairing is generally stronger than using a 2-hander. That 100 Int is a big boost to our mana and spellpower.

I'll try to get some more updates up soon, along with some info on gear (particularly what pieces to be looking out for in raids and heroics). But I'm balancing this with still being busy in-game and the usual real-life goings on, so apologies in advance if some of the newer posts are a bit slow in rolling out! I am always updating my Resto and Feral guides, though, so do keep an eye on those, and feel free to get in touch with any questions or comments!

Monday, 6 December 2010

Cataclysm Feral Druid Guide is up!

Just in time for Cataclysm launch, my Feral Druid Guide is up!
Link here: Cataclysm Feral Druid Guide!

As with my new Cata Resto Guide, the old Feral guide has been taken completely down in order to start fresh with the new guide for Cata.

I'll be updating the guide as new information comes in and with new patches and changes.

Enjoy the new guide, and enjoy the launch of Cataclysm!

Wednesday, 1 December 2010

Cataclysm Resto Druid Guide is up!

I've finished my Resto Guide for Cataclysm and it is now up and running!

You can find the new guide here: Cataclysm Resto Druid Guide. ETA: I've posted the guide again to a NEW url, so please update your links and bookmarks! It is at the same URL as the previous guide, so your links and bookmarks should still work, though check to ensure they're updated. I took down the old guide completely to start fresh for the xpac. Everything there is for Cataclysm. 


As ever, I will be keeping the guide updated through changes and patches and adding any additional useful information that arises.


In other Cata preparations, there were a couple of great posts over on the MMO-Champion forums which are definitely worth a look.


Cataclysm Preparation Compilation by tunnland
There is a ton of useful information in this post, from suggestions of what to do before launch day, a full list of the new food, flasks, elixirs, and other buffs, to suggested dailies and their XP rewards to complete before launch day and turn in for quick easy XP at launch. There is also information on loot, strategy, and videos for the new 5-man instances. 


What Wrath players need to know to not suck at Cata! by Daetur
This post has some great info for everyone on what to expect in the new Cataclysm dungeons and raids and, in particular, what you need to start thinking about for the changes from the Wrath style of dungeons. There's general advice and more specific advice for DPS, Healers, and Tanks.

As that's quite a lot to look at and read, I'll cut this post off here. Enjoy! :D

Sunday, 28 November 2010

I'm going to punch that dragon in the face! New quests after the Shattering.

It's been an interesting week! The Shattering has come at last and I must say, I've been really impressed with the results. I've been checking out some of the revamped zones, both on alts and on my main, and the new quests are really impressive (not to mention the landscape changes!).

The levelling experience has been improved dramatically. Certainly it seems to have sped up a lot (that or you really do just get caught up so don't notice the time going by!). Each zone feels much more coordinated now - story and quest lines all flow together, leading you logically from one area to the next. There are still some little quests around which you can either skip or come back to later, but the majority seem to be interconnected, often starting with one or two quests to introduce you to the zone which develop into a whole host of additional quests.

For those who will be working on Loremaster in this expansion, the new zone objectives will make it a lot easier, and it's also very easy (and fun) to get all the quests in each zone to get them. Many friends and myself checking out the new zones on alts found it very easy to get the achievements by simply following all the quest lines, completing the zone and moving on to the next.

The quests themselves are a ton of fun. There's a mix of old and new quests as far as I've seen - most all have been revamped in some way, but there are still ones that are unchanged (the two children in Redridge are still losing their necklace in the Lake, for example). The quests are really interesting and fun, and though there are still the 'kill x amount of creatures' and 'collect y amount of items', they're mixed in with a lot of unique tasks and mechanics and just all around fun. I highly recommend reading the quest text! You're definitely missing out if you don't.

I haven't had a chance yet to check out all the zones (some guildies I know have been working quite quickly through all the Loremaster achievements), but I've really enjoyed the ones I've seen so far, and thought I'd share some (...many) screenshots of some of the highlights so far!

Spoiler alert: The screenshots and text below may contain some spoilers if you haven't yet done the zones. I'll try not to give away too much, but just in case, read on with caution!

More treants!
I'll start with Darkshore, as that is where I went to first. I was particularly keen to find Withers, who is a new quest reward (I believe he's also available via an NPC purchase for horde). At first I was a bit disappointed that the quest wasn't available right away, but I'm now very glad it wasn't, as it gave me a chance to do all the Darkshore quests. It was incredibly fun and felt like a great place to start on my druid, who likely would have been home in Teldrassil following the long adventure in Northrend and would of course go to help his fellow Night Elves following the devastation to Auberdine and Darkshore.
Surveying the ruins of Auberdine.
The opening quests have you helping the survivors and plunge you straight into the aftermath of the Cataclysm. You begin closer to Lor'danel, the new base, and gradually expand outward into the zone. Eventually you'll be sent all the way down to Auberdine. The devastation to the town is quite staggering and many of the quests are tinged with the tragedy that has befallen the Night Elves and other inhabitants of Darkshore. I think the saddest thing I picked up was this: Broken Timepiece. It's earned a permanent spot in my bags as a memory to those lost. There are some very sad quests especially in Auberdine, and those familiar with the zone may recognise some of the NPCs lost in the wreckage. It's not all sad, though, and there are plenty of funny moments as well (in particular a rather senile Dwarf).


I was very excited to find Shan'do Stormrage in Darkshore, who had not yet travelled to Mount Hyjal. There are some fun quests as you travel around gathering help for him to repair the land.

A very sad Moonkin.
Assistance from the Green Dragonflight.
Protecting Darkshore from trolls.
If the new Tree of Life form looked like this, I might not have glyphed Treant form.
Finally I returned to Lor'danel and got little Withers.
I really enjoyed questing around Darkshore. The new quest lines really get you wrapped up and involved in the stories. It takes a little bit longer when reading all the quest texts but it's definitely worth it (and for those levelling, XP rewards are really quite good, so it shouldn't slow down your actual levelling too much). There are a lot of new mechanics too, of vehicles and disguises and tasks (don't assume you need to just kill mobs, some require that you don't kill things!), but they're all done very well so they're fun rather than annoying.

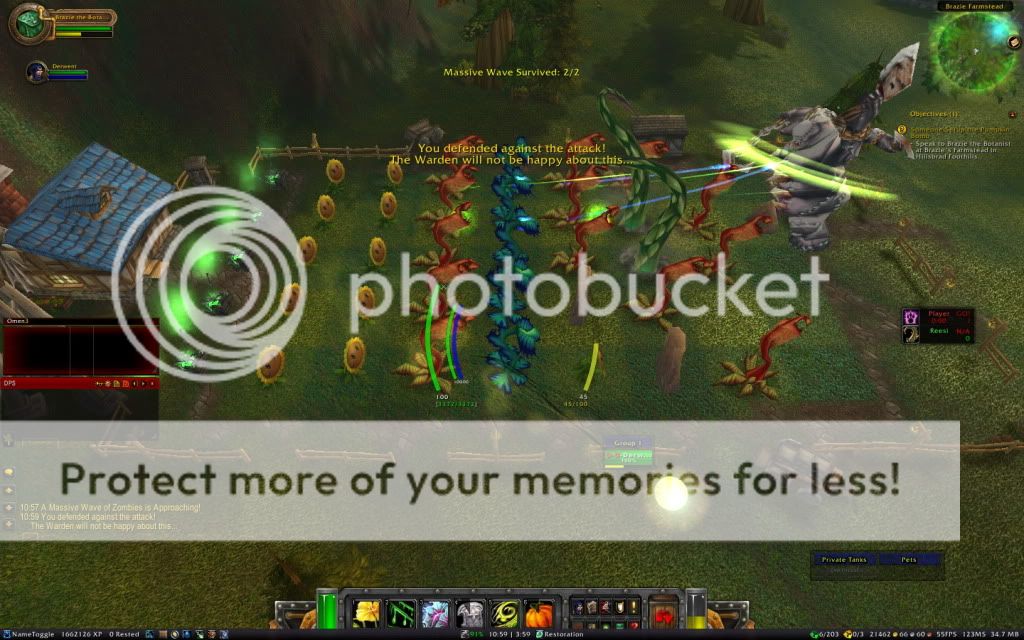
After Darkshore I made a quick swing by Alterac Mountains to check out one of the other new pets, the Singing Sunflower. There's also Mr Grubbs from the Eastern Plaguelands, who's not as long a grind as I had first thought (I found him quite quickly). The Sunflower is from the Plants vs Zombies game and quests, which was quite a lot of fun. I'd never played PvZ before so it was an interesting experience!


I then went to the Badlands. There were a ton of great quests here, including a nice long chain involving dragons and some fun little riddles and games. By far though the best quests were the three 'The Day that Deathwing Came' quests. They take place just by Dragon's Mouth at the Scar of the Worldbreaker.


As you can tell just from those screenshots, this is an amazing quest! One of the best quests I've done. I won't include the screenshots from all three of the quests here, as they're definitely best as a surprise, but if there's any quests you make sure to do, these three are it. The only thing I'd change is to implement an option for you to go back and speak to the NPCs and ask to see their stories again, so that you could repeat the little quests over and over (without any XP gain though). I'll be going back on all my alts! I'll include this last shot as the red sky just looks amazing behind Deathwing.


That is really just the smallest sample of some of the amazing new quests out there, and even just those two zones there are a ton of great quests. I've gone through all of Westfall and Redridge now as well, and Alliance (and even Horde who wouldn't mind levelling up a toon 1-20 Alliance-side) should definitely check these zones out.
Playing in the tornadoes in Westfall.
Epic battles in Redridge.
I was also lucky (or unlucky) enough to get the following:


Unfortunately I don't have a good screenshot of that as it was incredibly unexpected! I was running through the Burning Steppes to Blackrock Mountain, so the sky was already quite red, and had just noticed something large in the sky in the distance and was thinking 'What is that?' when BAM. Dead druid.

I'm looking forward to checking out all the other zones and working on Loremaster. I'm very glad I didn't bother trying to complete it before 4.0, as going through all the new zones is going to be great. I'm also looking forward to levelling a new toon, though I think I'll be waiting for Cata to land so I can roll a Worgen warrior. I just might even level another druid at some point (troll perhaps?) but we'll see!

Also, for those who don't play with the in-game music on, I definitely suggest turning it on! The new music is really great and definitely adds to the atmosphere in the zones.

I'll leave this here for now. Just over a week now until Cataclysm arrives! I can't believe it's almost December already. I'm working on getting the guides updated so they'll be ready for the launch and the push to 85. I imagine they'll be getting many little updates over the initial weeks and months of Cataclysm as well, as I'm sure Blizz will be making adjustments and changes as everything goes live and much more data than they had on Beta starts to flood in.

Happy questing!

Scar of the WorldBreaker.