Showing posts with label Blackwing Descent. Show all posts

Friday, 4 March 2011

Tips and Tricks for the First Tier of Cata Raiding


There are a lot of useful little tips and tricks for the different bosses and encounters in the first set of Cataclysm raids, not all of which are too obvious, so I thought I'd share those that have helped me and my guildies out so far this tier! 
I'll start with some general tips before moving on to specific encounters.
Mirror of Broken Images - This trinket (attained from Tol Barad vendors for 125 TB Commendations at Exalted) is an amazingly helpful trinket for any fight this tier, normal or heroic mode (though especially heroic). Although Mastery isn't always useful for every class and spec, it can be Reforged into a more useful stat. While you may not use the trinket for every fight, it's great to have at the ready for when you need it, especially when working on a new and difficult encounter.
The biggest gain of this trinket is its /use - Increases Arcane, Fire, Frost, Nature, and Shadow resistances by 400 for 10 seconds, on a 1 minute cooldown. I highly recommend every raider pick one of these trinkets up to have ready in your bag, especially if you're looking to do heroic modes. The trinket can save your life in a fight and, for druids in particular, can be nice to alternate with Barkskin on fights with repeated large damage that occurs more frequently than every minute (e.g. Nefarian's Electrocute every 10%).
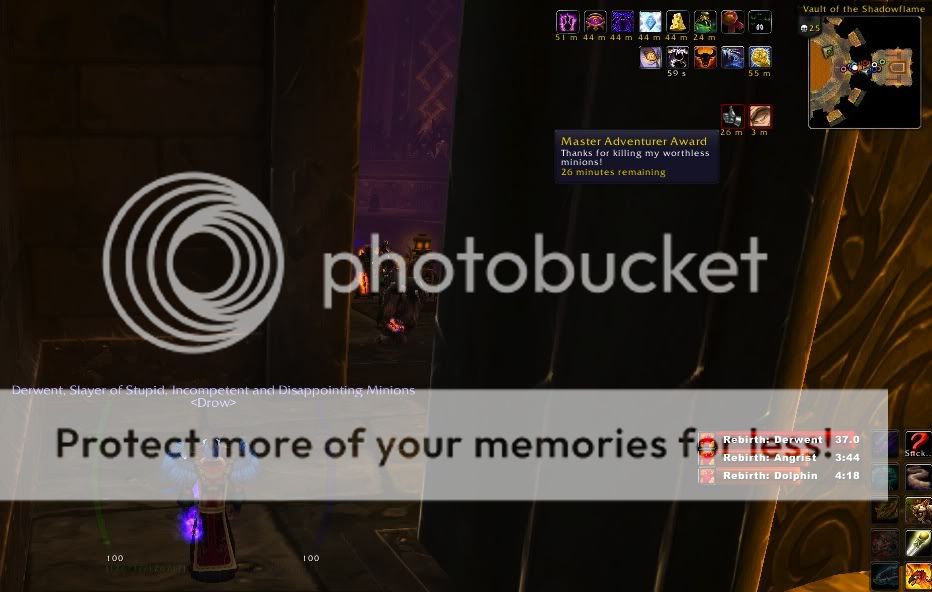
Drums of Forgotten Kings - Note: It appears this may have been hotfixed to no longer work (24 March HotfixesThis is an interesting one. Using the Drums instead of Mark of the Wild or Blessing of Kings essentially gives you a trade-off of 1% less stats (4% rather than 5%) but will get you to a solid 247 Resists across the board - Arcane, Frost, Fire, Nature, and Shadow (including other relevant raid buffs ie Shadow Protection, Nature Resist, etc) as opposed to a normal 195 resist. 
ETA: Several have asked about this, I grabbed a couple of screenshots in our last raid to show this... click: Mark/Kings with 195 Resist ; Drums of Kings with 247 Resist. Both SSs also have Resist Aura (Pally), Shadow Protection (Priest), and Nature Resist (Shaman).
Range Checker - Most Boss Mods will have a Range checker window which are immensely helpful for fights that require you to spread out or get away from other raid members.
Power Auras Classic - This is a great Addon (one I use in my normal UI setup, visible here) which allows you to put in custom Debuff alerts. This is great for setting up additional alerts for debuffs in boss fights to help warn you - they are completely customizable and can be made with various icons, colours, and even animations and sounds. I will list debuffs which are helpful to make Power Auras alerts for each boss.
Atramedes - This is an addon which measures and displays in simple percentages the amount of Sound (Atramedes) or Corrupted Blood (Cho’gall) of everyone in your raid.


Bastion of Twilight
Halfus
Quick Drake Guide
Time Warden: Grants the Proto-Behemoth the Fireball Barrage ability. Releasing slows the fireballs from the Proto-Behemoth.
Stormrider: Gives Halfus the ability to cast Shadow Nova. Releasing slows Halfus’ Shadow Nova cast time.
Nether Scion: Applies a +100% Attack Speed buff to Halfus. Releasing slows Halfus’ attack speed and reduces his damage done.
Slate Dragon: Gives Halfus Malevolent Strikes, a stacking healing debuff. Releasing occasionally paralyzes for 12 seconds. 
Whelps: Gives the Proto-Behemoth the Scorching Breath ability. Releasing reduces the Proto-Behemoth’s damage done.
As each drake dies, it causes Halfus to take 100% increased damage from all sources. Stacks.
It is generally easier to never release the Slate Dragon, as the paralysis affects everyone and the healing debuff can be handled through simple tank taunt swaps.
Furious Roar (cast by Halfus when he is sub-50% HP) is Physical damage, so Blessing of Protection will protect the target from the damage and knockdown. Useful on a healer such as a druid or priest for Tranquility / Divine Hymn in this phase.
Valiona and Theralion
Twilight Blast - If you focus Theralion, you can easily see if he’s targeting you for a Twilight Blast while he is in the air, giving you more time to move out of the way. Spread out some while he’s in the air so the Blasts don’t hit multiple people.

Important debuffs for healer’s raid frames: Blackout.
Ascendant Council
In Phase 1, the person with the Heart of Ice debuff should be near the group attacking Ignacious and the Burning Blood debuff near the group attacking Feludius for a buff to damage done before the debuffs are dispelled.
In Phase 2, the AE ability order is always Quake, Thundershock, Quake, Thundershock, so you know to alternate the tornado’s Swirling Winds buff and the Grounded buff. You can survive Thundershock without being grounded if you have a cooldown available (Barkskin, an external like Guardian Spirit, etc) but you will not survive Quake without the Swirling Winds buff.
Power Auras Debuffs: Lightning Rod. Heroic mode: Frost Beacon, Static Overload.
Important debuffs for healer’s raid frames: Gravity Crush in phase 3.
Cho’gall
Simple notes for healers: When Cho’gall summons the Fire Elemental, there will be damage focussed on the tanks. When Cho’gall summons the Shadow Lord, there will be more damage on the raid.
The Blood of the Old God (the small, oozey adds) can be stunned, slowed, and knocked back.
Good interrupts of the Worshipping channel is key in this fight. AE abilities like a Priest’s Psychic Scream, a Prot Warrior’s Shockwave, Destro Lock’s Shadowfury, etc can be extremely useful for quick interrupts while the raid is grouped up. 
Some guildies provided an excellent macro for reliable individual stuns players can use to interrupt the Worshipping channel. This macro will clear your current target (eg Cho’gall), target the nearest enemy player (a Mind Controlled raid member), cast the interrupt, then return you to your previous target (eg Cho’gall).
#showtooltip
/cleartarget
/targetenemyplayer
/cast (Name of Interrupt)
/targetlasttarget
For a cat, you could put in /cast Skull Bash(Cat Form) into the /cast line of that macro.
Displaying enemy nameplates can also help you immediately identify when players are mind controlled.
Blackwing Descent
Omnotron Defense System
Magmatron’s ability Acquiring Target can be removed by a Paladin’s Divine Shield, Rogue’s Cloak of Shadows, and a Mage’s Iceblock.
Do not do anything to drop threat on Toxitron’s adds if you are Fixated - it will cause them to find a new target and could lead to them blowing up someone in melee range. The adds can be slowed.
Position the bosses so that they pass through Toxitron’s green Chemical Cloud - the cloud causes everything to take additional damage, including the boss. Toxitron’s adds will also take additional damage if you are able to kite them through the cloud.
Stand in the Power Generator pools left by Arcanotron - they will boost your damage and mana regen!
Important debuffs for healer’s raid frames: Acquiring Target, Lightning Conductor.
Magmaw
Disable Projected Textures! Disabling Projected Textures removes the appearance of the bright green and white circles from the Druid and Priest AE healing spells, but it does not diminish the graphics for Pillar of Flame and Meteor (Heroic). This makes it immensely easier to see the fire and Pillar of Flame target spots, especially while in melee.
To disable, go to Options > Video > Projected Textures > Disabled.
I recommend turning it back on afterwards, as other fights have effects which need to be shown!
Resto Druids: Plant your Wild Mushrooms by the spike - when Magmaw is impaled, Detonate them for some nice damage!
Chimaeron
Assigning or claiming spots before the start of the fight helps ensure everyone remains spread out when they need to be and that no one crashes into each other when spreading back out after Feud.
For Boomkins: When afflicted by the Caustic Slime hit-reducing debuff, use Wild Mushrooms - they won’t miss.


A DPS can technically tank the Break attacks while the Bile-o-Tron is online; as long as they're above 10k health they won't die. The Double-Attack tank (and Feud tanks on Heroic) must be proper Tanks. (See Chimaeron Raid Guide).
Heroic: In Phase 2, Nefarian begans casting Mocking Shadows, dealing 2,000 shadow damage every second to all enemies. It is important to ensure the raid is fully topped off before Phase 2 begins in Heroic in order to help keep everyone alive to DPS the last 20%. Abilities like Power Word: Shield, Power Word: Barrier, and Aura Mastery can be helpful in mitigating or absorbing much of this damage.
Important debuffs for healer’s raid frames: Low Health, Break.
Maloriak
The Flash Freeze ability in the blue phases causes initial damage and also damages the frozen player when the freeze is broken. Be careful not to DPS the tombs too quickly before the target is healed. Druids can pop Barkskin if hit by Flash Freeze for extra protection.
Abilities like Hunter traps, Frost DK’s Howling Blast (with Chilblains), and Mage’s Ring of Frost can be helpful in slowing and stopping the adds managed by the kite tank.
Prime Subjects in the final phase fixate on a target and are immune to taunt. Blessing of Protection and other abilities are helpful on raid members targeted (especially healers or squishy DPS).
Power Auras Debuffs: Consuming Flames, Biting Chill, Dark Sludge (Heroic).
Important debuffs for healer’s raid frames: Flash Freeze, Engulfing Darkness (Heroic).
Atramedes
Melee - Atramedes has a huge hitbox, stand as far out from him as you can to give yourself more time to avoid the Sonar Pulse discs.
In air phases, the second target Atramedes chases will be whomever hits a shield/gong in the air phase. Assigning a class or player with some sort of sprint-like ability to hit the shields can be helpful as they’ll have the speed boost to kite Atramedes.
Nefarian
Disable ‘Water Collision’ effects - this effect is what causes your camera to dip below and above the surface of water/lava in the game. Turning it off will allow you to just see your character from above the surface of the lava, making it much easier to see where your pillar is and get on.
To turn it off go to Options > Interface > Camera > Un-tick ‘Water Collision’.
Do not try to lifegrip (Leap of Faith) players onto the platforms - it doesn’t work and may get them caught on the lip of the pillars.
Do not jump in and out of the lava when sitting in it (especially on Heroic mode when you need to go into it for Explosive Cinders) - it will stack the Magma debuff faster. If you need to leave the platform, simply strafe off and strafe back, saving the only jump used for getting back onto the platform.
Note: As of the 16 March Hotfixes, toggling run/walk no longer works to slow down your movement speed when Mind Controlled (Dominion). To slow players in order to give them more time to stack up the power buff, try dropping slowing abilities such as Frost Traps and Earthbind Totems. For heroic mode in Phase 1 and Phase 3, have your Toggle Walk/Run keybound and toggle the walk on for the Mind Controls (Dominion). If you are mind controlled, this slows your movement towards the portals, giving you more time to stack up the power buff before you need to release yourself from the mind control. 
If you are Mind Controlled, you will get a new bar - press 1 to release yourself from the MC, press 2 to build stacks of the Siphon Power buff.
The adds in Phase 2 which need to be interrupted are called Chromatic Prototype. These adds do not melee and do not require a tank, they just need to be interrupted while killed. On Heroic, these adds need to die at about the same time, as Nef will begin to land as soon as the first one dies.
Important debuffs for healer’s raid frames: Magma (lava), Heroic Mode: Explosive Cinders, Dominion.
Power Auras Debuffs: Explosive Cinders.
Throne of the Four Winds
Conclave of Wind
If you ever have to go to the East Platform with Rohash, I highly suggest setting him as your focus in order to see if and when he is casting Wind Blast (cutters). 
Also for East Platform, in preparation for cutters it is best to hover carefully in melee range (avoiding tornadoes) before each Wind Blast. This will position you best for moving aside from the Wind Blast. If you are too far at range, you may be unable to move out of the way in time. Zooming your camera out is also helpful as it will give you a full view of Rohash and help you see which way he is facing. If you are still having trouble seeing where he is facing (especially if you are in melee range), watch people’s pets - pets will always position themselves behind their target. 
Wind Blast always rotates in the same direction (clockwise). 
If you are on the North Platform (Nezir/frost), try to avoid standing in the centre of the platform. The raid needs to stack up there to soak the damage during the Specials, and you don’t want a Frost Patch laid down in the centre just before a Special occurs.
Al’akir
The Squall Lines (tornadoes) have a graphic when they begin to spawn, they start as gold and white swirls which pulse a couple of times before the actual tornadoes form. This allows you to see where they’re spawning and can also help you spot where the gap will be.
People can be lifegripped (Leap of Faith) out of the Squall Lines.
Be sure to have your Sit ability keybound - Phase 3 has everyone ‘swimming’ in the air and you will need to move up and down - using the ‘Sit’ / down binding makes it very easy to move straight down.
Power Auras Debuffs: Lightning Rod.


Hope some of these tips are helpful! Be sure to leave a comment with any additional tips, tricks, or ideas you've found helpful in this tier.

Tuesday, 25 January 2011

Slayer of Stupid, Incompetent, and Disappointing Minions!

A quick update; we got Heroic Maloriak down last night, and I was actually recording for once so I have a video of our first kill!


Video: Our Heroic Maloriak 25 man kill.

Despite taking ages to upload and being recorded in 1080 HD it for some reason is only showing up in 720 HD on youtube, so I'll have a poke at that later after raid time to figure out why that is. A bit annoyed at that and hoping it won't be too difficult to amend, as I've been trying to improve the picture and overall video qualities as I do each one. Added a little intro lead-in for the site, will be playing some more with those sorts of things as I go as well. Also, if anyone has recommendations for new music to check out, always interested to hear some new stuff! The videos so far have some similar soundtracks, though I do have some very different music in mind for an upcoming vid (ideally a Conclave vid if I can get one recorded).

The Heroic Maloriak fight is quite a good one, with the primary difference from normal mode being an additional phase in which Nefarian adds Dark Magic to Maloriak's cauldron. You can see in the video that this results in a lot of additional adds (the dark swills), dark patches on the ground which deal a lot of damage if you stand in it, and a debuff cast on the tank called 'Engulfing Darkness'.

The Engulfing Darkness debuff is very important as it reduces all healing taken by 99%. You can see in the video I have Maloriak focussed to watch his cast bar and have the debuff icon appearing on my Vuhdo - it's a 3 second cast with an 8 second channel applied on the tank (and any who happen to get in front of him) which applies the debuff. It's very important that the tank is healed to full in those few seconds before the debuff is reapplied and any necessary cooldowns used by/on the tank as needed, as healing will be ineffective while the cast is channelled.

I'll be trying to get a full raid guide up for Maloriak soon to go with the video, including some more information on the heroic mode abilities. I've also had some questions about my UI so I'll see about doing an updated UI post as well.

One of the most fun things about the Maloriak hardmode is you receive the following awesome (yet sadly  temporary) title:

You also get a fun debuff:

Unfortunately, both disappear when you die (including if you die during the encounter itself), so more incentive to stay out of bad stuff and remain alive!

We all quickly lost our titles though as our raid leaders forgot to set the instance back to Normal mode. We were a few minutes into Nefarian when we suddenly realised 'hm... why are people getting mind controlled?.. OMG IT'S STILL ON HEROIC!!' One day no one will realise it when that happens and maybe we'll end up with an accidental heroic win.

More to come soon!

Monday, 24 January 2011

Heroic Chimaeron Video + Raid Guide Update!

I recorded a video of our Heroic Chimaeron 25 kill last night! Working on improving the videos as I go, I'd still like to up the sharpness some more, though you can still watch this and the Omnotron kill in HD. I had a comment on my Omnotron video to see my cursor during a fight so you can see a bit more what I'm doing, so I tried that out for this video. My primary focus on this fight is on tank healing.


I have also updated the Raid Encounter Guide for Chimaeron with information on the Heroic version of the fight, including the Heroic mode abilities and additional tanking and healing suggestions.

You can see the updated guide here: Raid Encounter Guide - Chimaeron.

In other amusing news, there is no running from the trash in Blackwing Descent - they've learned to use the lifts!

This gives whole new meaning to deaths to the lift-boss! A guildie aptly described these drakes as like velociraptors, learning to use lifts, they'll be learning how to open doors next... Run while you still can!

Thursday, 20 January 2011

Raid Encounter Guides - Omnotron Defense System (Blackwing Descent)


Video: Our recent Omnotron Defense System Heroic 25 kill. Information on the Heroic mode of this encounter is below the Normal mode abilities towards the end of this post.

Omnotron Defense System

The Omnotron Defense System is one of the first bosses you'll encounter in Blackwing Descent, and one of two bosses you will need to defeat in order to access the rest of the zone. Included in this guide are the boss abilities, strategy suggestions, and a video of our heroic mode kill and some info on the heroic mode abilities.

This fight is a council-type fight against four constructs with a shared healthpool - Magmatron, Toxitron, Arcanotron, and Electron. The constructs become active in a random order and you can face any combination at one time. You will fight against all four constructs in this encounter, however, only two constructs will be active at any given time. Spatial awareness and quick target changes are key to succeeding in this fight.

Each construct has an energy bar which starts at full when it is activated and decreases over time. At 50% energy, the construct will activate a shield specific to its abilities and become invulnerable and another construct will activate. The construct will deactivate at 0% energy and will remain inactive until reactivated by the encounter.

You can tell which construct will be activated next by a beam connecting from the forge in the back of the room to a deactivated construct. The beam will be a different colour for each construct - a red, magma-looking beam for Magmatron, a green beam for Toxitron, a purple beam for Arcanotron, and a blue lightning beam for Electron. Each construct has its own unique abilities.

Abilities (source)
Arcanotron:
-Power Generator: Summons a Power Generator under a random friendly target. This generator increases damage by 50% of all friendly and enemy targets within 5 yards. Lasts 1 minute.
-Arcane Annihilator: Inflicts significant Arcane damage to a random enemy target. 1.5 second cast time. Can be interrupted.
-Power Conversion: Power Conversion converts damage against the target to be converted into additional Magic damage and increased cast speed. Purge, Spellsteal, or stop DPS.

Electron:
-Lightning Conductor: Targets and effects a raid member for 10 seconds, causing them to inflict Nature damage to nearby allies every 2 seconds.
-Electrical Discharge: Inflicts Nature damage to up to 3 enemies within 8 yards. Damage is increased by 20% between each jump.
-Unstable Shield: Attacks against the Unstable Shield cause a Static Shock at a nearby enemy's location. Stop DPS.

Magmatron:
-Incineration Security Measure: Inflicts 14000-15000 Fire damage every second for 4 seconds to the entire raid.
-Acquiring Target: Acquiring a target. After 4 seconds Magmatron will channel his Flamethrower on a target, inflicting ~35000 Fire damage every second to all enemies in front of him for 4 seconds. The Flamethrower appears as an obvious red beam directed onto the target.
-Barrier: Absorbs 150000 damage and, if the barrier is broken, it releases a gale of flame, inflicting ~76000 Fire damage to all enemies.

Toxitron:
-Chemical Bomb: Fires a Chemical Bomb at a random target, causing a Chemical Cloud at the location. The chemical cloud doubles damage taken and can affect Constructs as well as raid members.
-Poison Protocol: The Poison Protocol creates Poison Bombs that will explode after coming in contact with its target or after being killed. Poison Bombs will Fixate on random raid members and move towards them and will explode on contact. Poison Bombs can be snared and slowed.
-Poison Soaked Shell: Applies Soaked in Poison on melee and spell attacks which inflicts 5000 Nature damage every 2 seconds. Stacks. Will increase damage done to the target, however, it will also stack and inflict damage on any raid member effected.

Strategy
You will only need 2 tanks for this fight as only 2 constructs will be active at any one time. The fight will begin with only one Construct active, the second Construct becoming active when the first reaches 50% energy. The order of the constructs is random; you could start with a different construct each pull and have the remaining constructs activate in any order and in any combination. One construct will deactivate while a new one activates, freeing the tank to pick up the new boss.

Each construct has two unique offensive abilities and a third Shield ability which activates when the specific construct hits 50% energy. Quick target switches are key in this fight due to these shields - all of the shields will result in increased damage to raid members if they are DPSd. The shields are activated when a construct's energy reaches 50% - this is also the time a new construct will activate, so it is simple to change to the newly activated construct when the shield is powering up on the previous target.

Arcanotron's Power Generator forms light-coloured puddles on the ground which increases the damage of anyone standing in them and will regenerate mana for casters. The raid should move into these puddles when they can for the damage gain, though raid members shouldn't stand in them if it puts them in danger of an ability from a different construct. These puddles will also increase the constructs' damage, so the constructs should be moved out of them. Arcane Annihilator is a hard-hitting cast which should be interrupted. It may not always one-shot people, however, it will do significant enough damage that you could easily lose raid members if they are hit by this and another ability in quick succession.

Damage to Arcanotron's shield will give a haste buff to the Annihilator cast, so it is essential that DPS switches quickly and any stacks are Purged or Spellstolen.

Electron's Lightning Conductor affects a targeted raid member and causes them to shock nearby raiders with electricity. Any raid member affected should move away from the rest of the raid. Electrical Discharge is simply a chain lightning - you may find it easiest to spread your raid out whenever Electron is active to mitigate this damage, though it is not strictly necessary. Depending on your group and the composition of the two constructs active, you may find it more useful to keep your raid stacked together for AoE heals. If stacking, people should be aware of the chain lightning and healers prepared for quick top-ups so that you don't lose raiders to a combination of chain lightning and another ability.

Damage to Electron's shield is extremely dangerous - DPS to his shield will cause Static Shock which can quickly lead to a raid wipe. This includes the tank's damage! The tank will need to stop attacking as well when that shield goes up. ETA: A good note from our Bear Reesi (of The Inconspicuous Bear), even abilities like Demoralizing Shout/Roar will trigger this shield!

Magmatron's abilities are pretty hard-hitting and unavoidable. Incineration Security Measure inflicts an AoE Fire Damage to the entire raid. There is no way to avoid it - it must be healed through. Raid-wide cooldowns may be helpful, such as Power Word: Barrier and Aura MasteryAcquiring Target focusses a Flamethrower (a giant red beam) onto a random raid member. The targeted member must be healed through it. Other raid members should ensure they are not caught in the beam or in front of Magmatron or they will be hit as well. You can choose to have the targeted raid member run away from the group or simply have the rest of your raid shift to avoid them. Having your raid move (rather than the target) may better help prepare you for Heroic mode, which I will touch on shortly. Certain abilities can avoid Flamethrower: Cloak of ShadowsDivine ShieldIce Block.

Magmatron's Barrier shield will inflict massive AoE damage to the entire raid if it is DPSd and broken.

Toxitron's Chemical Bomb creates a green chemical cloud on the ground, doubling damage taken by anyone stood in the cloud. This includes damage the construct takes - if you are able to carefully position an active construct in the cloud, you can increase damage done to it significantly. Toxitron also summons adds called Poison Bombs. These are non-elites which will fixate on random raid members and explode for significant damage should they reach their target. These adds can be slowed, so abilities like Frost Trap and Earthbind Totem are extremely helpful. DPS must kill these adds before they reach their targets. Melee are best off retreating to range to ensure they are a safe distance away from the adds in case they are targeted, however, if they are not fixated, they can carefully assist in DPSing the adds as well. No one should use any aggro-dropping abilities such as Feign Death if they are fixated by an add - the adds will reset aggro and fixate on another target, which could result in the add fixating on someone who happens to be right next to them.

If you position Toxitron on one side of the room and your raid on the other, this can help to funnel the adds in a specific direction, making it easier to AoE them and to ensure they pass through any Frost Traps which may be down.

Toxitron's shield is arguably the least dangerous, Poison Soaked Shell applying a stacking Nature damage debuff. The debuff can be cleansed. This debuff will actually cause people to inflict additional Nature damage with their attacks, however, it will also inflict damage on the affected raid member. If your healers feel they can handle it, you may be interested in letting a few DPS remain on Toxitron a bit longer, though it may not be worth it. You will still need to change targets to the newly activated construct eventually.

The only ability which you may find you need to spread out for is Electron's chain lightning, which can arguably be handled while stacked up anyway. This may make it easier for targeted raid members (for Lightning Conductor and Fixate) to move out of the raid or for the raid to move away from them (such as for Magmatron's Flamethrower). Stacking up when you can may be helpful for raid healing and cooldowns like Power Word: Barrier to assist in healing. This in particular can be helpful in Heroic mode.

Heroic Omnotron Defense System
In all of the Blackwing Descent heroic modes, Nefarian appears to liven things up a bit and add difficulty to the fight. In addition to regaling us with his rather, er, eccentric presence, Nefarian generally adds a type of Shadow magic to the fight, giving the bosses additional abilities.

For the Omnotron Defense System, Nefarian adds an additional ability to each construct. Nefarian's meddling is on its own cooldown separate from the constructs, so you may find yourself faced with any of the new abilities depending on which constructs are active and when his cooldown timer is up. Some of these combinations can be particularly dangerous depending on which constructs are active at the time.

Shadow Infusion: Nefarian causes Electron's Lightning Conductor target to become fused with Shadow. Causes Shadow damage to allies, inflicting damage based on the distance from the Shadow Infusion target.

The Lightning Conductor will still tick for approximately 5 seconds while the target is becoming Infused with Shadow, so the target should move out of the raid initially. Once the Lightning Conductor turns into  Shadow Infusion, though, the target must immediately re-stack with the rest of the raid (priest's Leap of Faith is excellent for whipping a target quickly back into the group) to reduce the damage. Damage from Shadow Infusion increases the farther people are from the target, so your raid must be stacked up to mitigate this damage. If a tank has to be out of the group for whatever reason, it is advisable to use external cooldowns.

Encasing Shadows: Nefarian holds Magmatron's Acquired Target in place, preventing them from moving.

This ability roots the Flamethrower target in place, preventing them from moving. This is why it's advisable to practice from normal mode always having the Flamethrower target remain in place while the rest of the raid moves to avoid the beam, so everyone is prepared should the target find themselves rooted by Nefarian.

Arcane Blowback: Nefarian fires shadows at a Power Generator pool left by Arcanotron, causing it to expand and explode, inflicting Arcane damage to anyone caught in it. (TY to Haast for pointing me to the name of this ability!)
Raid members need to be very aware of these pools when standing in them, as they can expand very rapidly when Nefarian targets one and the resulting explosion will severly injure, if not kill, anyone caught by it.

Grip of Death: Nefarian ports to the centre of a Chemical Cloud and grips the entire raid into the cloud.
This can be a particularly dangerous ability, especially if it happens to be timed with Incineration Security Measure. The raid needs to move as quickly as possible back out of the cloud. It is also extremely important that adds are slowed and killed quickly. If any adds are still up and catch their target while the raid is gripped into the Chemical Cloud, you will likely wipe.

Heroic mode makes the normal mode spatial awareness and target swap requirements even more important as any losses can be extremely costly. You may wish to run more healers than you normally would to help deal with the significant raid damage.

Ultimately this Heroic mode comes down to knowing the different boss abilities and Nefarian's meddlings - raid members need to be able to react quickly and correctly to whichever Nefarian ability is active. The fight can quickly appear to become chaotic as people lose track of which constructs are active and which Nefarian ability is likely to be next. You can begin to figure out which Nefarian ability to expect based on his timer, though - as his cooldown finishes, you can plan to expect one of two abilities based on which constructs are active. For example, if Toxitron and Arcanotron are active, you can prepare for either being gripped into a Chemical Cloud or for a Power Generator pool to blow up.

Keeping the raid stacked together can be extremely useful for ensuring as many raid members as possible benefit from AoE healing and raid cooldowns like Power Word: Barrier, which you can see used frequently for the Incineration Security Measure in my Heroic video at the beginning of this guide. Similar cooldowns such as Aura Mastery and Divine Guardian can also be extremely helpful. There is a lot of damage both on raid members and on the tanks in this fight, and you may wish to run more healers than you would use on Normal mode. DPS does need to be strong, however, as there will be a 10 minute enrage timer on the Heroic mode of this fight (effective in Patch 4.0.6).

Good luck and have fun!

Sunday, 26 December 2010

Raid Encounter Guides - Chimaeron (Blackwing Descent)

I'm working on getting some new guides up (though the information on the Beta Raid Previews pages are still relevant) and thought I'd kick it off with Chimaeron in Blackwing Descent.

Video: One of our Chimaeron 25 man Heroic kills. Details on the Heroic mode are towards the end of this post after the normal mode description.

Chimaeron is one of the three bosses inside Blackwing Descent beyond the entry gate - after defeating the Omnitron Defense System and Magmaw, the portcullis will open and allow you to face Chimaeron, Maloriak, and Atramedes before facing the final boss, Nefarian.

Chimaeron is a mix of simplicity and difficulty - the concept and strategy to the fight is straightforward, but the actual execution can be quite challenging. While DPS have a fairly straightforward burn throughout this fight, tanking and healing have some unique challenges which I'll cover after the ability and strategy breakdown.

Let's start by taking a look at Chimaeron's abilities. (source)

Finkle's Mixture - Damage taken while above 10,000 health cannot reduce your health below 1.

Phase 1
(100%-20%)
Caustic Slime - Deals 280,000 Nature damage and reduces chance to hit for all enemies in an area. Damage is split between all enemies with 6 yards of impact.
Massacre - Inflicts maximum damage to all enemy players.
Double Attack - Chimaeron will strike twice on his next attack.
Feud - Chimaeron's heads are fighting each other and are unable to perform melee attacks.
Break - Increases Physical damage taken by 25% and reduces healing by 15% for 1 min on the target, stacks.

Phase 2
(20%-0%)
Mortality - Chimaeron goes into a rage, becoming immune to Taunts, increasing his damage taken by 20%, and reducing healing effects for all enemy players by 99%.
Double Attack - Chimaeron will strike twice on his next attack.

The key mechanic in this fight is Finkle's Mixture. This is a raid-wide debuff that is enabled when you activate the Bile-o-Tron by speaking to Finkle Einhorn, the gnome in the cage at the back of the room. Once you speak to Finkle, the Bile-o-Tron will switch on and begin moving around the room. Chimaeron will begin to wake up, however, you can speed things up by engaging him directly.

Phase 1
It is extremely important to spread out at least 6 yards apart for all of phase 1. This should ideally include melee, who can spread out around the boss' hitbox. This is to prevent Caustic Slime hitting more than one target at a time, as the splash damage can kill even if the initial hit doesn't. While the Bile-o-Tron is active, Finkle's Mixture will prevent everyone in the raid from dropping below 1 health if they are at or above 10,000 health. This allows the raid to survive the Caustic Slimes and Massacre.

The Bile-o-Tron will periodically be knocked offline during phase 1. When the Bile-o-Tron is knocked offline, the raid is no longer protected by Finkle's Mixture, so the raid needs to stack up and be healed fully. There will still be Caustic Slimes and without the Bile-o-Tron raiders can die from it, so they must be healed up. It is also extremely important the raid is tightly stacked - this will mitigate the damage from Caustic Slime on the raid.

As soon as the Bile-o-Tron is back online, the raid needs to immediately spread back out to again avoid splash damage from Caustic Slimes.

Phase 2
Phase 2 begins when Chimaeron hits 20% health. At this point, it is simply a DPS burn. Chimaeron becomes immune to taunts but takes additional damage. Healing is reduced by 99%, so basically no one will be getting healed during this part of the fight and people will die. He moves slowly, so he can be kited, but he needs to be burned before raid members begin dying. The Bile-o-Tron will still be active, so you'll have the Finkle's Mixture buff, but you won't be able to heal anyone back up above 10,000 health once they fall below it.

Tanking Chimaeron
You'll need two tanks for this fight on normal mode to deal with two of Chimaeron's abilities: Break and Double Attack. These two abilities affect Chimaeron's targets and specific tank taunts will effectively deal with this.

You can use the Finkle's Mixture to your advantage here. The Main Tank can tank Chimaeron and take the Break debuff. So long as the MT is kept above 10,000 health, if the Bile-o-Tron is online the MT will not die. The MT only needs to be kept above 10,000 health. Even with multiple stacks of the debuff, if he's above 10,000 health, he won't die while the Bile-o-Tron is active.

The key here is the Off-Tank. The OT will be taunting Chimaeron in order to take the Double Attack only. The OT must be kept topped off at full health. Because the Double Attack is two strikes, even if the first hit doesn't kill the OT, the second one can easily kill if the OT falls below 10,000 health.

In normal mode, Chimaeron will Feud while the Bile-o-Tron is offline and will not deal any melee attacks, so your tanks should be healed up along with the rest of the raid but won't require special attention until after Feud is over when the Bile-o-Tron is back online.

Chimaeron deals massive strikes to the tanks, so it is important both tanks and healers be ready for these hits and rotate cooldowns as needed. Good avoidance and mitigation for tanks is great on this fight - dodging one of Chimaeron's big hits is fairly obvious.

Healing Chimaeron
I've touched on one aspect of healing this fight above in the tanking section. This fight is fairly specific in terms of healing strategy and hinges on the use of Finkle's Mixture.

While Finkle's Mixture is active when the Bile-o-Tron is online, the raid will not drop below 1 health - as long as they are above 10,000 health. The entire raid needs to be kept at 10,000 health minimum and, ideally, maximum. Do NOT waste mana trying to heal everyone up to full in these phases - you will burn yourself OoM.

When players are below 10,000 health, they will gain a debuff called 'Low Health'. For those of you using addons such as Vuhdo and Grid, you can enter this debuff into your customizable debuffs and it will show up on players below 10,000 health. (You can see this debuff indicator on my Vuhdo frames in my video at the beginning of this post).

At lower gear levels, our cheap heals (Nourish for druids, Heal for priests, etc) will likely not heal targets up over 10,000 hp unless they crit (most will hit for around 8k), so you will likely have to try different heals to get targets healed quickly enough. You'll have about 5 seconds between the different abilities (Slimes and Massacre). You may want to try heals like Healing Touch, Rejuvs, etc.

It is extremely helpful to assign healers to groups to prioritise targets hit by Caustic Slime and Massacre and to avoid missing some raid members when you have overlaps on other targets. Having healers prioritise certain groups or targets first and assisting other targets/groups when they can is useful. Also be aware of healers who can heal themselves while healing others, such as Priest's Binding Heal. You may also find it helpful to run extra healers, especially for early attempts and kills, as adapting to the healing strategy will likely be the most challenging part of this fight for many raids.

When the Bile-o-Tron is knocked offline, the raid is no longer protected by Finkle's Mixture. It is imperative the entire raid stacks up tightly to mitigate the Caustic Slime damage. During this phase, the entire raid needs to be healed to full - AE heals like Efflorescence, Wild Growth, and other class abilities like Holy Word: Sanctuary, Healing Rain, etc are extremely useful in this phase. If you have several druids, you may find rotating Tranquility in each collapse is helpful. DPS classes can also throw out a quick AE heal if they have it to help (such as ele and enhance shamans throwing out a Healing Rain). Once you top the raid up fully the first time after Massacre hits, you can likely heal the raid up to about 85% and on downwards from there for the remaining hits to conserve a bit of mana, as there will be a only a few Caustic Slimes hitting the raid before the next Massacre and the Bile-o-Tron coming back online.

When the Bile-o-Tron is back online, the raid should spread back out and again be kept only at 10,000 health.

As mentioned in the Tanking section, the Main Tank tanking Chimaeron can be kept just above 10,000 health. The Off-tank taking the Double Attack hits must be kept at full health, though, in order to prevent him from dying to the Double Attack.

Once you hit Phase 2, all healing is reduced by 99%, so any heals are pretty futile at this stage. You'd likely be most useful by helping with the DPS burn. For Druids, using Tree Form as a DPS cooldown in Phase 2 can be helpful in the DPS burn.


And that is it for the fight! It's fairly simple in concept - spread out, collapse, repeat, and pewpew, really - but it will likely be a gear-check for many and will test tanks and healers as well as DPS, who need to burn him at a decent pace (especially if sacrificing some DPS for additional healers).

Heroic Chimaeron
There are two significant changes from normal mode to Heroic mode.

The first extremely important difference is Chimaeron no longer does Feud - Nefarian appears and interrupts it, allowing Chimaeron to attack.

This means Chimaeron will melee the tanks while the Bile-o-Tron is offline.

Your tank rotation for Break and Double Attack become of much greater importance on hard mode.

There are several ways to manage this change, all involving important tank rotations in addition to solid healing and damage mitigation cooldowns.

It is easiest, especially in 25 mans, to run three tanks for this fight on Heroic. One tank will continue to be the Double Attack tank only - he will only taunt Chimaeron to take the Double Attack strikes. This tank needs to be topped off at full health throughout the fight and should never get the Break debuff.

Your other two tanks will be your Break tanks. It is crucial to survival that the person tanking Chimaeron while the Bile-o-Tron is offline not have any stacks of Break when they taunt - they will die very quickly if they are taking melee hits from Chimaeron while the Bile-o-Tron is offline. A simple way to handle this, then, is to have one of your Break tanks begin the fight tanking Chimaeron. They will continue to do so up until the first Feud, which generally leads to about 4 stacks of Break. The second Break tank then taunts Chimaeron at the start of Feud. The second tank can continue to hold Chimaeron when the Bile-o-Tron comes back online until the next Feud, by which time the first tank's stack of Break will have cleared, allowing the first tank to taunt Chimaeron for the following Feud.

In summary, you have your Double Attack Tank (DA Tank), offtank 1, and offtank 2.
OT 1 begins the fight, DA Tank taunts for all Double Attack hits.
Feud - OT 2 taunts, DA Tank taunting as needed for Double Attack still.
2nd Feud - OT 1 taunts, DA Tank again taking Double Attack strikes.
3rd Feud - OT 2 taunts, DA Tank taking Double Attack.
and so forth. This sort of rotation should ensure your tanks are clear of the Break debuff when they are tanking Chimaeron while the Bile-o-Tron is offline.

The tanks will need to be topped off during Feud in addition to the normal raid healing, and the tanks must be quickly topped off after the Massacre before Feud in preparation for Chimaeron's first strike. A cooldown such as Guardian Spirit, Pain Suppression, or Hand of Sacrifice is also crucial when the OT taunts to help mitigate the incoming damage. You can see in the Heroic video at the top of this post (where I am tank-healing) how quickly we're working to get the tanks topped off for those phases.

Note: I have not tried the following strategy suggestion for 10 mans (as I'm currently doing primarily 25 man raids) - if any have used this strategy or a similar one, please do let me know and I can update this suggestion. :)
10 mans may feel a bit pressed to get 3 tanks into their raid, and it may be feasible to work out a tanking rotation that utilises a DPS class (Plate would likely be preferable) as their third tank. The DPS would only feasibly be able to tank while the Bile-o-Tron is online (as they will not have the mitigation or crit immunity to survive melee hits while it is offline). It may be possible, then, to have the DPS be the dedicated Break tank and always tank Chimaeron while the Bile-o-Tron is online. The Off Tank (an actual tank) would then always (and only) tank Chimaeron during Feud while the Bile-o-Tron is offline. The Double Attack tank remains the same and only taunts for Double Attack. This should theoretically provide time for the Off Tank to clear the Break stacks obtained during Feud stages. The Feud timer is slightly different and more random in Heroic mode, though, which may pose issues. Playing with rotations to find what works best for your raid is recommended!

There will still be Caustic Slime damage incoming to the raid during Feud while the Bile-o-Tron is offline, so raid cooldowns such as Power Word: Barrier and AoE heals like Efflorescence and Healing Rain are extremely helpful.

The other main difference in the Heroic mode is in Phase 2. Nefarian again appears to spice things up a bit.

Throughout Phase 2 (Chimaeron sub-20% health), Nefarian will cast Mocking Shadows which inflicts 1000 Shadow damage to all raid members every second.

This ability is, of course, combined with the normal Phase 2 debuff Mortality, which reduces all healing by 99%. It is essential the entire raid is topped off as you push into Phase 2. This gives crucial extra time to burn Chimaeron before too many raid members begin to die. Timing the push into Phase 2 is also important, and it is generally best to do so after healing the raid up to full immediately after a Massacre. After Massacre hits you will have about 5 seconds to top up the raid and push him into Phase 2 before Caustic Slime hits the raid and reduces raid member's health. Healthstones are best saved for this part just before Phase 2, and personal damage mitigation cooldowns (Anti-Magic Shell, Barkskin, etc) are best used in Phase 2 to reduce damage taken from Mocking Shadows. Disc Priests can be very helpful in Phase 2 as well as their Power Word: Shields will absorb much of the damage, helping mitigate raiders' damage taken rather than futilely attempting to heal through Mortality.

Good luck and have fun!

Friday, 19 November 2010

Beta Raid Testing - Chimaeron (Blackwing Descent)


Cataclysm is less than three weeks away! Time is really flying by. I've been quite busy this week so I've fallen behind a bit on getting some posts up. There's still a couple more bosses I've yet to cover in Blackwing Descent, though, so I thought I'd get a post up on one more of them. The deceptively simple but very hard-hitting Chimaeron.

Chimaeron

The Chimaeron encounter isn't too difficult conceptually, but the fight itself can be quite rough and will likely be a harsh gear-check for raids.

Essentially the fight is a tank-and-spank, with one key mechanic - the Bile-o-Tron. When you walk into the room, Chimaeron will be asleep in the centre. Behind him is a gnome in a cage, Finkle, who you must speak with before engaging Chimaeron. He activates the Bile-o-Tron which spews forth Finkle's Mixture - this mixture will buff all raiders so that anyone above 10,000 health cannot have their health reduced below 1. As long as the Bile-o-Tron is active (and this is key), if raid members are above 10,000 health, they won't die from Chimaeron's other two key abilities. Let's touch on his abilities now (source).

Caustic Slime: Deals 280,000 Nature damage and briefly reduces the chance to hit for all enemies in an area. Damage is split between all enemies within 6 yards of the impact crater.
Massacre: Inflicts maximum damage to all enemy players.
Feud: Chimaeron's heads are fighting amongst themselves, and so Chimaeron cannot perform melee attacks.
Double Attack: Chimaeron will strike twice on his next attack.
Break: Chimaeron breaks through his target's defenses, increasing physical damage taken by 25% for one minute. This ability stacks.

In phase 2 (which begins once Chimaeron reaches 20% health), Chimaeron keeps his Double Attack and also Mortality: Chimaeron goes into a rage, becoming immune to Taunt effects, increasing his damage taken by 20%, and reducing healing effects for all enemies by 99%.


Basically, you enter into the room, and do NOT attack Chimaeron. If anyone strikes him, he'll instantly engage (and if anyone but a tank strikes him, they'll probably be one-shot). You must talk with Finkle to get the Bile-o-Tron active. After that, you can either wait for Chimaeron to wake up (he will eventually once the machine's come online) or have your tanks start up the fight by engaging him. There is a stacking debuff placed on the tanks (Break), so you'll likely need two to taunt off each other. The tanks will be taking big hits (particularly the Double Attack, which will likely be helpful for the tanks to call it out when it's coming to help the healers). The tanks must warn before doing their tank swaps so the healers are ready.

The rest of the raid should be spread around the room. There are basically two parts to the fight in the first phase - when the Bile-o-Tron is Active and when it is Inactive. When the Bile-o-Tron is active, the raid will be buffed by Finkle's Mixture, and the raid need only be kept above 10,000 health each. Do not fall into the trap of trying to top everyone off - there's no need to do so and you'll only be wasting mana. Raiders should be prepared to use healthstones or health pots if needed. Caustic Slime and Massacre will not kill anyone above 10,000 health while the Bile-o-Tron is active.

The tricky moments will come when the Bile-o-Tron goes offline. The entire raid should collapse and stack up on melee (excluding the tanks) and healed up to full - all the new AE healing spells are wonderful here, throwing on Healing Rains, Efflorescences, Holy Word: Sanctuary, etc. On normal mode, Feud will temporarily stop Chimaeron's melee attacks on the tanks during this time, so healing on them should be easier to manage as you top up the raid. Stacking up will spread the Caustic Slime damage (which will still be cast during Feud) amongst the entire raid, so as long as everyone is stacked and getting those heals, no one should die during this phase. The moment the Bile-o-Tron comes back online, the raid should spread back out so new Caustic Slimes don't splash.

Phase 2, which begins when Chimaeron hits 20% health, turns into something of a burn phase. Chimaeron will take 20% more damage, however he is immune to taunt at this stage and your tanks may likely end up dying to him at some point during this stage (he hits hard). He does move fairly slowly, though, so if you've reached this stage and a tank goes down, it's not an instant-wipe - if necessary, kite him while continuing to DPS. The Mortality debuff also reduces all healing received by raid members by 99%. Watching his health percentage will be extremely helpful in order to try to maximise people's remaining health before he transitions into phase 2. While healing won't be useless in phase 2, it will be drastically reduced, and this may be a time for some healers to assist in DPSing along with healing.

Again, the fight is fairly simple in its overall strategy and execution. The big hits on the tanks and dealing effectively with the damage from Caustic Slime and Massacre will be the most challenging aspects to the fight (as well as, as ever, laying in decent DPS). It's crucial healers resist the urge to try to top up everyone in the raid while the Bile-o-Tron is on-line. It's unnecessary and will waste mana. As long as everyone remains above 10,000 health in those phases, they should be fine. (There have been some bugs on beta where players above 10,000 health have been killed, but, it is a bug).

Overall, most will likely find this a challenging fight. The general simplicity of it may be nice after many more complex fights involving target switches or de/buff watching. DPS should certainly be doing what they can to help keep themselves alive, though (or at least above the 10,000 health) and healers should be concerned with keeping the raid above that point but no more while the Bile-o-Tron is active. Topping the healing meters in this fight will mean nothing if you're out of mana within a minute.

Have fun!

Sunday, 31 October 2010

Beta Raid Testing - Atramedes and Nefarian (Blackwing Descent)

Apologies for the lack of updates this past week! It's been a pretty crazy week both work-wise and otherwise, so I've either not had the time or just been too tired to get a proper post up.

To get back into the swing of things I'll start with an update on some of the Beta Raid Testing I did over the past couple of weeks. Since there were so many encounters, I'm breaking them down, and thought I'd kick off the rest with two fun encounters in Blackwing Descent: Atramedes and Nefarian! I'm a bit of a sucker for dragon encounters, as the dragons are one of the things I love most in WoW, and these two encounters didn't disappoint.


Atramedes


This fight is really quite interesting conceptually. Atramedes is blind, so his abilities centre around trying to hear you - 'I have no need for eyes to see my enemies. Your clumsy footsteps... give you away!'

The key mechanic of this fight is your Sound Bar. This appears as a circle graphic on your screen which has a small blue dot in the centre of it. You want that blue dot to remain as small as possible - the more 'noise' you create, the larger the blue dot gets. If it fills up or exceeds the circle, Atramedes will hear you and kill you.

There are two ways to manage your sound bar (and sound bars are individual, not raid-wide). Avoiding damage from Atramedes' abilities is the primary way to keep your sound bar low - raid awareness is key in this fight. The other way to deal with the sound bars is by using the Shields arranged around the room. If you strike one of the shields, it resets everyone's sound bar and also causes Vertigo to Atramedes - he will be stunned and increase damage done to him by 50%. There are a limited number of Shields, though, and he will destroy a Shield after it's used, so you do not want to waste these. They are best saved to interrupt Searing Flame - and 8 second cast which cause Fire damage every second and increase fire damage taken by 25% per stack.

There are two phases which cycle throughout this fight, a ground phase and an air phase. Ability info thanks to wowwiki.


Ground Phase
Sonic Breath: Cast at the player with the highest sound. Causes damage per second and increases sound by 20 per second. The flames will follow the player faster the higher their sound is.
Searing Flame: Causes 15k fire damage per second and increases fire damage taken by 25% per stack, cast over 8 seconds. Interrupt this with the Shields.
Modulation: Atramedes begins to Modulate, increasing the Sound of all enemies and causing shadow damage. Damage increased by a player's sound bar.
Sonar Pulse: Discs of energy fly around the room, causing arcane damage and increasing sound by 7 if struck.

Air Phase
Roaring Flame Breath: Cast at the player with the highest sound. Deals 15k damage per second and adds 20 sound per second. The flame follows the player faster the higher their sound is and continues to speed up.
Sonar Bomb: Drops Sonar Bombs (visible in the first screenshot) which inflict arcane damage and adds thirty sound.
Sonic Fireball: Deals 30k fire damage to enemies within 6 yards of impact.
Roaring Flames: Scatters flame patches around the room. Cause 15k fire damage and an additional 8k fire damage every second for 4 seconds and increases sound.

The key to this fight is keeping your sound bar low by reducing your damage taken and using the Vertigo stuns at the right time. The achievement Silence is Golden says everything about this fight - keep that sound bar low! Master that and you'll get this fight down.

The fight itself was a lot of fun, I really enjoyed the mechanics and the concept behind the fight. Atramedes' model is quite cool as well as you can see in the screenshots. Healing this fight isn't bad, assuming raid awareness is up. Everyone should be focussing on reducing their damage taken, so if the fight is done right, healing won't be a struggle.


Nefarian


This was quite an interesting and involved fight. There are three phases total, and the beginning of the fight has you fighting a reanimated Onyxia as well as Nefarian.


Once you activate the fight, Nefarian will transform into his dragon form and take off into the air and the magma that filled the pit below him will drain away, revealing an undead Onyxia. To begin the fight, you leap down into the pit and engage Onyxia. A note for druids: Even from the lowest platform, everyone will take some fall damage from the jump - shifting into cat form (regardless of your role) for the jump will eliminate fall damage for you.

Phase 1:
Phase 1 begins when you jump down and engage Onyxia. Normal dragon rules apply on both dragons - they cleave, have a conal breath, and a tail lash which will cause damage and stun. Their conal breath is Shadowflame Breath: Inflicts shadowflame damage in a frontal cone, also resurrects Animated Bone Warriors caught in the breath. They also have an additional ability, Children of Deathwing: Nefarian and Onyxia attack 100% faster when within 60 yards of each other. Abilities sourced from wowwiki.

Onyxia:
Electric Discharge: Fires lightning from her sides, dealing Nature damage to those on her sides. Damage increased by her lightning charge. Range should stay at good range and melee should try to move behind her as much as they can without getting Tail Lashed.

Nefarian:
Hail of Bones: Nefarian will cast this six times before he lands, dealing shadow damage to nearby enemies and spawning Animated Bone Warriors. The zones are a deep purple and easy to avoid, an offtank should be prepared to pick up the Bone Warriors which spawn.

Animated Bone Warrior:
These adds have an energy bar which decreases over time but resets if they are hit by Shadowflame, and any dead ones will be resurrected by the Shadowflame. They should be kited by an offtank or CCd. Their damage is increased as they attack and the buff will stack infinitely, so it's best to try to kite these and ensure they stay out of Shadowflames so that they will die, otherwise they'll eventually kill the tank. They cannot be allowed to run amok as they will begin wailing on dps and healers in particular (through healing aggro) and will kill them.

You'll begin the fight by DPSing Onyxia. You'll notice a cast bar by her which is slowly filling up which is her electrical charge - she needs to be killed before this bar is filled. Nefarian will land after he finishes his circle casting Hail of Bones. We had the two dragons tanked on opposite ends of the pit facing out with their tails about meeting in the centre of the room. Ultimately we DPS'd Onyxia very low, then turned and dealt some damage to Nefarian to start wearing him down. When Onyxia's electrical charge bar was closing in on full, we quickly switched back to her and finished her off.

It's essential to prepare your raid for phase 2 by splitting the raid into three groups and assigning each group to one of the platforms/columns arranged around the pit. These groups need to have an equal split of tank, dps, and healers. An interrupt should be on each platform. The screenshot below will show you the platforms/columns, one is just to the right in that shot. This shot was an initial pull just to get a glimpse of what was goign on, so don't rely on that positioning!


Phase 2:
Phase 2 begins when Onyxia dies. The second she dies your entire raid should be moving to their assigned platforms/columns and be ready to get on them. When Onyxia dies, Nefarian will take to the air and the pit will begin filling up with Magma. The Magma will deal 5000 fire damage per second and increase your damage taken by an additional 2000 per stack. You will use the magma to swim up onto the columns, but it's essential you do so quickly!

Nefarian will be in the air casting Shadowflame Barrage and Shadow of Cowardice. Shadowflame Barrage will cause constant Shadowflame damage to the raid.

On top of each platform will be a Chromatic Prototype, an add which will stand on the platform and attempt to cast Blast Nova. You'll want to DPS these down and interrupt those casts.

It was unclear whether Phase 3 begins when those adds are dead or after a set amount of time. It appeared to be after a set period of time when we tried it. We had our melee DPS focussed full time on bringing the adds down and had our ranged DPS switching between attacking Nefarian and assisting on the adds. The adds need to be killed before Phase 3 begins.


Phase 3:
For phase 3, the magma will once again drain from the pit and Nefarian will land. You MUST jump off the platforms/columns - if you remain on them you will be killed very quickly by Nefarian (this appears to be when Shadow of Cowardice strikes).

Phase 3 is very similar to Phase 1 in that you have Nefarian's original dragon abilities (his breath, cleave, and tail lash) as well as the Animated Bone Warriors, who will again be resurrected if they are hit by any Shadowflames.

The key difference in Phase 3 is the pink fire on the ground which you can see in the screenshot above. This is started by a Shadowblaze Spark - this starts a Shadowblaze, which expands in a circular shape and appears to follow players and speed up if touched. The fire deals Shadowflame damage, so it will also resurrect the Bone Warriors.

Positioning is a little bit tricky in this fight, as you can find your space is quickly eaten up by the Shadowblaze. We began with holding him in the centre and kiting him to clear areas as needed. The Shadowblaze will despawn, but it will be quickly replaced by a new spark, so your raid has to be very aware of it.

There's a lot going on in this fight and it is a great encounter! There's definitely a mix of raid awareness as well good target switches and knowing when to dps what. The Animated Bone Warriors should NEVER be DPSd - you'll just be wasting time doing that.

Healing this fight is pretty interesting. Positioning of the two dragons in Phase 1 can be tricky - you may either want to assign tank healers who can position themselves closer to either tank or have the tanks position just close enough to both be in range. Your tank picking up the Bone Warriors also needs a good eye kept on him - if the adds are resurrected or have their energy restore long enough to build up some stacks, their tank may begin taking some big hits. The tank handling them needs to be very aware of them spawning - they seem to have a particular love for healers. Preparing for Phase 2 is also crucial so that no one takes any extra unnecessary ticks of Magma damage, as is interrupting the cast by the adds on the platforms. AE damage on the melee in particular in Phase 1 will be strong if they get hit by Onyxia's lightning charges.


Overall a fun fight and two great encounters in Blackwing Descent! There are still a few more as well, the Omnitron Defense System which I've covered already, plus Chimaeron and Maloriak, and there should be at least one other battle against Magmaw which I haven't tested yet.

More updates to come!