Showing posts with label Beta. Show all posts
Friday, 19 November 2010
Beta Raid Testing - Chimaeron (Blackwing Descent)
Cataclysm is less than three weeks away! Time is really flying by. I've been quite busy this week so I've fallen behind a bit on getting some posts up. There's still a couple more bosses I've yet to cover in Blackwing Descent, though, so I thought I'd get a post up on one more of them. The deceptively simple but very hard-hitting Chimaeron.
Chimaeron
The Chimaeron encounter isn't too difficult conceptually, but the fight itself can be quite rough and will likely be a harsh gear-check for raids.
Essentially the fight is a tank-and-spank, with one key mechanic - the Bile-o-Tron. When you walk into the room, Chimaeron will be asleep in the centre. Behind him is a gnome in a cage, Finkle, who you must speak with before engaging Chimaeron. He activates the Bile-o-Tron which spews forth Finkle's Mixture - this mixture will buff all raiders so that anyone above 10,000 health cannot have their health reduced below 1. As long as the Bile-o-Tron is active (and this is key), if raid members are above 10,000 health, they won't die from Chimaeron's other two key abilities. Let's touch on his abilities now (source).
Caustic Slime: Deals 280,000 Nature damage and briefly reduces the chance to hit for all enemies in an area. Damage is split between all enemies within 6 yards of the impact crater.
Massacre: Inflicts maximum damage to all enemy players.
Feud: Chimaeron's heads are fighting amongst themselves, and so Chimaeron cannot perform melee attacks.
Double Attack: Chimaeron will strike twice on his next attack.
Break: Chimaeron breaks through his target's defenses, increasing physical damage taken by 25% for one minute. This ability stacks.
In phase 2 (which begins once Chimaeron reaches 20% health), Chimaeron keeps his Double Attack and also Mortality: Chimaeron goes into a rage, becoming immune to Taunt effects, increasing his damage taken by 20%, and reducing healing effects for all enemies by 99%.
Basically, you enter into the room, and do NOT attack Chimaeron. If anyone strikes him, he'll instantly engage (and if anyone but a tank strikes him, they'll probably be one-shot). You must talk with Finkle to get the Bile-o-Tron active. After that, you can either wait for Chimaeron to wake up (he will eventually once the machine's come online) or have your tanks start up the fight by engaging him. There is a stacking debuff placed on the tanks (Break), so you'll likely need two to taunt off each other. The tanks will be taking big hits (particularly the Double Attack, which will likely be helpful for the tanks to call it out when it's coming to help the healers). The tanks must warn before doing their tank swaps so the healers are ready.
The rest of the raid should be spread around the room. There are basically two parts to the fight in the first phase - when the Bile-o-Tron is Active and when it is Inactive. When the Bile-o-Tron is active, the raid will be buffed by Finkle's Mixture, and the raid need only be kept above 10,000 health each. Do not fall into the trap of trying to top everyone off - there's no need to do so and you'll only be wasting mana. Raiders should be prepared to use healthstones or health pots if needed. Caustic Slime and Massacre will not kill anyone above 10,000 health while the Bile-o-Tron is active.
The tricky moments will come when the Bile-o-Tron goes offline. The entire raid should collapse and stack up on melee (excluding the tanks) and healed up to full - all the new AE healing spells are wonderful here, throwing on Healing Rains, Efflorescences, Holy Word: Sanctuary, etc. On normal mode, Feud will temporarily stop Chimaeron's melee attacks on the tanks during this time, so healing on them should be easier to manage as you top up the raid. Stacking up will spread the Caustic Slime damage (which will still be cast during Feud) amongst the entire raid, so as long as everyone is stacked and getting those heals, no one should die during this phase. The moment the Bile-o-Tron comes back online, the raid should spread back out so new Caustic Slimes don't splash.
Phase 2, which begins when Chimaeron hits 20% health, turns into something of a burn phase. Chimaeron will take 20% more damage, however he is immune to taunt at this stage and your tanks may likely end up dying to him at some point during this stage (he hits hard). He does move fairly slowly, though, so if you've reached this stage and a tank goes down, it's not an instant-wipe - if necessary, kite him while continuing to DPS. The Mortality debuff also reduces all healing received by raid members by 99%. Watching his health percentage will be extremely helpful in order to try to maximise people's remaining health before he transitions into phase 2. While healing won't be useless in phase 2, it will be drastically reduced, and this may be a time for some healers to assist in DPSing along with healing.
Again, the fight is fairly simple in its overall strategy and execution. The big hits on the tanks and dealing effectively with the damage from Caustic Slime and Massacre will be the most challenging aspects to the fight (as well as, as ever, laying in decent DPS). It's crucial healers resist the urge to try to top up everyone in the raid while the Bile-o-Tron is on-line. It's unnecessary and will waste mana. As long as everyone remains above 10,000 health in those phases, they should be fine. (There have been some bugs on beta where players above 10,000 health have been killed, but, it is a bug).
Overall, most will likely find this a challenging fight. The general simplicity of it may be nice after many more complex fights involving target switches or de/buff watching. DPS should certainly be doing what they can to help keep themselves alive, though (or at least above the 10,000 health) and healers should be concerned with keeping the raid above that point but no more while the Bile-o-Tron is active. Topping the healing meters in this fight will mean nothing if you're out of mana within a minute.
Have fun!
Wednesday, 3 November 2010
Beta Raid Testing - Throne of the Four Winds
Thought I'd change tack on this post and give a preview of the raid instance in Uldum, Throne of the Four Winds. I unfortunately don't have as many lovely screenshots of this instance as it was a bit harder to grab shots of some of the bosses (the first boss is actually three bosses spread around the instance), but I have got a few still!
This is definitely one of the most unique instances I've seen. The place itself is all the way up in the sky, rising out of the clouds, and the art and architecture inside are just amazing. The design is really stunning, and it's a really lovely shift from the dark gloom and the lava in the Bastion of Twilight and Blackwing Descent.
There are only two encounters in this instance. From my understanding, this instance is supposed to be roughly equivalent to encounters like Malygos in that it's a short instance with no trash to deal with.
Inside is really quite unique - there are a total of five platforms, one in the centre surrounded by four smaller ones. The first platform is where you zone in on, the three others surrounding the centre hold the bosses for the first boss, Conclave of Wind, and the largest, centre platform is where Al'Akir sits (the final boss). To get to each platform you walk (carefully) onto a ramp of air, which will launch you up and over to the next platform. These can be a bit tricky - especially during the first encounter (where you will need people transferring platforms) - you want to move slowly and directly onto them. Also, don't levitate or slow fall before going onto one, as it will launch you too far and you'll likely end up flying off to your death.
Conclave of Wind
The Conclave of Wind is made up of three bosses, the Djinn: Anshal, Rohash and Nezir. All three bosses have an energy bar which, when it reaches 90 energy, will allow them to cast their special ability and will reset their energy to zero. You cannot jump between platforms during a special ability, and there MUST be raid members at each boss at all times - if any boss is left completely alone, they will wipe the raid. All three bosses must be killed at roughly the same time or they will regenerate.
Ability information sourced from WoWpedia.org.
Anshal:
Soothing Winds: Summons an area of calm winds on a random friendly target creating a green circle which will heal allies for 20,000 per second. Enemies (raiders) in the area will be silenced/pacified while in the area.
Nurture: Summons a Ravenous Creeper every second for five seconds.
Toxic Spores: Caused by Ravenous Creepers, spores erupt every second for five second afflicting those within 8 yards iwth a deadly toxin which deals stacking Nature damage for five seconds.
Zephyr: Cast at full energy, this healls all allies within 15 yards for 25,000 health per second and afflicted targets gain 15% damage for 15 seconds. Stacks.
Nezir:
Wind Chill: Deals Frost damage to all enemies within 15 yards and increases all frost damage taken by 10% for 30 seconds. Stacks.
Permafrost: Channels a Frost blast at Nezir's current target dealing ~10,000 damage per second in a frontal cone for 3 seconds.
Ice Patch: Deals ~7000 frost damage per second to all enemies within 20 yards and slowing their movement speed. Stacks, lasts 3 seconds.
Sleet Storm: Cast at full energy, deals ~30,000 Frost damage per second to all enemies within 100 yards. Damage is split among all targets.
Rohash:
Slicing Gale: Cast instead of a melee attack - Winds slice through a random enemy target dealing ~12,000 nature damage and increasing Nature damage received by 5% for 30 seconds.
Wind Blast: Slowly spins around the platform, blasting the area in front of the caster for ~10,000 nature damage and will knock back anyone struck 200 yards.
Tornado: Summons 3 tornados which move randomly and deal damage to anyone within 10 yards of them and will knock back.
Hurricane: Cast at full energy, this creates a vortex of wind, catching nearby enemies and lifting them into the air. Causes Nature damage and drops enemies at the end of the cast, causing fall damage.
As you can see, each boss has their own unique abilities and specials. Strategy can be pretty variable it seems like, and we tried several different strategies. In general, for having them die at the same time, what seems to work is beginning with one boss and burning him down to roughly 10%, moving to the next boss and repeating, then moving to the final boss, burning him down completely, then moving back and finishing off the first two. If you can split your dps up enough (more likely in 25s probably) you may be able to try burning all three at the same time rather than moving. As of now, your best bet may be being open to experimentation and working with your group makeup and how you're able to handle abilities. On our 25s kill, we used the movement strategy, burning down first Rohash, then Nezir, then Anshar, then returning to the previous bosses to finish them off after Anshar went down.
There MUST be raid members at each boss at all times - you cannot move your entire raid from boss to boss. If any of the three bosses is left on their own, they will cast an ability which will wipe the raid. You will generally be fine with leaving a tank with 1-2 healers at each boss as the rest of the raid moves to the next boss. All the bosses need to die within a very short time of each other (roughly at the same time) or they will regenerate.
Some key things to note for each boss:
As Rohash doesn't have a melee attack, you don't necessarily need a tank for this boss, which is particularly useful for 10 mans (on 25s you can easily just have a tank for him, and have the tank remain with the boss along with a healer when the rest of the raid moves to the next boss.
Sleet Storm, cast by Nezir, can do a significant amount of damage, but it is split amongst the targets in range, so if your raid is mostly on Nezir when he casts his ability, damage will be mitigated.
There are several stacking abilities which may require tank swaps throughout the fight, so it's important your tanks (and healers who have remained at each boss with them) communicate. In particular are Wind Chill and Slicing Gale, and potentially Toxic Spores.
The bosses won't aggro if you just step onto their platform, so what seems to be the best pre-pull strategy is for the raid to buff up on the first platform, then for everyone to move to their designated platform and prepare to pull together. Also keep in mind raid-wide buffs vs range buffs - for instance, any warlocks should turn off their imp's Pact and instead have your priests buff Fortitude to ensure no one loses range on Pact.
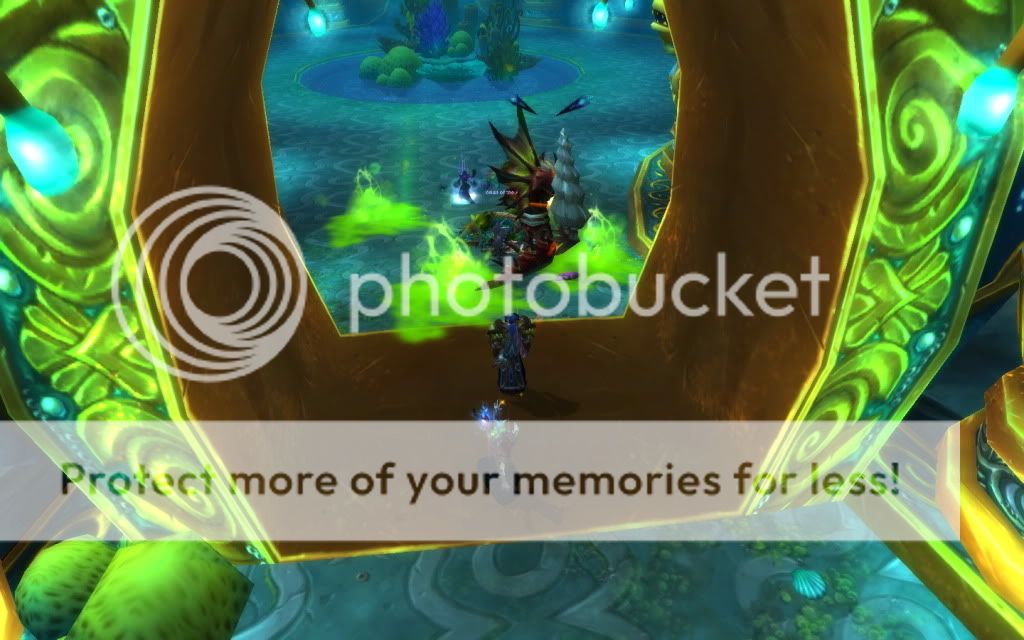
Unfortunately I don't have a good screenshot as yet of the three Djinn. But after you kill them, Al'Akir (above) will appear. In that screenshot I've clicked on the wind current on the first platform which will launch you up and onto his platform.
Al'Akir
This is a pretty interesting boss. There are three phases to the fight. Abilities sourced from WoWpedia.org.
Phase 1:
The first phase is from 100% down to 80% HP. We found the best positioning was to have basically two groups for this phase, the tank up front and the melee and ranged stacked up at the back, and possibly a couple of healers inched in towards the tank to keep him in range.
He has a few abilities in phase 1 to be aware of. One is Ice Storm, which creates a blizzard that moves around the platform and leaves a path of frost, which deals frost damage and slows movement speed. Not killer, but best to stay out of. Another is Static Shock, which deals damage to nearby enemies and interrupts spells cast, lasts for 5 seconds. This may be avoidable at range, but staying in melee will be helpful for his other main ability, Wind Burst. Wind Burst deals ~30,000 Nature damage to all enemies and knocks them back. It is best to run into melee range for this cast to prevent getting knocked off the platform. While getting knocked off won't kill you, it takes a few moments for you to get caught in the winds and swirled back up onto the platform, so it will waste a fair bit of time. You can resist the knockback, but don't count on it.
In Phase 1 and in Phase 2, Al'Akir also has an ability called Electrocute, which channels a bolt of electricity to Al'Akir's target (the tank) and does increasing damage over time. Al'Akir is only able to use this ability when he is unable to melee the target, so it will likely be up whenever the tank is either knocked away or has to move out of melee range. The tank and healers should be ready for this when the tank needs to move.
Phase 2:
Phase 2 keeps only two of the abilities of Phase 1, Static Shock and Electrocute. Several new abilities are introduced. One is Acid Rain, a stacking Nature damage which will continue to stack until you hit Phase 3. This is essentially a soft enrage - if you take too long to get to phase 3 (30%), this will eventually kill you. Al'Akir also summons adds in this phase called Stormlings - when these are killed, they can apply Feedback to Al'Akir, a debuff which will increase the damage he receives by 10% per stack, lasting 20 seconds. You want to try to kill these Stormlings to stack up that debuff as much as you can.
The biggest ability he will do is a Squall Line - this creates a wall of tornados which circle Al'Akir around the platform. Each wall will have a gap the width of one tornado, which players must move to to avoid getting hit by the tornados. Getting hit by one will trap you in the tornado, dealing damage and eventually flinging you off the edge. You can survive this if you are healed through it, but ideally you do not want anyone getting hit, as you will lose DPS time, heals and mana. You can see where each set is going to spawn, as they will start forming as gold-white wind swirls and solidify into the gray tornados.
Phase 3:
I imagine this will be another phase people will love or hate - at 30%, Al'Akir will shatter the platform and engage phase 3, tossing everyone up into the air. Everyone is in flight with their movement speed increased by 300%. The best strategy this phase seems to be coordinating everyone's movement, as his abilities this phase will be cast at random raid members and can quickly eat up usable space. We began by flying everyone to the very highest we could go. Al'Akir will summon Lightning Clouds, which will create a thick dark gray layer of clouds at the targeted player's level. After 5 seconds, these clouds will erupt in lightning, dealing ~50,000 damage to anyone caught in it. The best way to avoid this is, by having the raid all at the same level, the instant a Lightning Cloud forms, the entire raid can shift down slightly to the next level, and continue moving down and up to avoid the new layers as they spawn.
The raid wants to be spread out on each level due to Chain Lightning, which is cast constantly during the phase, and damage increases with each jump. Al'Akir will also cast Lightning Rod, which causes a random target to emit lightning, damaging themself and nearby allies. Anyone with Lightning Rod will want to move away from the raid, preferably back (rather than down) to avoid summoning Lightning Clouds on clear levels.
Al'Akir will also resume casting Wind Burst, so you will have knockbacks as well. The most annoying ability, which seems to be quite random, is Relentless Storm - random raid members will find themselves caught inside the Relentless Storm. While in the Relentless Storm, you are spun around in a windstorm around Al'Akir, and you are unable to control your character.
The entire fight is pretty intensive all around. Phase 2 and Phase 3 are very heal-intensive (especially if DPS can't push him into Phase 3 quickly enough, as Acid Rain will stack too high). Phase 3 needs to have very careful movement to ensure the raid doesn't run out of room to avoid Lightning Clouds.
Raid awareness is really key in this fight, particularly for avoiding the tornado walls. While they won't necessarily kill raid members (assuming those caught are given heals), it will waste valuable time and healer mana dealing with them. You also want to handle the Stormling adds well in order to build up the debuff on Al'Akir to help push Phase 3. You don't necessarily need a tank for those - we had them aggro on to the melee and had our DKs deathgrip them into melee to help burn them down, which seemed to work fine. It's best to avoid them latching on to healers or ranged, though.
All in all it's a pretty interesting instance with some unique encounters! Have fun!
This is definitely one of the most unique instances I've seen. The place itself is all the way up in the sky, rising out of the clouds, and the art and architecture inside are just amazing. The design is really stunning, and it's a really lovely shift from the dark gloom and the lava in the Bastion of Twilight and Blackwing Descent.
There are only two encounters in this instance. From my understanding, this instance is supposed to be roughly equivalent to encounters like Malygos in that it's a short instance with no trash to deal with.
Inside is really quite unique - there are a total of five platforms, one in the centre surrounded by four smaller ones. The first platform is where you zone in on, the three others surrounding the centre hold the bosses for the first boss, Conclave of Wind, and the largest, centre platform is where Al'Akir sits (the final boss). To get to each platform you walk (carefully) onto a ramp of air, which will launch you up and over to the next platform. These can be a bit tricky - especially during the first encounter (where you will need people transferring platforms) - you want to move slowly and directly onto them. Also, don't levitate or slow fall before going onto one, as it will launch you too far and you'll likely end up flying off to your death.
Conclave of Wind
The Conclave of Wind is made up of three bosses, the Djinn: Anshal, Rohash and Nezir. All three bosses have an energy bar which, when it reaches 90 energy, will allow them to cast their special ability and will reset their energy to zero. You cannot jump between platforms during a special ability, and there MUST be raid members at each boss at all times - if any boss is left completely alone, they will wipe the raid. All three bosses must be killed at roughly the same time or they will regenerate.
Ability information sourced from WoWpedia.org.
Anshal:
Soothing Winds: Summons an area of calm winds on a random friendly target creating a green circle which will heal allies for 20,000 per second. Enemies (raiders) in the area will be silenced/pacified while in the area.
Nurture: Summons a Ravenous Creeper every second for five seconds.
Toxic Spores: Caused by Ravenous Creepers, spores erupt every second for five second afflicting those within 8 yards iwth a deadly toxin which deals stacking Nature damage for five seconds.
Zephyr: Cast at full energy, this healls all allies within 15 yards for 25,000 health per second and afflicted targets gain 15% damage for 15 seconds. Stacks.
Nezir:
Wind Chill: Deals Frost damage to all enemies within 15 yards and increases all frost damage taken by 10% for 30 seconds. Stacks.
Permafrost: Channels a Frost blast at Nezir's current target dealing ~10,000 damage per second in a frontal cone for 3 seconds.
Ice Patch: Deals ~7000 frost damage per second to all enemies within 20 yards and slowing their movement speed. Stacks, lasts 3 seconds.
Sleet Storm: Cast at full energy, deals ~30,000 Frost damage per second to all enemies within 100 yards. Damage is split among all targets.
Rohash:
Slicing Gale: Cast instead of a melee attack - Winds slice through a random enemy target dealing ~12,000 nature damage and increasing Nature damage received by 5% for 30 seconds.
Wind Blast: Slowly spins around the platform, blasting the area in front of the caster for ~10,000 nature damage and will knock back anyone struck 200 yards.
Tornado: Summons 3 tornados which move randomly and deal damage to anyone within 10 yards of them and will knock back.
Hurricane: Cast at full energy, this creates a vortex of wind, catching nearby enemies and lifting them into the air. Causes Nature damage and drops enemies at the end of the cast, causing fall damage.
As you can see, each boss has their own unique abilities and specials. Strategy can be pretty variable it seems like, and we tried several different strategies. In general, for having them die at the same time, what seems to work is beginning with one boss and burning him down to roughly 10%, moving to the next boss and repeating, then moving to the final boss, burning him down completely, then moving back and finishing off the first two. If you can split your dps up enough (more likely in 25s probably) you may be able to try burning all three at the same time rather than moving. As of now, your best bet may be being open to experimentation and working with your group makeup and how you're able to handle abilities. On our 25s kill, we used the movement strategy, burning down first Rohash, then Nezir, then Anshar, then returning to the previous bosses to finish them off after Anshar went down.
There MUST be raid members at each boss at all times - you cannot move your entire raid from boss to boss. If any of the three bosses is left on their own, they will cast an ability which will wipe the raid. You will generally be fine with leaving a tank with 1-2 healers at each boss as the rest of the raid moves to the next boss. All the bosses need to die within a very short time of each other (roughly at the same time) or they will regenerate.
Some key things to note for each boss:
As Rohash doesn't have a melee attack, you don't necessarily need a tank for this boss, which is particularly useful for 10 mans (on 25s you can easily just have a tank for him, and have the tank remain with the boss along with a healer when the rest of the raid moves to the next boss.
Sleet Storm, cast by Nezir, can do a significant amount of damage, but it is split amongst the targets in range, so if your raid is mostly on Nezir when he casts his ability, damage will be mitigated.
There are several stacking abilities which may require tank swaps throughout the fight, so it's important your tanks (and healers who have remained at each boss with them) communicate. In particular are Wind Chill and Slicing Gale, and potentially Toxic Spores.
The bosses won't aggro if you just step onto their platform, so what seems to be the best pre-pull strategy is for the raid to buff up on the first platform, then for everyone to move to their designated platform and prepare to pull together. Also keep in mind raid-wide buffs vs range buffs - for instance, any warlocks should turn off their imp's Pact and instead have your priests buff Fortitude to ensure no one loses range on Pact.
Unfortunately I don't have a good screenshot as yet of the three Djinn. But after you kill them, Al'Akir (above) will appear. In that screenshot I've clicked on the wind current on the first platform which will launch you up and onto his platform.
Al'Akir
This is a pretty interesting boss. There are three phases to the fight. Abilities sourced from WoWpedia.org.
Phase 1:
The first phase is from 100% down to 80% HP. We found the best positioning was to have basically two groups for this phase, the tank up front and the melee and ranged stacked up at the back, and possibly a couple of healers inched in towards the tank to keep him in range.
He has a few abilities in phase 1 to be aware of. One is Ice Storm, which creates a blizzard that moves around the platform and leaves a path of frost, which deals frost damage and slows movement speed. Not killer, but best to stay out of. Another is Static Shock, which deals damage to nearby enemies and interrupts spells cast, lasts for 5 seconds. This may be avoidable at range, but staying in melee will be helpful for his other main ability, Wind Burst. Wind Burst deals ~30,000 Nature damage to all enemies and knocks them back. It is best to run into melee range for this cast to prevent getting knocked off the platform. While getting knocked off won't kill you, it takes a few moments for you to get caught in the winds and swirled back up onto the platform, so it will waste a fair bit of time. You can resist the knockback, but don't count on it.
In Phase 1 and in Phase 2, Al'Akir also has an ability called Electrocute, which channels a bolt of electricity to Al'Akir's target (the tank) and does increasing damage over time. Al'Akir is only able to use this ability when he is unable to melee the target, so it will likely be up whenever the tank is either knocked away or has to move out of melee range. The tank and healers should be ready for this when the tank needs to move.
Phase 2:
Phase 2 keeps only two of the abilities of Phase 1, Static Shock and Electrocute. Several new abilities are introduced. One is Acid Rain, a stacking Nature damage which will continue to stack until you hit Phase 3. This is essentially a soft enrage - if you take too long to get to phase 3 (30%), this will eventually kill you. Al'Akir also summons adds in this phase called Stormlings - when these are killed, they can apply Feedback to Al'Akir, a debuff which will increase the damage he receives by 10% per stack, lasting 20 seconds. You want to try to kill these Stormlings to stack up that debuff as much as you can.
The biggest ability he will do is a Squall Line - this creates a wall of tornados which circle Al'Akir around the platform. Each wall will have a gap the width of one tornado, which players must move to to avoid getting hit by the tornados. Getting hit by one will trap you in the tornado, dealing damage and eventually flinging you off the edge. You can survive this if you are healed through it, but ideally you do not want anyone getting hit, as you will lose DPS time, heals and mana. You can see where each set is going to spawn, as they will start forming as gold-white wind swirls and solidify into the gray tornados.
Phase 3:
I imagine this will be another phase people will love or hate - at 30%, Al'Akir will shatter the platform and engage phase 3, tossing everyone up into the air. Everyone is in flight with their movement speed increased by 300%. The best strategy this phase seems to be coordinating everyone's movement, as his abilities this phase will be cast at random raid members and can quickly eat up usable space. We began by flying everyone to the very highest we could go. Al'Akir will summon Lightning Clouds, which will create a thick dark gray layer of clouds at the targeted player's level. After 5 seconds, these clouds will erupt in lightning, dealing ~50,000 damage to anyone caught in it. The best way to avoid this is, by having the raid all at the same level, the instant a Lightning Cloud forms, the entire raid can shift down slightly to the next level, and continue moving down and up to avoid the new layers as they spawn.
The raid wants to be spread out on each level due to Chain Lightning, which is cast constantly during the phase, and damage increases with each jump. Al'Akir will also cast Lightning Rod, which causes a random target to emit lightning, damaging themself and nearby allies. Anyone with Lightning Rod will want to move away from the raid, preferably back (rather than down) to avoid summoning Lightning Clouds on clear levels.
Al'Akir will also resume casting Wind Burst, so you will have knockbacks as well. The most annoying ability, which seems to be quite random, is Relentless Storm - random raid members will find themselves caught inside the Relentless Storm. While in the Relentless Storm, you are spun around in a windstorm around Al'Akir, and you are unable to control your character.
The entire fight is pretty intensive all around. Phase 2 and Phase 3 are very heal-intensive (especially if DPS can't push him into Phase 3 quickly enough, as Acid Rain will stack too high). Phase 3 needs to have very careful movement to ensure the raid doesn't run out of room to avoid Lightning Clouds.
Raid awareness is really key in this fight, particularly for avoiding the tornado walls. While they won't necessarily kill raid members (assuming those caught are given heals), it will waste valuable time and healer mana dealing with them. You also want to handle the Stormling adds well in order to build up the debuff on Al'Akir to help push Phase 3. You don't necessarily need a tank for those - we had them aggro on to the melee and had our DKs deathgrip them into melee to help burn them down, which seemed to work fine. It's best to avoid them latching on to healers or ranged, though.
All in all it's a pretty interesting instance with some unique encounters! Have fun!

Sunday, 31 October 2010
Beta Raid Testing - Atramedes and Nefarian (Blackwing Descent)
Apologies for the lack of updates this past week! It's been a pretty crazy week both work-wise and otherwise, so I've either not had the time or just been too tired to get a proper post up.
To get back into the swing of things I'll start with an update on some of the Beta Raid Testing I did over the past couple of weeks. Since there were so many encounters, I'm breaking them down, and thought I'd kick off the rest with two fun encounters in Blackwing Descent: Atramedes and Nefarian! I'm a bit of a sucker for dragon encounters, as the dragons are one of the things I love most in WoW, and these two encounters didn't disappoint.
Atramedes
This fight is really quite interesting conceptually. Atramedes is blind, so his abilities centre around trying to hear you - 'I have no need for eyes to see my enemies. Your clumsy footsteps... give you away!'
The key mechanic of this fight is your Sound Bar. This appears as a circle graphic on your screen which has a small blue dot in the centre of it. You want that blue dot to remain as small as possible - the more 'noise' you create, the larger the blue dot gets. If it fills up or exceeds the circle, Atramedes will hear you and kill you.
There are two ways to manage your sound bar (and sound bars are individual, not raid-wide). Avoiding damage from Atramedes' abilities is the primary way to keep your sound bar low - raid awareness is key in this fight. The other way to deal with the sound bars is by using the Shields arranged around the room. If you strike one of the shields, it resets everyone's sound bar and also causes Vertigo to Atramedes - he will be stunned and increase damage done to him by 50%. There are a limited number of Shields, though, and he will destroy a Shield after it's used, so you do not want to waste these. They are best saved to interrupt Searing Flame - and 8 second cast which cause Fire damage every second and increase fire damage taken by 25% per stack.
There are two phases which cycle throughout this fight, a ground phase and an air phase. Ability info thanks to wowwiki.
Ground Phase
Sonic Breath: Cast at the player with the highest sound. Causes damage per second and increases sound by 20 per second. The flames will follow the player faster the higher their sound is.
Searing Flame: Causes 15k fire damage per second and increases fire damage taken by 25% per stack, cast over 8 seconds. Interrupt this with the Shields.
Modulation: Atramedes begins to Modulate, increasing the Sound of all enemies and causing shadow damage. Damage increased by a player's sound bar.
Sonar Pulse: Discs of energy fly around the room, causing arcane damage and increasing sound by 7 if struck.
Air Phase
Roaring Flame Breath: Cast at the player with the highest sound. Deals 15k damage per second and adds 20 sound per second. The flame follows the player faster the higher their sound is and continues to speed up.
Sonar Bomb: Drops Sonar Bombs (visible in the first screenshot) which inflict arcane damage and adds thirty sound.
Sonic Fireball: Deals 30k fire damage to enemies within 6 yards of impact.
Roaring Flames: Scatters flame patches around the room. Cause 15k fire damage and an additional 8k fire damage every second for 4 seconds and increases sound.
The key to this fight is keeping your sound bar low by reducing your damage taken and using the Vertigo stuns at the right time. The achievement Silence is Golden says everything about this fight - keep that sound bar low! Master that and you'll get this fight down.
The fight itself was a lot of fun, I really enjoyed the mechanics and the concept behind the fight. Atramedes' model is quite cool as well as you can see in the screenshots. Healing this fight isn't bad, assuming raid awareness is up. Everyone should be focussing on reducing their damage taken, so if the fight is done right, healing won't be a struggle.
Nefarian
This was quite an interesting and involved fight. There are three phases total, and the beginning of the fight has you fighting a reanimated Onyxia as well as Nefarian.
Once you activate the fight, Nefarian will transform into his dragon form and take off into the air and the magma that filled the pit below him will drain away, revealing an undead Onyxia. To begin the fight, you leap down into the pit and engage Onyxia. A note for druids: Even from the lowest platform, everyone will take some fall damage from the jump - shifting into cat form (regardless of your role) for the jump will eliminate fall damage for you.
Phase 1:
Phase 1 begins when you jump down and engage Onyxia. Normal dragon rules apply on both dragons - they cleave, have a conal breath, and a tail lash which will cause damage and stun. Their conal breath is Shadowflame Breath: Inflicts shadowflame damage in a frontal cone, also resurrects Animated Bone Warriors caught in the breath. They also have an additional ability, Children of Deathwing: Nefarian and Onyxia attack 100% faster when within 60 yards of each other. Abilities sourced from wowwiki.
Onyxia:
Electric Discharge: Fires lightning from her sides, dealing Nature damage to those on her sides. Damage increased by her lightning charge. Range should stay at good range and melee should try to move behind her as much as they can without getting Tail Lashed.
Nefarian:
Hail of Bones: Nefarian will cast this six times before he lands, dealing shadow damage to nearby enemies and spawning Animated Bone Warriors. The zones are a deep purple and easy to avoid, an offtank should be prepared to pick up the Bone Warriors which spawn.
Animated Bone Warrior:
These adds have an energy bar which decreases over time but resets if they are hit by Shadowflame, and any dead ones will be resurrected by the Shadowflame. They should be kited by an offtank or CCd. Their damage is increased as they attack and the buff will stack infinitely, so it's best to try to kite these and ensure they stay out of Shadowflames so that they will die, otherwise they'll eventually kill the tank. They cannot be allowed to run amok as they will begin wailing on dps and healers in particular (through healing aggro) and will kill them.
You'll begin the fight by DPSing Onyxia. You'll notice a cast bar by her which is slowly filling up which is her electrical charge - she needs to be killed before this bar is filled. Nefarian will land after he finishes his circle casting Hail of Bones. We had the two dragons tanked on opposite ends of the pit facing out with their tails about meeting in the centre of the room. Ultimately we DPS'd Onyxia very low, then turned and dealt some damage to Nefarian to start wearing him down. When Onyxia's electrical charge bar was closing in on full, we quickly switched back to her and finished her off.
It's essential to prepare your raid for phase 2 by splitting the raid into three groups and assigning each group to one of the platforms/columns arranged around the pit. These groups need to have an equal split of tank, dps, and healers. An interrupt should be on each platform. The screenshot below will show you the platforms/columns, one is just to the right in that shot. This shot was an initial pull just to get a glimpse of what was goign on, so don't rely on that positioning!
Phase 2:
Phase 2 begins when Onyxia dies. The second she dies your entire raid should be moving to their assigned platforms/columns and be ready to get on them. When Onyxia dies, Nefarian will take to the air and the pit will begin filling up with Magma. The Magma will deal 5000 fire damage per second and increase your damage taken by an additional 2000 per stack. You will use the magma to swim up onto the columns, but it's essential you do so quickly!
Nefarian will be in the air casting Shadowflame Barrage and Shadow of Cowardice. Shadowflame Barrage will cause constant Shadowflame damage to the raid.
On top of each platform will be a Chromatic Prototype, an add which will stand on the platform and attempt to cast Blast Nova. You'll want to DPS these down and interrupt those casts.
It was unclear whether Phase 3 begins when those adds are dead or after a set amount of time. It appeared to be after a set period of time when we tried it. We had our melee DPS focussed full time on bringing the adds down and had our ranged DPS switching between attacking Nefarian and assisting on the adds. The adds need to be killed before Phase 3 begins.
Phase 3:
For phase 3, the magma will once again drain from the pit and Nefarian will land. You MUST jump off the platforms/columns - if you remain on them you will be killed very quickly by Nefarian (this appears to be when Shadow of Cowardice strikes).
Phase 3 is very similar to Phase 1 in that you have Nefarian's original dragon abilities (his breath, cleave, and tail lash) as well as the Animated Bone Warriors, who will again be resurrected if they are hit by any Shadowflames.
The key difference in Phase 3 is the pink fire on the ground which you can see in the screenshot above. This is started by a Shadowblaze Spark - this starts a Shadowblaze, which expands in a circular shape and appears to follow players and speed up if touched. The fire deals Shadowflame damage, so it will also resurrect the Bone Warriors.
Positioning is a little bit tricky in this fight, as you can find your space is quickly eaten up by the Shadowblaze. We began with holding him in the centre and kiting him to clear areas as needed. The Shadowblaze will despawn, but it will be quickly replaced by a new spark, so your raid has to be very aware of it.
There's a lot going on in this fight and it is a great encounter! There's definitely a mix of raid awareness as well good target switches and knowing when to dps what. The Animated Bone Warriors should NEVER be DPSd - you'll just be wasting time doing that.
Healing this fight is pretty interesting. Positioning of the two dragons in Phase 1 can be tricky - you may either want to assign tank healers who can position themselves closer to either tank or have the tanks position just close enough to both be in range. Your tank picking up the Bone Warriors also needs a good eye kept on him - if the adds are resurrected or have their energy restore long enough to build up some stacks, their tank may begin taking some big hits. The tank handling them needs to be very aware of them spawning - they seem to have a particular love for healers. Preparing for Phase 2 is also crucial so that no one takes any extra unnecessary ticks of Magma damage, as is interrupting the cast by the adds on the platforms. AE damage on the melee in particular in Phase 1 will be strong if they get hit by Onyxia's lightning charges.
Overall a fun fight and two great encounters in Blackwing Descent! There are still a few more as well, the Omnitron Defense System which I've covered already, plus Chimaeron and Maloriak, and there should be at least one other battle against Magmaw which I haven't tested yet.
More updates to come!
To get back into the swing of things I'll start with an update on some of the Beta Raid Testing I did over the past couple of weeks. Since there were so many encounters, I'm breaking them down, and thought I'd kick off the rest with two fun encounters in Blackwing Descent: Atramedes and Nefarian! I'm a bit of a sucker for dragon encounters, as the dragons are one of the things I love most in WoW, and these two encounters didn't disappoint.
Atramedes
This fight is really quite interesting conceptually. Atramedes is blind, so his abilities centre around trying to hear you - 'I have no need for eyes to see my enemies. Your clumsy footsteps... give you away!'
The key mechanic of this fight is your Sound Bar. This appears as a circle graphic on your screen which has a small blue dot in the centre of it. You want that blue dot to remain as small as possible - the more 'noise' you create, the larger the blue dot gets. If it fills up or exceeds the circle, Atramedes will hear you and kill you.
There are two ways to manage your sound bar (and sound bars are individual, not raid-wide). Avoiding damage from Atramedes' abilities is the primary way to keep your sound bar low - raid awareness is key in this fight. The other way to deal with the sound bars is by using the Shields arranged around the room. If you strike one of the shields, it resets everyone's sound bar and also causes Vertigo to Atramedes - he will be stunned and increase damage done to him by 50%. There are a limited number of Shields, though, and he will destroy a Shield after it's used, so you do not want to waste these. They are best saved to interrupt Searing Flame - and 8 second cast which cause Fire damage every second and increase fire damage taken by 25% per stack.
There are two phases which cycle throughout this fight, a ground phase and an air phase. Ability info thanks to wowwiki.
Ground Phase
Sonic Breath: Cast at the player with the highest sound. Causes damage per second and increases sound by 20 per second. The flames will follow the player faster the higher their sound is.
Searing Flame: Causes 15k fire damage per second and increases fire damage taken by 25% per stack, cast over 8 seconds. Interrupt this with the Shields.
Modulation: Atramedes begins to Modulate, increasing the Sound of all enemies and causing shadow damage. Damage increased by a player's sound bar.
Sonar Pulse: Discs of energy fly around the room, causing arcane damage and increasing sound by 7 if struck.
Air Phase
Roaring Flame Breath: Cast at the player with the highest sound. Deals 15k damage per second and adds 20 sound per second. The flame follows the player faster the higher their sound is and continues to speed up.
Sonar Bomb: Drops Sonar Bombs (visible in the first screenshot) which inflict arcane damage and adds thirty sound.
Sonic Fireball: Deals 30k fire damage to enemies within 6 yards of impact.
Roaring Flames: Scatters flame patches around the room. Cause 15k fire damage and an additional 8k fire damage every second for 4 seconds and increases sound.
The key to this fight is keeping your sound bar low by reducing your damage taken and using the Vertigo stuns at the right time. The achievement Silence is Golden says everything about this fight - keep that sound bar low! Master that and you'll get this fight down.
The fight itself was a lot of fun, I really enjoyed the mechanics and the concept behind the fight. Atramedes' model is quite cool as well as you can see in the screenshots. Healing this fight isn't bad, assuming raid awareness is up. Everyone should be focussing on reducing their damage taken, so if the fight is done right, healing won't be a struggle.
Nefarian
This was quite an interesting and involved fight. There are three phases total, and the beginning of the fight has you fighting a reanimated Onyxia as well as Nefarian.
Once you activate the fight, Nefarian will transform into his dragon form and take off into the air and the magma that filled the pit below him will drain away, revealing an undead Onyxia. To begin the fight, you leap down into the pit and engage Onyxia. A note for druids: Even from the lowest platform, everyone will take some fall damage from the jump - shifting into cat form (regardless of your role) for the jump will eliminate fall damage for you.
Phase 1:
Phase 1 begins when you jump down and engage Onyxia. Normal dragon rules apply on both dragons - they cleave, have a conal breath, and a tail lash which will cause damage and stun. Their conal breath is Shadowflame Breath: Inflicts shadowflame damage in a frontal cone, also resurrects Animated Bone Warriors caught in the breath. They also have an additional ability, Children of Deathwing: Nefarian and Onyxia attack 100% faster when within 60 yards of each other. Abilities sourced from wowwiki.
Onyxia:
Electric Discharge: Fires lightning from her sides, dealing Nature damage to those on her sides. Damage increased by her lightning charge. Range should stay at good range and melee should try to move behind her as much as they can without getting Tail Lashed.
Nefarian:
Hail of Bones: Nefarian will cast this six times before he lands, dealing shadow damage to nearby enemies and spawning Animated Bone Warriors. The zones are a deep purple and easy to avoid, an offtank should be prepared to pick up the Bone Warriors which spawn.
Animated Bone Warrior:
These adds have an energy bar which decreases over time but resets if they are hit by Shadowflame, and any dead ones will be resurrected by the Shadowflame. They should be kited by an offtank or CCd. Their damage is increased as they attack and the buff will stack infinitely, so it's best to try to kite these and ensure they stay out of Shadowflames so that they will die, otherwise they'll eventually kill the tank. They cannot be allowed to run amok as they will begin wailing on dps and healers in particular (through healing aggro) and will kill them.
You'll begin the fight by DPSing Onyxia. You'll notice a cast bar by her which is slowly filling up which is her electrical charge - she needs to be killed before this bar is filled. Nefarian will land after he finishes his circle casting Hail of Bones. We had the two dragons tanked on opposite ends of the pit facing out with their tails about meeting in the centre of the room. Ultimately we DPS'd Onyxia very low, then turned and dealt some damage to Nefarian to start wearing him down. When Onyxia's electrical charge bar was closing in on full, we quickly switched back to her and finished her off.
It's essential to prepare your raid for phase 2 by splitting the raid into three groups and assigning each group to one of the platforms/columns arranged around the pit. These groups need to have an equal split of tank, dps, and healers. An interrupt should be on each platform. The screenshot below will show you the platforms/columns, one is just to the right in that shot. This shot was an initial pull just to get a glimpse of what was goign on, so don't rely on that positioning!
Phase 2:
Phase 2 begins when Onyxia dies. The second she dies your entire raid should be moving to their assigned platforms/columns and be ready to get on them. When Onyxia dies, Nefarian will take to the air and the pit will begin filling up with Magma. The Magma will deal 5000 fire damage per second and increase your damage taken by an additional 2000 per stack. You will use the magma to swim up onto the columns, but it's essential you do so quickly!
Nefarian will be in the air casting Shadowflame Barrage and Shadow of Cowardice. Shadowflame Barrage will cause constant Shadowflame damage to the raid.
On top of each platform will be a Chromatic Prototype, an add which will stand on the platform and attempt to cast Blast Nova. You'll want to DPS these down and interrupt those casts.
It was unclear whether Phase 3 begins when those adds are dead or after a set amount of time. It appeared to be after a set period of time when we tried it. We had our melee DPS focussed full time on bringing the adds down and had our ranged DPS switching between attacking Nefarian and assisting on the adds. The adds need to be killed before Phase 3 begins.
Phase 3:
For phase 3, the magma will once again drain from the pit and Nefarian will land. You MUST jump off the platforms/columns - if you remain on them you will be killed very quickly by Nefarian (this appears to be when Shadow of Cowardice strikes).
Phase 3 is very similar to Phase 1 in that you have Nefarian's original dragon abilities (his breath, cleave, and tail lash) as well as the Animated Bone Warriors, who will again be resurrected if they are hit by any Shadowflames.
The key difference in Phase 3 is the pink fire on the ground which you can see in the screenshot above. This is started by a Shadowblaze Spark - this starts a Shadowblaze, which expands in a circular shape and appears to follow players and speed up if touched. The fire deals Shadowflame damage, so it will also resurrect the Bone Warriors.
Positioning is a little bit tricky in this fight, as you can find your space is quickly eaten up by the Shadowblaze. We began with holding him in the centre and kiting him to clear areas as needed. The Shadowblaze will despawn, but it will be quickly replaced by a new spark, so your raid has to be very aware of it.
There's a lot going on in this fight and it is a great encounter! There's definitely a mix of raid awareness as well good target switches and knowing when to dps what. The Animated Bone Warriors should NEVER be DPSd - you'll just be wasting time doing that.
Healing this fight is pretty interesting. Positioning of the two dragons in Phase 1 can be tricky - you may either want to assign tank healers who can position themselves closer to either tank or have the tanks position just close enough to both be in range. Your tank picking up the Bone Warriors also needs a good eye kept on him - if the adds are resurrected or have their energy restore long enough to build up some stacks, their tank may begin taking some big hits. The tank handling them needs to be very aware of them spawning - they seem to have a particular love for healers. Preparing for Phase 2 is also crucial so that no one takes any extra unnecessary ticks of Magma damage, as is interrupting the cast by the adds on the platforms. AE damage on the melee in particular in Phase 1 will be strong if they get hit by Onyxia's lightning charges.
Overall a fun fight and two great encounters in Blackwing Descent! There are still a few more as well, the Omnitron Defense System which I've covered already, plus Chimaeron and Maloriak, and there should be at least one other battle against Magmaw which I haven't tested yet.
More updates to come!
Labels:
Beta,
Blackwing Descent,
Cataclysm,
Healing,
Raids
Saturday, 23 October 2010
Beta Raid Testing - Bastion of Twilight
There was a lot of Raid Testing on Beta last week, so I have lots of updates for you all! I'm splitting up the zones into separate posts as there were a lot of bosses.
We'll kick it off with the rest of the Bastion of Twilight!
I covered the first boss of BoT in my last Beta Raid post here. After you defeat him, you have some pretty straightforward trash on the way to the second boss. You'll have some fun with the fire elementals that charge up the set of stairs on the walk to the second boss - they explode on impact and, although they don't do a huge amount of damage, they will knock you back. If you are angled to the side, you may go flying off the staircase and fall to your death. We had several people get knocked off and had a good laugh.
The second boss are the two dragons, Valiona and Theralion.
Valiona and Theralion
This was an interesting fight, and not too difficult once you figured out the abilities. You only need one tank as only one dragon will engage at a time, the other will be in the air. The dragons have the following abilities (source):
Valiona:
Grounded:
-Blackout - Dispellable debuff - when dispelled or expired causes 250,000 shadow damage spread amongst all nearby players.
-Devouring Flames - Targets a random player and casts flames that deal 70,000 damage per second.
Flying:
-Twilight Meteorite - Debuff - after 5 seconds deals 110,000 shadow damage spread amongst all nearby players.
-Deep Breath - Instant death on hit, 10,000 damage per second caused by the remaining flames on the ground.
Theralion:
Grounded:
-Engulfing Magic - Causes a random player to explode for 10% of their spell damage or healing done for 20 seconds, hitting nearby players.
-Fabulous Flames - Flames on the ground which deal 7,000 damage per second.
Flying:
-Dazzling Destruction - Swirling zones on the ground which deal 400,000 shadow damage to players in the blast zone after 5 seconds.
-Twilight Blast - 17,000 shadow damage to a player spread amongst nearby players.
We started by pulling Valiona so she was grounded first and Theralion flew into the air as we pulled. We spread out within close range of Valiona to deal with her two attacks. Remaining in close range made it easier to move out of the way when she cast Devouring Flames. It also made it easier to deal with her second ability, Blackout - this debuff's damage is dealt to the targeted player BUT it is spread amongst any nearby players. You want to stack your raid on top of the targeted player before dispelling, as this will mitigate the damage immensely. If the person is on their own when they are dispelled, they will die.
While fighting Valiona on the ground, we also had to watch for Theralion's Flying abilities. Dazzling Destruction is quite obvious - just move out of the swirling zones on the floor and you won't take damage. Twilight Blast is similar to Valiona's debuff, the targeted raid member can just stay with the group and the damage should be split amongst them.
The dragons will switch and Theralion will land and Valiona will take to the air. You now will see Theralion's grounded abilities and Valiona's flying abilities. Engulfing Magic is the one debuff you must run out of the raid - it causes you to explode and will cause damage to those around you (similar in concept to the arcane explosions caused by Unchained Magic in Sindragosa HM, except you'll be constantly exploding while you have it). He also deals Fabulous Flames, which is a simple 'stay out of fire' mechanic. Valiona has two abilities of import when she's flying - her Twilight Meteorite is similar to her Blackout, simply stack up before dispelling the debuff again. The second ability she has is Deep Breath - this is similar in concept both to Felmyst and to Onyxia's Deep Breath. If you get caught in it - you will die. She'll line up to a third of the room before sweeping across with the cast.
After each round of abilities the dragons will continue to switch until they're killed.
Overall, a pretty fun fight. Some slightly different mechanics mainly in the debuffs, as many are used to running debuffs and dispels out of the raid, and most in this fight require you to be stacked up. Tank damage is not too bad and much of the raid damage is avoidable. Hits that you will have to deal with to the raid will be from dispelling the debuffs, but if the raid is fully stacked, the damage to everyone will be much less than if the debuff targets are more isolated.
We now head to the third boss in Bastion of Twilight!
Ascendant Council
The trash in this room just before the bosses were... interesting. There were lots of elementals, Earth, Wind, Water/Frost and Fire (how many times will people be yelling 'Heart! By your powers combined... I am CAPTAIN PLANET!!' on this boss :D ). The earth and wind elementals did not feel too difficult to deal with, but the fire and frost adds hit a lot harder. We found that pulling a fire and frost together helped immensely - the fire add had a fire shield up which dealt damage to attackers, and it seemed like the frost add destroyed that shield. The frost had does an AoE frostbolt attack which hits very hard and should be interrupted if possible, as it's a lot of damage to the entire raid.
This boss was a very interesting fight with some creative use of buffs and debuffs. It's a bit difficult to see in that screenshot, but there are four members of the council around the room, two straight ahead by the columns and two more up on platforms. You will only fight two at a time in the first two phases. I can't remember the names of each one and unfortunately wowwiki doesn't seem to be updated for this fight yet, so I can't fall back on that to double check. They each represent a different element, though, and their names are fairly obvious - Fire, Frost, Wind, Earth. The Fire boss was called Ignaceous I think, the Earth boss had 'Terra' in its name and the Wind boss had 'Ara' in its name. I'll just refer to them by the elements for now.
The two bosses on the ground will be the Fire and Frost bosses. I'm not sure if this might change each time you zone in (so that you might fight Earth and Wind first), but the pairings will remain the same.
You will only need two tanks. The phases seem to be pushed by health percentages - we chose to dps just one boss in each pairing which got us to the next phase.
Phase 1 - Fire and Frost:
There are several abilities these two do. The fire boss will lay streaks of fire on the ground and the frost boss will toss out a debuff on players called water globules - if you have this debuff, you want to walk through the fire to remove it. You don't need to stand in the fire for long (so don't), just long enough to remove it. This will spare you from getting hit with the Frost boss's next ability, Flash Freeze - if that water globule debuff is still on you when he casts this, you will be Flash Frozen in an iceblock. These two also have two AoE abilities - the Fire boss will jump to a random player, do a fire nova AoE and knock the players in the area back. This isn't too big of a deal, BUT, if you are near the Frost boss or just angled in his direction, you might get knocked into the Frost boss and get caught in his AoE, which happens at about the same time. This will kill you.
Phase 2 - Earth and Wind:
These two have big AoE abilities which you must use the debuffs around the room to mitigate them. There will be tornadoes zipping around the room and swirling spots on the floor - these two things will give and remove a debuff that helps you survive their abilities. The Earth boss will cast Quake and after that the Wind boss will cast Thundershock. There will be on-screen emotes for both abilities. As soon as the two bosses come down, you'll want to run into a Tornado. The Tornado will knock you back a bit and do a little bit of damage, but it will place a swirling winds debuff on you which is crucial. This debuff will cause you to hover a bit above the ground and will mitigate the damage from Quake and allow you to survive it.
After Quake, you will want to move to one of the swirling zones on the ground. These swirls will suck you in and 'ground' you, removing the winds debuff. You MUST do this before Thundershock is cast, as getting grounded will mitigate the Thundershock damage.
There are a couple of other abilities to be aware of. There is a big cast which must be interrupted - I believe it was by the Wind boss (someone please correct me if I'm wrong). There is also a Chain Lightning ability. Players targeted by this ability will have a yellow arrow above their head. These players MUST run out and away from the rest of the raid. If these players are clustered amongst the raid, people will take massive amounts of damage. If they run out and are alone, the damage will be significantly less.
We again burned down one of the bosses.
Final Phase - Elementium Monstrosity:
In the transition to the final phase, the entire raid will be stunned and the four bosses will merge into one, forming the Elementium Monstrosity. This final phase wasn't too difficult. The boss will drop pools on the ground (though these may be bugged or undertuned, as they weren't causing much damage for us). We kited him around the outer edge of the room. We kited him fairly slowly as the pools weren't growing too quickly and weren't too damaging.
It's a very fun fight! Overall damage isn't too bad, especially if the raid is paying attention to their buffs/debuffs and using the mechanics in the fight. It is a really interesting concept and fun to do. The big killer seemed to be chain lightning on our first couple of attempts, raid members targeted really need to ensure they move away. I enjoyed this fight a lot! It wasn't too tough to heal, though again raid awareness was key in keeping overall damage down.
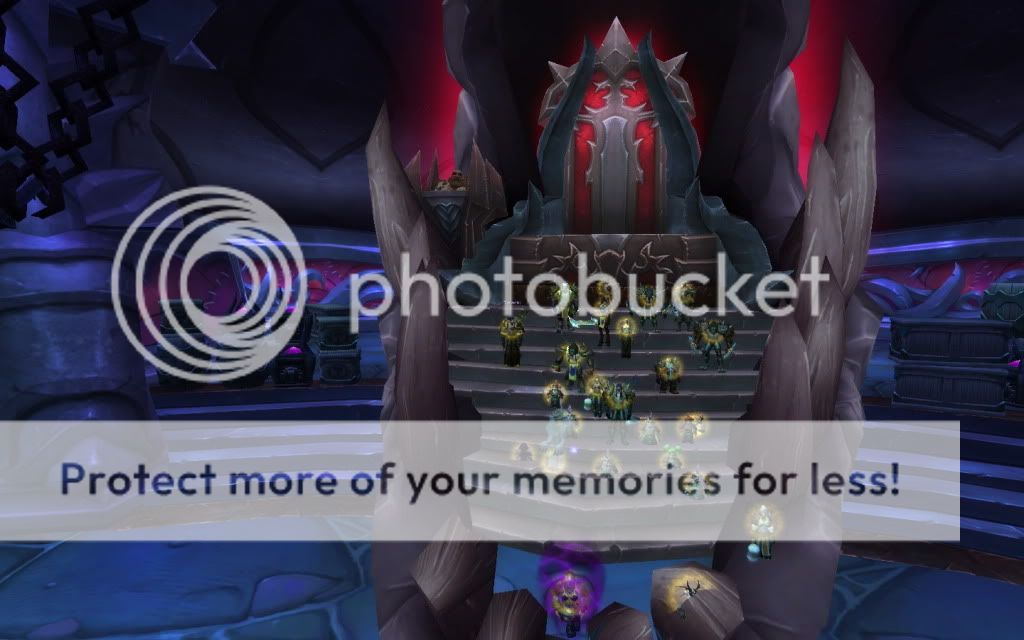
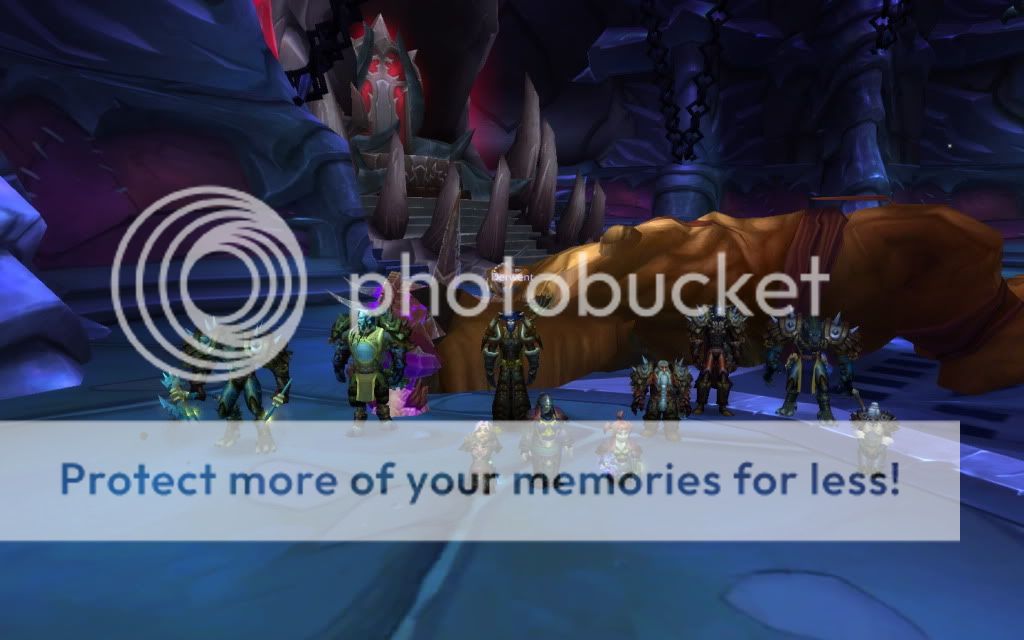
The kill screenshot unfortunately isn't too fantastic for this boss, as all that remains is this belt.
Now it's time for the last boss!
Cho'gall!
The raid testing on Cho'gall was announced pretty last minute, and a ton of the guild had gone off to see Blizzcon as we were pretty much done for the week, so we ended up only having enough people to do this fight on 10 man. It was still a good fight, though, interesting and a lot of fun and still fairly challenging on 10 man. There's a lot of concern at the moment about the 10 man vs 25 man tuning, and Blizz as well has said that ensuring the fights are equally challenging on both 10 and 25 will be one of the more difficult things to get right. They mentioned in the Blizzcon Dungeons and Raids Q&A that this is a very high priority for them. I really quite enjoy 10 mans so I'd definitely like them to be as challenging as the 25 man versions.
The nice thing about doing this fight on 10 man is I can be a lot more detailed about our group makeup and things as I can remember it a lot more easily, and I can also give a nice idea of how healing feels in a 10 man.
Our group makeup was as follows: 2 tanks (Warrior and Paladin), 2 healers (Druid (myself) and Paladin), 6 DPS (DK, ShadowPriest, Mage, Lock, Warrior, Paladin).
Wowwiki does have a page on Cho'gall's Abilities which is great, as now I can be a lot more specific/accurate about his abilities.
A note at the start - you will see a graphic of a Blood Bar on your screen (though on our final attempt this seemed to bug, as none of us saw it). A lot of abilities will cause Corrupted Blood, which seem to fill up this bar, though none of us ever got very high. It looks like if you fill up your bar and reach Absolute Corruption, which will turn you into a Faceless One. Apparently this debuff will cause you to receive 100% less healing (so no healing) but inflict 100% additional damage - we didn't really see this happen so I'm not certain whether this will mind control you (and turn you against the raid) or simply increase your damage on the boss but allow you to die much more quickly. You can avoid getting corruption by avoiding damage.
Raid awareness is crucial in this fight. Interrupts and avoiding AoE damage is essential. Healer mana is crucial - the final phase has a lot of damage and healers will need to conserve mana for that final phase, and raid members avoiding taking excess damage will help immensely.
There are two phases to this fight.
Phase 1 - 100% to 25%:
This phase will primarily be alternating between DPSing the boss and the adds he summons. There are also several abilities that will need to be avoided or interrupted.
Conversion - Cho'gall will MC a player, causing them to channel Worship onto him, which causes him to gain Twisted Devotion (increasing Cho'gall's damage done by 10% for 20 seconds). This channel is interruptable, and interrupting the target will break the MC. This should be done as quickly as possible to avoid the damage buff on Cho'gall and to free the player. Dispels may be needed on the player to free them from lingering stun effects (ie HoJ).
Flame's Orders and Shadow's Orders - Cho'gall orders either Flame or Shadows to come to his aid. Flames will add fire damage to his melee swings and create fire patches on the floor, Shadows will add an AoE shadow damage to the raid and create shadow patches on the floor.
Fury of Cho'gall - This will blast the target causing damage and increasing Physical and Shadow damage by 20% each. Cast on the primary aggro target and stacks - tanks will need to taunt off each other as this stacks up. The timing on the taunts worked well for us, as generally a taunt time came as an add was spawning, freeing up a tank to pick up the add.
Summon Corrupting Adherent - These are Faceless Ones-type adds that will be summoned. On ten man he only summons one at a time. DPS should switch and kill the add immediately. We pulled the add to the back of the room, because when they die they leave a black pool called Spilled Blood of the Old God, which will cause shadow damage to anyone caught in it. They don't seem to go away so you don't want your room littered with these. The adds have an interruptable cast called Depravity - INTERRUPT THIS. It causes a large amount of shadow damage to everyone in the raid and causes Corruption. They also have a frontal cone of Sprayed Corruption, so melee should remain behind the add. They also have a shadow-crash ability called Corrupting Crash; there is an obvious swirl effect on the area of the ground it's targeted at, so move out of that spot. The add needs to be killed quickly before he can cast Festering blood.
There is also a second type of add which are lots of non-elite blobs - there seems to be two Corrupting Adherents summoned, then finally these blobs. It's best if the offtank or a DPS tries to pick up aggro on them. They don't do a huge amount of damage and they can be AoE'd/DPSd down quite quickly, but they can quickly aggro onto healers and cause a nuisance.
Keep an eye on his health - you want to be prepared for the transition to phase 2 and ensure all adds are dead before you push the phase. Damage increases significantly in phase 2 and there are more adds to deal with in the phase, so you don't want to be surprised by the transition.
Phase 2 - 25%-0%:
The tank debuff Fury of Cho'gall will still be placed on the tanks, so the tanks will still need to taunt off each other in this phase.
Healing becomes a lot more intense in this phase, so the entire raid really needs to ensure they mitigate their damage in the first phase so healers have enough mana and their cooldowns ready for this phase. Having people topped off or very close is pretty key going into this phase. Raid members should be prepared to use healthstones if they need to in this phase.
Cho'gall gains Corruption of the Old God in this phase, inflicting shadow damage every 2 seconds to everyone in the room.
You'll want to spread out just enough in this phase (healers could probably just turn to face away from the raid) due to Dark Sickness - this debuff causes you to feel sick, making you vomit and inflict shadow damage to those 5 yards in front of you.
This is not strictly a burn phase - you will be burning the boss, but he will summon adds which MUST be killed.
The adds he summons are Darkened Creations, they look like eyestalks in Naxx. They are non-elites so they can be killed fairly quickly, BUT, most crucially, they are channeling a spell called Debilitating Beam, which reduces healing and damage done by 75% and inflicts shadow damage. These adds MUST be killed and killed as soon as possible, and should be stunned or interrupted if possible. If they don't die, you will, because damage and healing will not be able to keep up. The AoE shadow damage plus these beams will be causing huge damage.
Deal with those adds and finish off the boss and you're done!
Two healing this on 10 man was definitely doable and quite fun as well. It was challenging but not too difficult, and good raid awareness to mitigate raid damage at the start is crucial as is watching your mana and timing your cooldowns. As a druid, I was timing my cooldowns and my innervate very carefully. I was being careful with my heals and ensuring I didn't waste mana by mis-targeting heals (ie a poorly placed Efflorescence or Wild Growth). I used my innervate a bit earlier than I normally would, at approximately 50-60% mana or so, to just top myself back up as much as I could and to ensure that Innervate would be available again in the final phase. I saved my Tree of Life and Tranquility cooldowns for the final phase.
The pally and I were pretty dead even with heals; on HPS, healing done, and mana levels and conservation. This was particularly nice to see as not only was our healing even, it was interesting to see that in comparison to our 25 mans, where our priest, shaman and druids were all pulling pretty equal HPS, but our pallies were disproportionately high (Holy Radiance was doing a ton in 25s).
Druid heals overall; we're feeling strong both on tank healing and on raid. Our HoTs are still excellent for raid healing. Our tank healing tools are strong as well, and the change to Empowered Touch is excellent - now both Healing Touch and Nourish will refresh our Lifebloom stacks. I'd be quite intrigued for Empowered Touch to also add stacks of Lifebloom - say you put up one stack of Lifebloom on your tank, then begin healing with Nourish or Healing Touch - those two spells would then add the second and third stacks of Lifebloom, then continue to refresh as normal. They likely won't implement that but I mentioned it in my beta feedback on this fight so maybe they'll take a peek at the idea. :) I feel like Nourish and Healing Touch could hit just a bit harder to improve our tank heals a little more as well, but we'll see. I'm not sure where their healer tuning is at the moment.
Wrap-up:
Overall, some very interesting fights! Bastion of Twilight is going to be a lot of fun. There are a lot of interesting mechanics and raid awareness and things like interrupts and CC will be very important throughout the instance.
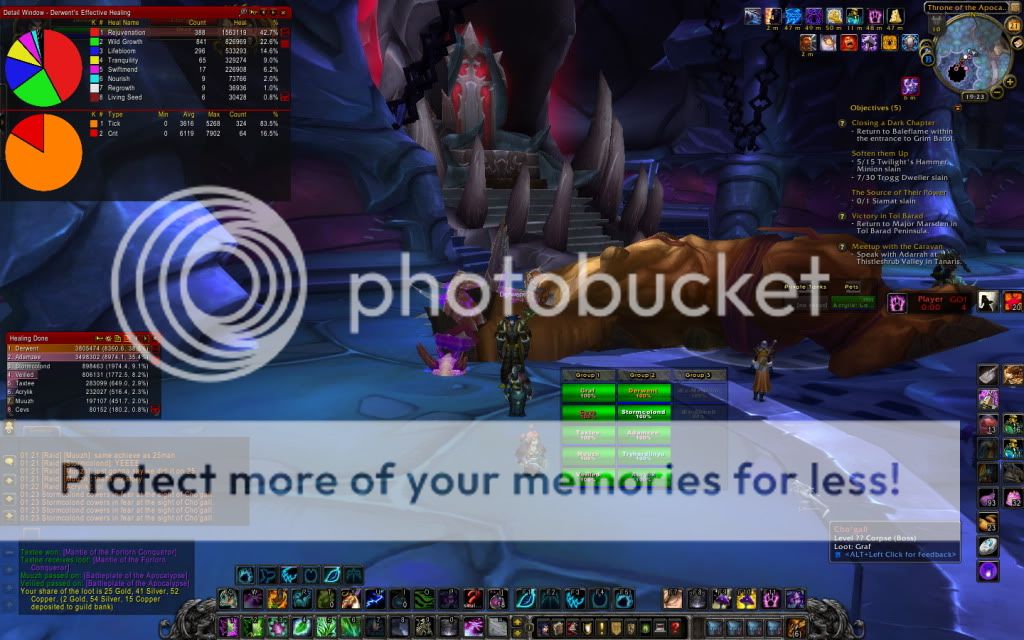
Druid healing is doing very well at the moment! We're still excellent on raid heals and our HoTs are very strong. Two healing the 10 man gave me a good feeling of it as well, 25 mans have been good to show how all the healers are doing in comparison to each other and working together, but two healing the 10 is a bit more challenging as there's less room to fall back on. It was also good to see the druid and the pally, as pallies are seeming a bit overly strong in the 25s - you can see in the screenshot below, we both pulled around 8.5k HPS and about 37% each of the healing done, so very very even, and neither of us were having to compensate for the other.
You can see on the recount window there, Rejuvs and Wild Growths are still very important in both raid healing and also on the tanks - my WGs were typically cast on the melee to hit the tanks as well. There are a lot of Swiftmends (though Efflorescence isn't showing up as it's being recognised as a 'pet heal') which I was casting mostly on the Tanks and melee to get that AE heal on them. Lifeblooms are high up there as I was always keeping a stack up on either one of the tanks. I popped Tranquility at the start of phase 2 to top people back up and heal through that initial shock of AoE damage. You can see some Nourishes on there from tank healing and there are also Healing Touches (not visible on that screenshot unfortunately) from both tank heals and a Nature's Swiftness cast. There are also some Regrowths in there, a mixture of some quick heals on the tanks that were necessary and also some instant Regrowths on raid members when I popped ToL in phase 2. I also used the extra WG HoT and was throwing Lifeblooms on many raid members in phase 2 while in ToL, and had my innervate and mana pot available for that phase so that I could really keep the heals up in that phase.
That's quite an extensive work up! I'll get more posts up soon on the additional bosses we tested in Blackwing Descent as well as the first boss in the Throne of the Four Winds and Tol Barad.
Friday, 22 October 2010
Twitter!
I have taken the plunge and made a twitter feed for the blog! We'll see how it goes - I've not tried it before (yes, yes, I'm late to the game on this one) but it certainly seems simple enough to use. It seems like it will be a good way to keep up some minor posts and updates in between my normal posts, particularly between my longer ones which take more time to write and set up. You can find my twitter page here @feraltree. I should be able to add it to my sidebar as well in the links, so I'll go see about setting that up now.
In other news! There was a lot more beta raid testing this week, so I have a lot of updates to come. We cleared all of the Bastion of Twilight and a couple more bosses in Blackwing Descent, as well as checking out the boss in Tol Barad. Some pretty fun stuff! I took screenshots as well so you can get a glimpse of what the bosses look like. Because it was a lot of bosses in just a few days, I'll probably split up the posts, likely one on the rest of Bastion of Twilight and then a separate one on Blackwing Descent. I'm also working on getting my kitty guide updated (sorry fellow cats!!), fallen a bit behind due to the beta testing, but that will be updated soon.
Blizzcon is this weekend as well! I'll try to post with any particularly exciting news or information (though there may be a lot, so no promises on catching all of them haha) - perhaps a nice start for the twitter feed to put some mini-post reactions there!
All for now! Beta raid posts and kitty updates to come!
Monday, 18 October 2010
Beta Raid Testing - Bastion of Twilight and Blackwing Descent
The first round of beta raid testing started yesterday afternoon, so I thought I'd share some impressions of the two fights we tested, healing at 85, and some screenshots. I'll try to update this along with more official information on the encounters/abilities, and I think several people were frapsing the attempts so I'll try to get links to our videos up as well if possible. Our tests were on the 25 man versions of the raid.
Halfus Wyrmbreaker - Bastion of Twilight
Due to a plethora of horde loitering around the Blackwing Descent stone, we went over to the Bastion of Twilight first to test out Halfus Wyrmbreaker.
Firstly - when zoning in, there is a lot of trash. Many cries of 'oh no, it's Tempest Keep all over again...'. You WILL be using CC and you likely will spend a little bit of time negotiating this first hall of trash (though it's subject to change come release, of course). I think we had two saps and two sheeps up on every pull. We went through it pretty quickly to get to the boss so I don't have detailed descriptions of all the trash adds in there. Some do hit fairly hard though. There are also mobs of blood elves on either side of the first hall standing around light balls of energy - the blood elves don't hit very hard so these packs you can manage to just pull at once and AOE down. You will need to kill them, though, as the orbs they surround will channel a harmful beam onto you if you don't kill them.
The boss!
When you go into his room, you will see him standing at the edge by a proto-drake. There's a Slate dragon injured laying to one side, a Storm dragon chained and a Time Warden (Bronze dragon) chained. For basic abilities - the proto-drake fires large Fireballs at raid members, they are pretty easy to see coming towards you. The boss doesn't hit too hard, though he does do a cast which, if not interrupted (and it did seem to be interruptable), will do some AOE damage to everyone and knock everyone back.
You can speak to the chained drakes - however, at least as we did the fight, speaking to them released them, only to have them immediately mind controlled by the boss. The Storm dragon was really quite bad to free - he does some decent sized hits, but also creates an aura which interrupts casting. Consequently, all our healers kept getting interrupted. This does seem to interrupt the boss as well and helps mitigate his AOE cast, but it was very difficult on the healers. The Time Warden drake was a bit better - the debuff he put out froze us all in place, so we were unable to move (and so unable to be knocked back by the AOE from the boss, which was helpful).
What we ended up doing was engaging the boss, then the second tank and melee heading over to the Time Warden. We freed him, were locked in place, then nuked down the Time Warden. Once he was dead we returned to the boss.
When the boss got to ~15-20% or so health, he began whirlwinding around the room (BOOOONNEESTTOORRMM). He is tauntable, and didn't appear to go taunt immune, so our tanks were able to help martial him into place. As is probably obvious, don't stand in the whirlwind.
Healing impressions: The damage was a bit mixed on this fight. Tanks will be taking damage and the raid will be taking damage from both the fireballs and from the AOE the boss does. That AOE cast does appear interruptable, so everyone who can interrupt it should be trying to do so. Mana and mana management is definitely going to be big in Cata - all of our healers were running low. I was having to think a lot more about which heals I could use, trying to use Regrowth or another expensive spell on Omen of Clarity procs, and being careful not to waste heals with overheals. With healthpools at such a large size, it doesn't seem tanks will be dying within a GCD (not yet, at least), but you definitely will still be healing and they will die. You may also have to let your raid know what they can stand in - as you can see in the screenshot below, Efflorescence makes a nice green zone. Shamans have an AOE heal that makes a blue circle, and priests have one which makes a white circle.
Omnitron Defense System - Blackwing Descent
Second up was the Omnitron Defense System over at Blackwing Descent. This was a pretty interesting fight, and also seemed a bit easier than Halfus Wyrmbreaker.
There are four golems in this, but only two will be active at any one time. They all share the same health pool. They do not seem to do any cleaves, but there is some directional damage to be aware of which I'll get to. Only one golem will be active when you approach. The golem has 100 energy stored up - when it gets to 50, another golem will charge up and join the fight. Once the first golem gets to 0 energy, the next golem will charge up and join the fight, and they will rotate until their shared healthpool is gone. There is an obvious stream from the forge in the back of the room channeling to a specific golem, so it is easy to see which golem will be activated next.
Bosses: (abilities sourced from wowcataclysm-wiki.com)
Magmatron:
Incineration Security Measure: Jets of flame fire out all over the room. Don't stand in the fire, and the tank shouldn't move or rotate the boss.
Acquiring Target: Targets a raid member and, after a few seconds, shoots a jet of flame straight at them. Rest of the raid should move out of the way, and the target needs to be healed.
Barrier: Absorbs 300k damage and explodes to deal 75k damage to everyone. Do NOT attack the barrier.
Electron:
Lightning Conductor: Puts a debuff on a target that hits nearby raid members. Healer or DPS should move away from the group if targeted, if it's on the tank, tank should remain still and DPS move away from the tank.
Chain Lightning: Deals chain lightning - the raid should remain spread out.
Unstable Shield: When struck, the boss lets out a very high AOE damage. Do NOT hit the boss when the shield is up.
Toxitron:
Poison Cloud: Causes anyone standing in it to gain a debuff that increases all damage taken by 50%, including the boss.
Poison Protocol: Summons 3 slow moving slimes that crawl towards a chosen target. Ranged DPS should kill the slimes. If the slimes reach their target, they explode for ~100k and leave a pool of poison. Don't stand in poison and don't get hit by a slime - kite it if it targets you.
Poison Soaked Shell: The boss puts a stacking dot on the attacker when struck. The dot does give a burst of nature damage for the attacker (10k per stack), however, it will deal damage to you as well, so don't stack it too high.
Arcanotron:
Whirlpool: Gives anyone standing in it a boost to damage and mana regen - stand in the whirlpool but ensure the boss is not in it.
Arcane Annihilator: Short, interruptable cast, does a lot of damage to one target. Buffed by Power Conversion.
Power Conversion: The boss generates a stacking damage buff whenever he is struck. Do NOT hit him with this up. The damage buff is apparently spellstealable.
The biggest consistent thing for each of the golems is they put up some form of a barrier or shield which, for the most part, will result in massive damage to the raid if they are struck with it up. Quick target switches will be key in this fight.
Healing Impressions: Healing wasn't too bad in this fight, and a lot of the raid damage can be avoidable. The most precarious moments were when someone DPSd one of the golems with a barrier up, which resulted in the entire raid taking a massive drop in health. So long as people move out of fire, fire beams, poison, etc, and are quick on their target switches, healing will not be too bad. I can easily see people wiping a raid though by missing a target swap when one of those shields is up. Again, mana management will still be important, and your raid will need to help healers out by, well, not standing in bad stuff. This was a pretty fun fight though.
The instances themselves look pretty cool, certainly the zones and architecture/graphics inside look pretty amazing. The first hall in Bastion of Twilight will be... uncomfortable... for some, mainly due to the intensity of the trash in that first wing, especially as the first few pulls are in a fairly tight corridor. There's always the potential that may change between now and Cata, of course. There wasn't too much trash that we saw approaching the Omnitron Defense System in Blackwing Descent, though, just a couple of golems. They did have a targeted ability which did some heavy aoe damage, but it's pretty obvious (another 'don't stand in bad stuff' ability).
The DPS also got to have some fun with essentially a giant DPS dummy, they spawned a Patchwerk for us:
Overall Healing Impressions:
Mana management will definitely be important, especially in the first tiers of raiding.
For these tests, I used the following spec:
I used this spec to try to maximise what I could healing-wise in the Resto tree as well as maxing out Genesis in Balance. Blessing of the Grove still feels a bit weak, especially at only one point (2% boost to Rejuv instead of 4% at 2/2), so I put my spare point into Furor instead to just increase my mana pool that little bit more. Nature's Grace has been improved fortunately for Restoration druids, the haste boost now procs off of Regrowth as well as off of Moonfire and Insect Swarm. The wowtal calculator isn't updated to reflect that change yet. The most recent beta patch also made a great change to Empowered Touch which causes both Nourish and Healing Touch to refresh Lifebloom stacks. Unfortunately, this talent is currently bugged on the beta and neither spell is refreshing the stacks, but hopefully that will be fixed soon.
Druids are still excellent at raid healing and our HoTs are still excellent. The Rejuv durations are shorter but you will definitely be using them. Mostly instead of pre-HoTing everything, you'll be healing a lot more reactively, as overheals will end up wasting a ton of mana. Regrowth is a bit of a tricky spell at the moment - it's a very quick heal which is great, but it costs a lot of mana. Nourish and Healing Touch cast times both feel a bit long, but I think this only felt a bit worse because of the current bug to Empowered Touch, as I was having to constantly refresh my Lifebloom stack on the tank in between my other heals since the talented refresh isn't work.
The longer cooldown on Wild Growth really isn't a problem - it's still an excellent AOE heal and you will be using it (and it too can crit, which is great). Because of the longer cooldown, though, you will want to be very careful with how you target it - if you throw your WG onto a bad target so it ends up hitting just one or two people, that really ends up being a huge waste of both time and mana. Similarly, you will want to be using your swiftmends as an emergency heal, but be very aware of where it's landing to try to make best use of that Efflorescence proc. On beta, at least, the graphic is showing up (there seems to be a projected textures bug on live at the moment where abilities like Efflorescence, Consecrate, etc aren't showing up in some places), so once your raid realises that it's a green zone they CAN stand in safely, they'll move into it. You will want to target it most of the time though to maximise its effectiveness.
Tree of Life form too is a good cooldown to use. Being able to throw Lifeblooms on multiple targets will be very helpful (particularly on tanks on fights which have more than one taking damage), the additional Wild Growth will really need to be targeted well, and the instant regrowths are very useful for quick top-ups (just be careful you don't spam yourself OoM). I must say as well - Tree-Wrathing is pretty awesome and fun. Tree-dps (or TreePS as I like to call it) has gone up a fair bit, now that we have access to crittable Insect Swarm as well as Moonfire, plus very quick and harder-hitting Wraths. You likely won't be able to do this in raids until you overpower the fight (or just if the mechanics call for it) but it's a lot of fun particularly in randoms and things. I'm still undecided about the new tree form as well, I just might go for the new glyph to keep my little treant form.
That's all for now, I'll try to update with better/official information on Halfus Wyrmbreaker, and if our run's videos are posted I'll include a link to that as well. Tankspot does seem to have a couple of 10-man videos of the encounters posted so that can give you a glimpse as well.
I'll leave you with this lovely screenshot over Searing Gorge.
Halfus Wyrmbreaker - Bastion of Twilight
Due to a plethora of horde loitering around the Blackwing Descent stone, we went over to the Bastion of Twilight first to test out Halfus Wyrmbreaker.
Firstly - when zoning in, there is a lot of trash. Many cries of 'oh no, it's Tempest Keep all over again...'. You WILL be using CC and you likely will spend a little bit of time negotiating this first hall of trash (though it's subject to change come release, of course). I think we had two saps and two sheeps up on every pull. We went through it pretty quickly to get to the boss so I don't have detailed descriptions of all the trash adds in there. Some do hit fairly hard though. There are also mobs of blood elves on either side of the first hall standing around light balls of energy - the blood elves don't hit very hard so these packs you can manage to just pull at once and AOE down. You will need to kill them, though, as the orbs they surround will channel a harmful beam onto you if you don't kill them.
The boss!
When you go into his room, you will see him standing at the edge by a proto-drake. There's a Slate dragon injured laying to one side, a Storm dragon chained and a Time Warden (Bronze dragon) chained. For basic abilities - the proto-drake fires large Fireballs at raid members, they are pretty easy to see coming towards you. The boss doesn't hit too hard, though he does do a cast which, if not interrupted (and it did seem to be interruptable), will do some AOE damage to everyone and knock everyone back.
You can speak to the chained drakes - however, at least as we did the fight, speaking to them released them, only to have them immediately mind controlled by the boss. The Storm dragon was really quite bad to free - he does some decent sized hits, but also creates an aura which interrupts casting. Consequently, all our healers kept getting interrupted. This does seem to interrupt the boss as well and helps mitigate his AOE cast, but it was very difficult on the healers. The Time Warden drake was a bit better - the debuff he put out froze us all in place, so we were unable to move (and so unable to be knocked back by the AOE from the boss, which was helpful).
What we ended up doing was engaging the boss, then the second tank and melee heading over to the Time Warden. We freed him, were locked in place, then nuked down the Time Warden. Once he was dead we returned to the boss.
When the boss got to ~15-20% or so health, he began whirlwinding around the room (BOOOONNEESTTOORRMM). He is tauntable, and didn't appear to go taunt immune, so our tanks were able to help martial him into place. As is probably obvious, don't stand in the whirlwind.
Healing impressions: The damage was a bit mixed on this fight. Tanks will be taking damage and the raid will be taking damage from both the fireballs and from the AOE the boss does. That AOE cast does appear interruptable, so everyone who can interrupt it should be trying to do so. Mana and mana management is definitely going to be big in Cata - all of our healers were running low. I was having to think a lot more about which heals I could use, trying to use Regrowth or another expensive spell on Omen of Clarity procs, and being careful not to waste heals with overheals. With healthpools at such a large size, it doesn't seem tanks will be dying within a GCD (not yet, at least), but you definitely will still be healing and they will die. You may also have to let your raid know what they can stand in - as you can see in the screenshot below, Efflorescence makes a nice green zone. Shamans have an AOE heal that makes a blue circle, and priests have one which makes a white circle.
Omnitron Defense System - Blackwing Descent
There are four golems in this, but only two will be active at any one time. They all share the same health pool. They do not seem to do any cleaves, but there is some directional damage to be aware of which I'll get to. Only one golem will be active when you approach. The golem has 100 energy stored up - when it gets to 50, another golem will charge up and join the fight. Once the first golem gets to 0 energy, the next golem will charge up and join the fight, and they will rotate until their shared healthpool is gone. There is an obvious stream from the forge in the back of the room channeling to a specific golem, so it is easy to see which golem will be activated next.
Bosses: (abilities sourced from wowcataclysm-wiki.com)
Magmatron:
Incineration Security Measure: Jets of flame fire out all over the room. Don't stand in the fire, and the tank shouldn't move or rotate the boss.
Acquiring Target: Targets a raid member and, after a few seconds, shoots a jet of flame straight at them. Rest of the raid should move out of the way, and the target needs to be healed.
Barrier: Absorbs 300k damage and explodes to deal 75k damage to everyone. Do NOT attack the barrier.
Electron:
Lightning Conductor: Puts a debuff on a target that hits nearby raid members. Healer or DPS should move away from the group if targeted, if it's on the tank, tank should remain still and DPS move away from the tank.
Chain Lightning: Deals chain lightning - the raid should remain spread out.
Unstable Shield: When struck, the boss lets out a very high AOE damage. Do NOT hit the boss when the shield is up.
Toxitron:
Poison Cloud: Causes anyone standing in it to gain a debuff that increases all damage taken by 50%, including the boss.
Poison Protocol: Summons 3 slow moving slimes that crawl towards a chosen target. Ranged DPS should kill the slimes. If the slimes reach their target, they explode for ~100k and leave a pool of poison. Don't stand in poison and don't get hit by a slime - kite it if it targets you.
Poison Soaked Shell: The boss puts a stacking dot on the attacker when struck. The dot does give a burst of nature damage for the attacker (10k per stack), however, it will deal damage to you as well, so don't stack it too high.
Arcanotron:
Whirlpool: Gives anyone standing in it a boost to damage and mana regen - stand in the whirlpool but ensure the boss is not in it.
Arcane Annihilator: Short, interruptable cast, does a lot of damage to one target. Buffed by Power Conversion.
Power Conversion: The boss generates a stacking damage buff whenever he is struck. Do NOT hit him with this up. The damage buff is apparently spellstealable.
The biggest consistent thing for each of the golems is they put up some form of a barrier or shield which, for the most part, will result in massive damage to the raid if they are struck with it up. Quick target switches will be key in this fight.
Healing Impressions: Healing wasn't too bad in this fight, and a lot of the raid damage can be avoidable. The most precarious moments were when someone DPSd one of the golems with a barrier up, which resulted in the entire raid taking a massive drop in health. So long as people move out of fire, fire beams, poison, etc, and are quick on their target switches, healing will not be too bad. I can easily see people wiping a raid though by missing a target swap when one of those shields is up. Again, mana management will still be important, and your raid will need to help healers out by, well, not standing in bad stuff. This was a pretty fun fight though.
The instances themselves look pretty cool, certainly the zones and architecture/graphics inside look pretty amazing. The first hall in Bastion of Twilight will be... uncomfortable... for some, mainly due to the intensity of the trash in that first wing, especially as the first few pulls are in a fairly tight corridor. There's always the potential that may change between now and Cata, of course. There wasn't too much trash that we saw approaching the Omnitron Defense System in Blackwing Descent, though, just a couple of golems. They did have a targeted ability which did some heavy aoe damage, but it's pretty obvious (another 'don't stand in bad stuff' ability).
The DPS also got to have some fun with essentially a giant DPS dummy, they spawned a Patchwerk for us:
Overall Healing Impressions:
Mana management will definitely be important, especially in the first tiers of raiding.
For these tests, I used the following spec:
I used this spec to try to maximise what I could healing-wise in the Resto tree as well as maxing out Genesis in Balance. Blessing of the Grove still feels a bit weak, especially at only one point (2% boost to Rejuv instead of 4% at 2/2), so I put my spare point into Furor instead to just increase my mana pool that little bit more. Nature's Grace has been improved fortunately for Restoration druids, the haste boost now procs off of Regrowth as well as off of Moonfire and Insect Swarm. The wowtal calculator isn't updated to reflect that change yet. The most recent beta patch also made a great change to Empowered Touch which causes both Nourish and Healing Touch to refresh Lifebloom stacks. Unfortunately, this talent is currently bugged on the beta and neither spell is refreshing the stacks, but hopefully that will be fixed soon.
Druids are still excellent at raid healing and our HoTs are still excellent. The Rejuv durations are shorter but you will definitely be using them. Mostly instead of pre-HoTing everything, you'll be healing a lot more reactively, as overheals will end up wasting a ton of mana. Regrowth is a bit of a tricky spell at the moment - it's a very quick heal which is great, but it costs a lot of mana. Nourish and Healing Touch cast times both feel a bit long, but I think this only felt a bit worse because of the current bug to Empowered Touch, as I was having to constantly refresh my Lifebloom stack on the tank in between my other heals since the talented refresh isn't work.
The longer cooldown on Wild Growth really isn't a problem - it's still an excellent AOE heal and you will be using it (and it too can crit, which is great). Because of the longer cooldown, though, you will want to be very careful with how you target it - if you throw your WG onto a bad target so it ends up hitting just one or two people, that really ends up being a huge waste of both time and mana. Similarly, you will want to be using your swiftmends as an emergency heal, but be very aware of where it's landing to try to make best use of that Efflorescence proc. On beta, at least, the graphic is showing up (there seems to be a projected textures bug on live at the moment where abilities like Efflorescence, Consecrate, etc aren't showing up in some places), so once your raid realises that it's a green zone they CAN stand in safely, they'll move into it. You will want to target it most of the time though to maximise its effectiveness.
Tree of Life form too is a good cooldown to use. Being able to throw Lifeblooms on multiple targets will be very helpful (particularly on tanks on fights which have more than one taking damage), the additional Wild Growth will really need to be targeted well, and the instant regrowths are very useful for quick top-ups (just be careful you don't spam yourself OoM). I must say as well - Tree-Wrathing is pretty awesome and fun. Tree-dps (or TreePS as I like to call it) has gone up a fair bit, now that we have access to crittable Insect Swarm as well as Moonfire, plus very quick and harder-hitting Wraths. You likely won't be able to do this in raids until you overpower the fight (or just if the mechanics call for it) but it's a lot of fun particularly in randoms and things. I'm still undecided about the new tree form as well, I just might go for the new glyph to keep my little treant form.
That's all for now, I'll try to update with better/official information on Halfus Wyrmbreaker, and if our run's videos are posted I'll include a link to that as well. Tankspot does seem to have a couple of 10-man videos of the encounters posted so that can give you a glimpse as well.
I'll leave you with this lovely screenshot over Searing Gorge.
Thursday, 7 October 2010
Cataclysm Beta: Dungeon Guide - Throne of the Tides
I went into Throne of the Tides again today on my main (not on heroic, as he's not at level cap yet) to try it out again and get a better look at what's going on now that I knew what to expect. I thought I'd give a rundown of what you'll find in there (barring any changes between now and release), as it will likely be one of the first dungeons you encounter.
The dungeon itself is quite cool, the art is interesting, and there are a lot of walls and corridors made of what seems to be walls of water. Discovering the entrance to the dungeon is quite fun as well, as to get to it you have to venture down into the Abyssal Maw in Vash'jir. I didn't think I would come out alive!
The above screenshot is looking up through the lift (which has finally been implemented - no more goblins with 'Under Construction' signs!). The lift itself seems to be a giant jellyfish-type creature, though unlike jellyfish, it is not soft and squishy (and fortunately doesn't sting you), so if you jump off down to it you will get hurt and/or die (as a tank in one run found out).
Overall, the damage doesn't seem too bad (on regular), especially if your group is aware enough to not stand in deadly things. You will want to use CC on some of the trash packs and even on some of the boss fights (in my opinion, anyway) and you do need to be aware of your surroundings both on trash and on bosses. While you might be able to get away with not using CC and standing those extra few seconds in poison when in the regular dungeon, I highly doubt you will last long in the heroic versions.
Many of the trash packs will involve mobs like those in the screenshot above. There are lots of little murlocs who tend to come sprinting out in those little packs (just what would you call a pack of murlocs?). They don't do a massive amount of damage, but they are a nuisance, and seem quick to target onto either dps (like the priest there) or onto the healer (like myself). Barkskin and Nature's Grasp are your friend.
Those two Naga are another common presence in trash packs. The two above can both heal, and in every trash pull with these naga there are usually two. To handle them most effectively, you should generally mark one as the main target and the other to CC. The mage in this run had fallen behind, so I popped in with some Cyclones to interrupt a few heals. You do have Diminishing Returns to contend with, though.
These big guys are another common presence in trash. They tend to be on their own more, but one or two do pat around, so it's possible you'll end up pulling one while dealing with a larger group. They hit quite a bit harder than the other trash mobs and they also throw that green poison on the ground. DO NOT STAND IN GREEN POISON. It will hurt you. A lot. Also, once again this does raise the one complication with our Efflorescence proc - the big green healing zone does disguise the green poison a little bit. You can tell the difference if you actually look where you're standing, but if the person isn't paying attention, they may end up standing in both. You could also have some fun with this and see how many DPS you can get to stand in poison, but you didn't hear that from me.
![]() |
| Lady Naz'jar |
The first boss you will encounter is Lady Naz'jar. There are several things you'll want to keep in mind for this fight. At ~66% and ~33%, she will shield herself and summon adds. There are three adds, two Tempest Sea Witches and a Naga Honour Guard. On this fight I would advise either CC, interrupts, or silences for the Witches. You will want to take out the Honour Guard add first. The Sea Witches will be standing at range casting chain lightning. The chain lightning actually does a fair amount of damage, and they're fairly quick to cast it. I would recommend either CCing one or both of the Witches or at least getting an interrupt or silence on them. Once you actually switch to kill them, any class that can interrupt that cast should try to do so. Your healer will thank you.
There are also two abilities she has which the group needs to look out for. One is Fungal Spores, she will toss a spore at a target which will place a disease on them. These can be dodged if you see them coming towards you and the disease should be removable. The other ability actually does a decent amount of damage. She creates a Vortex, which is marked by light blue circle that appears on the floor, followed shortly by a vortex of water which will damage anyone caught in it and toss them in the air. These can be deadly. Screenshot below:
As you can see, my Vuhdo works on Beta, which has made me incredibly happy while healing. Though as of today it seems it needs to be updated, as it wasn't recognizing Lifebloom as a spell (likely due to some glitches with LB from Tree of Life changes).
After Lady Naz'jar, you will quickly get to the second boss.
![]() |
| Commander Ulthok |
Boss: Commander Ulthok
Ulthok is a fairly straightforward fight. He has two main abilities to be concerned about.
He will create Shaddow Fissures which do a significant amount of damage. The tank and melee dps need to be very aware of this ability. He slams the ground in front of him (which will result in a big hit on the tank of he gets caught in it, and likely one shot any DPS) which also leaves a dark circle on the ground which deals additional damage. Kiting him should help your tank and melee avoid these.
The second ability is Squeeze; he will grab a random group member and essentially holds and squeezes them. Whomever he picks up will be stunned and will take damage. Fortunately I had a HoT on myself when I was randomly grabbed today, hadn't been expecting it! Be sure to keep yourself and others topped off if you're healing.
Ulthok also has an enrage ability which will increase his damage done for 8 seconds.
Hm, I apparently neglected to pick up a screenshot of the next set of trash on the way to the third boss. There are two types of trash in the corridor approaching the third boss. One are lots of little Gilgoblin Hunters. In general they don't seem to hit too hard, but they do have an ability that can hit decently hard, and seems to have an AOE effect as well (hitting more than just the tank). I thought I've seen two abilities from them, one (the AOE one) looks a bit like a boomkin's Typhoon. The other I had thought I had read on recount as some sort of Spear attack. Regardless, be prepared for a potentially large hit!
The other type of trash in this corridor are Faceless Watchers. They do decent hits on the tank, but more importantly is they have an ability that whips the entire party into the air and draws them to the Watcher. You will get fall damage, and I advise the entire party (or in the very least all the DPS) run out immediately, as they also do an AOE damage immediately following the pull-in. As a Resto druid, the point when the entire party is grouped up just before you land at the Faceless Watcher is a great time to cast Wild Growth, as it should hit everyone in your party and will start healing that initial fall damage and the AOE damage. There are four in this corridor. One pats, and if you wait a moment you can easily pull him back towards the steps to avoid pulling the second. The final two are by the entrance to the next boss and seem like they will have to be dealt with together.
![]() |
| Erunok Stonespeaker |
The third boss you will face is Erunok Stonespeaker. You're not really fighting him, though, you're actually killing the Mindless One that's attached to his head and mind controlling him (reminds me of the Brain Slugs in Futurama).
There are several abilities Erunok does while hostile. He casts some coral spikes which will fire up under the feet of a party member. Naturally, move out of the spikes. He also casts Lava Bolt and Magma Splash. Magma Splash is a conal ability, so stay behind him.
At about 50%, the Mindless One will remove itself from Erunok. It now has three abilities it can do.
Mind Control: The Mindless One will attach itself to a party member, usually the one with the highest threat, mind controlling them. For the first time, it is ok to DPS the MC'd person! In fact, it's what you're supposed to do! You DPS the MC'd person to 50%, at which point they will be released. They regain full health after they are released. The MC'd player should be tanked, as otherwise they will start firing off their abilities at the party members.
The damage to the Mindless One between mind controls will be what kills him off, so you'll want to free your party members from the MC as quickly as possible. Between mind controls, he will fire off either (or both) of two AOE abilities.
Poison: Green poison on the ground. Don't stand in it.
Mind Flay: Purple beams shoot out from the boss and channel onto all party members, dealing damage.
See the screenshot below.
It's now time to make your way to the final boss!
The corridor on the approach to the final boss is filled with water elementals. The large ones should be tanked and killed quickly. The smaller ones are a bit more of a nuisance and the tank should keep a hold of them, as too many will be deadly on a DPS or healer. I'm unsure if this is supposed to be a guantlet (it's certainly a short one if it is), but it seems moving through that corridor as quickly as possible is best, as that seemed to reduce the amount of small elementals spawning. At the end of the corridor by the gate/entrance to the final boss are two more large water elementals. Apart from the small adds being a nuisance, none of this trash seems to have any abilities of any real consequence.
![]() |
| Neptulon |
Neptulon is the final boss in TotT. Or, rather, Ozumat is; you are actually trying to help Neptulon.
There are two phases to this fight. The first phase, which is essentially dealing with waves of adds, and the second phase, where you have to kill the boss (Ozumat).
This fight can be a bit confusing the first time, as there are a lot of adds and you need to know which to prioritise. I suggest trying to remain grouped fairly close together to help the tank pick up adds and to not get out of range of heals.
The adds of most importance in this fight are the Sappers. Think of the suppressors on Dreamwalker - they're quite like that in concept. You can see the Sappers in the screenshot below - they will be channelling onto Neptulon. It seems like the faster they die, the faster you push the phase, so these adds are top priority.
You can see in that screenshot as well one of the other types of adds, the mutated creatures (Blight Beasts). The tank should kite these. The tank should also kite the ones that look like Faceless Ones, Unyielding Behemoths, as they hit hard and do a frontal AOE cone of black tar. Don't stand in the cone, and don't stand in black stuff on the ground. There are also more packs of murlocs which, again, are mostly just a nuisance. The tank should try to get as many of these as he can to keep them from latching onto the healer (I had a warrior tank vigi me to help with this - keeping close to your tank may also be useful to catch them in AOEs). Barkskin and Nature's Grasp are once again your friend. Nature's Grasp will work on all these adds.
If Sappers are not up, priority is Vicious Mindlashers, the Unyielding Behemoths, Blight Beasts, and the murlocs. The sappers should spawn partway through the first phase.
Once all the Sappers are dead, Neptulon will begin yelling that the waters are cleansed and will fill the room with water.
This begins Phase 2:
The worst thing in this phase is orientating yourself at the beginning; it can be very confusing the first time. As the room has now filled with water, you begin to swim, and as you rise up and see the actual boss (Ozumat, the giant creature spewing tar into the water in the screenshot above) the room does seem to get smaller, which will move your camera position in. ETA: The buff Neptulon places on the party will make you all grow massively in size, which is also what makes the room appear smaller (Thank you to Trizophenie for the clarification!).
The fight from this point on basically is a DPS race. The black bile that's spewing in causes a stacking debuff which deals shadow damage over time (which appears to cap at 200 stacks, dealing 40,000 damage per second).
As a healer, you can likely ignore the boss and focus on healing (and you want to make sure you don't fall behind). Tranquility is great in this phase, especially if you found you have fallen a bit behind while adjusting to the phase change. You may want to target Neptulon to throw some heals his way if you need to.
For DPS and the tank, you'll want to target the boss and burn him as quickly as possible. Finding and targeting him will likely be your biggest issue, especially the first time; you will likely have to angle your camera slightly up to spot him (he's essentially on the wall of a dome, it seems like) then make sure you're facing him and in range to attack.
Currently this fight appears to be bugged, as you can target Ozumat, but you cannot attack him with anything other than melee autoattack swings. As you can see in the screenshot above, any other attacks give an error message of 'target is not in line of sight'.
And that is it! It's a pretty fun dungeon and a nice introduction to Cataclysm dungeons. I expect the heroic version will be very challenging!
Subscribe to:
Posts (Atom)