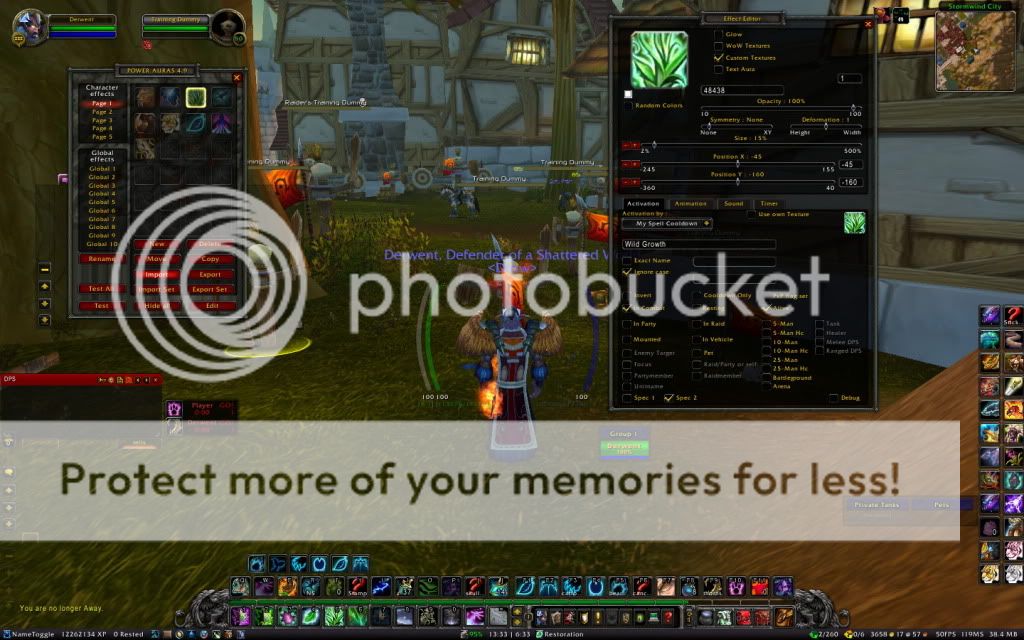
I thought I'd make a post about my UI, to show some useful things both for healing and dpsing and perhaps give some ideas for those personalizing their UIs.
I had a friend suggest making a UI package for people to use, so I'll likely try to set that up, especially if there's interest. I'll try to do that ASAP, I need to look into the best and simplest way to set that all up (and likely write some info on setting up the included addons).
What follows are what I'm using at the moment. My basic interface is still the Blizz standard - I personally quite like the party/target frame setup at the moment. I also got very accustomed to using the default action bars, particularly once I set up a hotkey system that made good sense to me. I did prefer to scale everything down, though, reducing the action bar and user frame sizes significantly. This cleared up a lot of space on my screen (and is one less addon to worry about as well). You can do this by going to Menu - Video - Resolution; tick 'Use UI Scale' and adjust the slider from Low to High to adjust the size of all of that.
I use all the action bars. Go to Menu - Interface - Action Bars and tick which ones you want (bottom left, bottom right, right 1 and 2).
For basic raid standards I have
Recount (including
RecountGuessedAbsorbs, which is useful for measuring Disc bubbles in fights),
Omen,
oRA2, and
Deadly Boss Mods.
I use
Parrot for my scrolling combat text. I particularly like Parrot as it shows stickies for crits and can show cooldowns/procs/etc as well which can be useful additional reminders. The only time I have to disable it is when raiding on my tanking toons, as there's simply too much incoming information (between incoming and outgoing damage and heals) that I end up having difficulty seeing, and I don't want to miss seeing a stray add or something similar.
I use
Quartz for cast bars.
I also have
FuBar, which I find is useful for various things (DualSpecFu for swapping talents, GuildFu and FriendFu for seeing friends, NameToggleFu for quickly turning names/guild tags on and off (useful for screenshots), DurabilityFu for keeping track of repairs, and some others). (Note - I had to do some fiddling with FuBar at the Halion patch, as I don't believe it's currently being updated. To fix it I believe I went into the addon file and pulled its Libraries out of the FuBar folder and just straight into the general addons folder. This made it easy to update the Libraries (using Curse's client), which got FuBar functioning again with the patch).
I use
SexyMap simply for cosmetics, my druid has the 'Emerald Portal' map, and I tend to put different maps for each toon. I also use
TipTac for tooltips.
I'll start with a shot of my kitty setup to show some useful addons for feral.
(Click the screenshots to see them full-size - you can also pull them up in a separate window that way).
The main addons of note here are
Rogue Power Bars,
Power Auras Classic, and
ArcHUD.
Rogue Power Bars are the bars just below my toon showing my buffs and debuffs. This is an excellent way to keep track of all your buffs and debuffs as cat, which are crucial in your rotation. As you can see, the timers are keeping track of my Savage Roar, and of my Rip, Mangle and Rake on the target. You can also set it up to track your Berserk timer (I didn't pop Berserk for this shot so you could see the Power Auras, which I'll get to). You can also enable it to track other's debuffs, particularly Mangle (cat), Mangle (bear) and Trauma (arms warrior), which is very useful if someone else is the Mangle-bot so you know you're safe to keep on shredding instead of refreshing the debuff.
Power Auras is showing a few things in that shot. You can see my Tiger's Fury is ready (the tiger icon below my toon), Berserk is ready (to the right of the three icons), and in the centre is my Omen of Clarity notification (which also makes two blue arcs around my toon). Power Auras is great for tracking spell cooldowns (like Berserk) or for notifying you when you gain buffs or procs (like OoC). Especially in cat, at OoC procs I try to get in another free shred, so it's crucial to see that it's available. The red ring around my toon is showing me that Predator's Swiftness is up. I mainly use this when PVPing as feral (though it has its uses in PVE), I also have it make a loud raid warning sound, so I know that the proc is up and that I can get an instant spell off (an instant Cyclone most likely in PVP, perhaps an instant Rebirth in PVE).
The last main one there is ArcHUD, which shows both my HP (and in this case, my energy), the target's HP, and, nicely for cat, it shows my combo points on the target. I like having all of these things centred around my toon so I can keep an eye on my combo points, my buffs/debuffs, my spell cooldowns, and all the while still be watching my toon and my feet (so I can avoid fire).
Now onto my Tree UI, which I'll also go over some of the raiding addons as well (I raid primarily as Tree).
Here again you can see Power Auras and ArcHUD. Rogue Power Bars is still on, but I disable the 'Track Other's Debuffs' while healing as it would otherwise get in the way of my healing frames.
I'll touch quickly first on Power Auras since I've already explained it above. In resto, I use it to track my Nature's Swiftness cooldown so that I know when it is available. Again, Omen of Clarity is set up as well. My last one is for Wild Growth to show me when it's available for use.
Along with Deadly Boss Mods (DBM), I also downloaded the additional
DBM Spell Timers. You can see some of the timers it tracks on the upper right - I can see all the Misdirects and Tricks of the Trade that have just been cast on this initial pull. This is particularly useful for tracking Battle Rezzes and Innervates - with just a glance I can see whose Battle Rez is available and, if I'm desperate for mana I can ask for an innervate, or if I see another druid is desperate for mana and has already used their innervate, I can toss them mine.
The primary addon of note here though is
Vuhdo (all the green bars dead centre). I use this addon to heal (though I've grown to love it so much that I now use it on all of my toons, including non-healing ones, as raid frames).
Vuhdo has been my favourite addon to use both for healing and otherwise. It's very customizable and easy to setup, so it's easy to get started with it and get it looking exactly how you want it to look. I personally like using the green bars (if you've seen either the Sindra or Halion videos I posted, you can see how they shift colour as people get low in health). It's also an extremely informative addon. Symbols will pop up on it at certain debuffs (which you can also customize if you do or don't like them), such as Icetomb targets on Sindra, Vile Gass on Festergut, Bone Spikes on Marrowgar, Incinerate Flesh on Jaraxxus, so forth. This is one of the primary reasons I use it as raid frames on all of my toons - I can easily see what's happening to everyone in the raid at any given time by just glancing at it.

It has several nice things for druids (and other classes). For druids, you can activate the setting to see when Swiftmend is available on a target (the red dot on the bar in the screenshot above is indicating Swiftmend is available). This is great for several reasons - for one, it will show you that your Swiftmend is off cooldown and ready to use. Secondly, this lets you see when Swiftmend is available on a target affected by another druid's HoTs (without needing indicators for others HoTs). With that, I can easily see any Swiftmendable target.
In that shot there, I've loaded myself fully with HoTs so you can see the indicators. I use the little HoT timer dots in Vuhdo to track mine. On the bar, moving around, top left is my Rejuv, top right are my Lifeblooms (additional stacks will cause the little square marker to change colours), bottom right is my Regrowth HoT, and bottom left is my Wild Growth.
You can also see the Quartz castbar for myself.
The best thing with using Vuhdo (or a similar addon such as Healbot) is I never have to target a person to heal them if I don't want to (though this can also be done with things such as mouseover macros). This leaves me free to target whomever I feel like; the boss, to keep track of its HP percentage perhaps, a specific tank perhaps, a Kinetic Bomb that's looking neglected in Princes, etc. Back when I took my first foray into healing (in 5-man dungeons while leveling) I tried the simple Target person taking damage, heal! I found this really slowed my reaction time, though. That is probably the biggest advantage to using an addon like Vuhdo - my reaction times are much better, which is particularly crucial in raids. In the seconds it would take to target someone taking damage and then heal them, they've likely already been healed by someone quicker. Since I no longer have to target anyone, I can directly and quickly heal them with Vuhdo.
Vuhdo also has a Buffwatch which is nice to use. You can set it to either Smart buff (automatically use group buffs when x amount of people are missing the buff, or use the single buffs when only 1 or 2 are missing the buff), always Group buff, or always Single buff. This is nice pre-pull for buffing to ensure everyone is buffed. You can also set specific targets - Thorns, for example, you can set to track always the tanks, or just yourself, or everyone. It also shows the time remaining on your buffs and who's low.
You can also set up different profiles for different specs on the same toon, so you don't end up running out of bindings to use, or if you have different spells. I use this primarily on my priest (who is Disc/Holy, I use the same binds for Penance and Circle of Healing and Pain Suppression and Guardian Spirit) and on my Paladin (mainly so I can have Righteous Defense up in his Prot spec but make sure it's not keyed up in his Holy spec). There are also configurations for working with Clique and with Pally Power should you choose to.
It's nice that Vuhdo can help you watch for some incoming damage (showing instantly who is marked for an Iceblock on Sindragosa, for example, so you can toss a HoT or heal on them), however, it's no substitute to knowing the fight and being aware of your surroundings! Knowing/learning the incoming damage you can expect in fights, seeing when raiders are in hazardous spots, and listening to your raiders, particularly your tanks (who may be calling for Cooldowns, or announcing that they're out of cooldowns to mitigate damage), will all help your healing tremendously.
Also, a note; under the 'Spells' tab on Vuhdo is a SmartCast configuration. I do tick Smartcast for rezzes/battlerezzes (makes BattleRezzing that much easier/quicker, I can get someone up instantly if necessary), however, I turn OFF (untick the box) for cleansing and buffs. The smart cleanse will basically instantly cleanse/decurse someone when you click their bar. You will likely NOT want to have this on - on a fight like Halion, it will likely result in you cleansing someone too early. It will also mean instead of healing the person (if that's what you tried to click the bar to do), you will cleanse them, which may end up meaning they're cleansed... but dead.
Some last things of note on my UI.
Chat boxes: I don't use any chat addons (though many use Prat), I do like to separate some things out of my primary chat window though. In the last screenshot you can see that I've moved all my system messages (rolls, announcements of people logging, etc) into a seperate, smaller window in the bottom left of my screen. This is to prevent these messages from spamming my chat window (up where I've said HAI in guild hehe) so I don't miss anything important said in Guild, Raid, or in our role-specific channels during raids.
For my action bars - although I'm normally using Vuhdo for my heals, I still have my healing spells (and some others) keybound for easy use should I need to use them at any time. Particularly on a fight like Valithria, if I'm healing the dragon, I tend to prefer to use a macro to /tar and /focus her to bring up a bar on Vuhdo to track my HoTs, but heal her directly. My Nature's Grasp and Barkskin are hotkeyed, as well as lockrocks, manapots, Cyclone, etc.
Hm, this ended up being a much more involved post than I had anticipated!
I'll see about setting up a UI pack, and can go into detail in an accompanying text file for how to actually set things up/customize the addons.
Feel free to leave any comments with questions!