
There was a lot of Raid Testing on Beta last week, so I have lots of updates for you all! I'm splitting up the zones into separate posts as there were a lot of bosses.
We'll kick it off with the rest of the Bastion of Twilight!
I covered the first boss of BoT in my last Beta Raid post here. After you defeat him, you have some pretty straightforward trash on the way to the second boss. You'll have some fun with the fire elementals that charge up the set of stairs on the walk to the second boss - they explode on impact and, although they don't do a huge amount of damage, they will knock you back. If you are angled to the side, you may go flying off the staircase and fall to your death. We had several people get knocked off and had a good laugh.
The second boss are the two dragons, Valiona and Theralion.
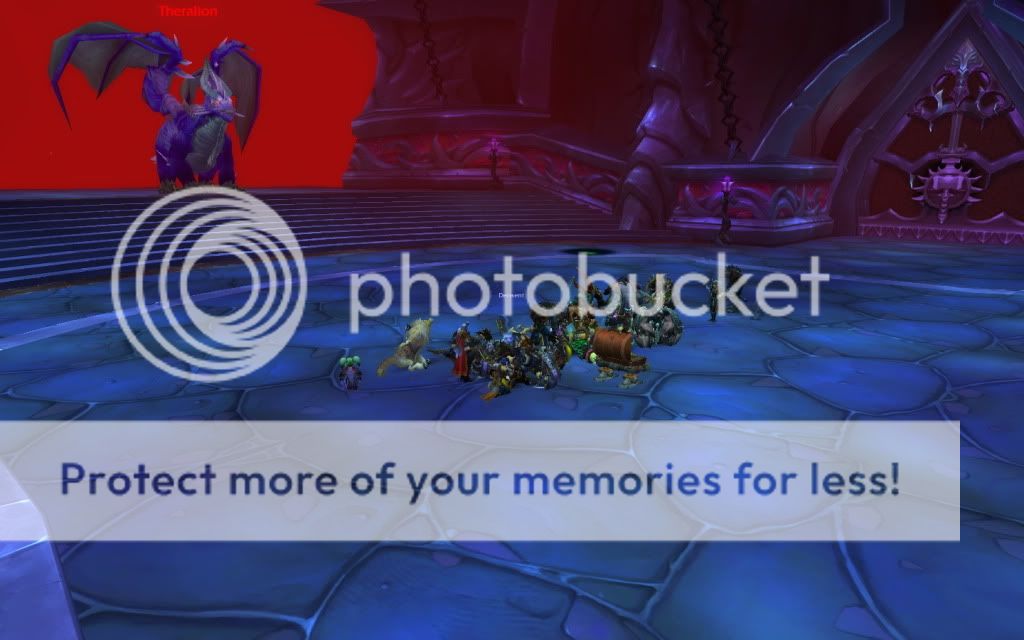
Valiona and Theralion
This was an interesting fight, and not too difficult once you figured out the abilities. You only need one tank as only one dragon will engage at a time, the other will be in the air. The dragons have the following abilities (source):
Valiona:
Grounded:
-Blackout - Dispellable debuff - when dispelled or expired causes 250,000 shadow damage spread amongst all nearby players.
-Devouring Flames - Targets a random player and casts flames that deal 70,000 damage per second.
Flying:
-Twilight Meteorite - Debuff - after 5 seconds deals 110,000 shadow damage spread amongst all nearby players.
-Deep Breath - Instant death on hit, 10,000 damage per second caused by the remaining flames on the ground.
Theralion:
Grounded:
-Engulfing Magic - Causes a random player to explode for 10% of their spell damage or healing done for 20 seconds, hitting nearby players.
-Fabulous Flames - Flames on the ground which deal 7,000 damage per second.
Flying:
-Dazzling Destruction - Swirling zones on the ground which deal 400,000 shadow damage to players in the blast zone after 5 seconds.
-Twilight Blast - 17,000 shadow damage to a player spread amongst nearby players.
We started by pulling Valiona so she was grounded first and Theralion flew into the air as we pulled. We spread out within close range of Valiona to deal with her two attacks. Remaining in close range made it easier to move out of the way when she cast Devouring Flames. It also made it easier to deal with her second ability, Blackout - this debuff's damage is dealt to the targeted player BUT it is spread amongst any nearby players. You want to stack your raid on top of the targeted player before dispelling, as this will mitigate the damage immensely. If the person is on their own when they are dispelled, they will die.
While fighting Valiona on the ground, we also had to watch for Theralion's Flying abilities. Dazzling Destruction is quite obvious - just move out of the swirling zones on the floor and you won't take damage. Twilight Blast is similar to Valiona's debuff, the targeted raid member can just stay with the group and the damage should be split amongst them.
The dragons will switch and Theralion will land and Valiona will take to the air. You now will see Theralion's grounded abilities and Valiona's flying abilities. Engulfing Magic is the one debuff you must run out of the raid - it causes you to explode and will cause damage to those around you (similar in concept to the arcane explosions caused by Unchained Magic in Sindragosa HM, except you'll be constantly exploding while you have it). He also deals Fabulous Flames, which is a simple 'stay out of fire' mechanic. Valiona has two abilities of import when she's flying - her Twilight Meteorite is similar to her Blackout, simply stack up before dispelling the debuff again. The second ability she has is Deep Breath - this is similar in concept both to Felmyst and to Onyxia's Deep Breath. If you get caught in it - you will die. She'll line up to a third of the room before sweeping across with the cast.
After each round of abilities the dragons will continue to switch until they're killed.
Overall, a pretty fun fight. Some slightly different mechanics mainly in the debuffs, as many are used to running debuffs and dispels out of the raid, and most in this fight require you to be stacked up. Tank damage is not too bad and much of the raid damage is avoidable. Hits that you will have to deal with to the raid will be from dispelling the debuffs, but if the raid is fully stacked, the damage to everyone will be much less than if the debuff targets are more isolated.

We now head to the third boss in Bastion of Twilight!

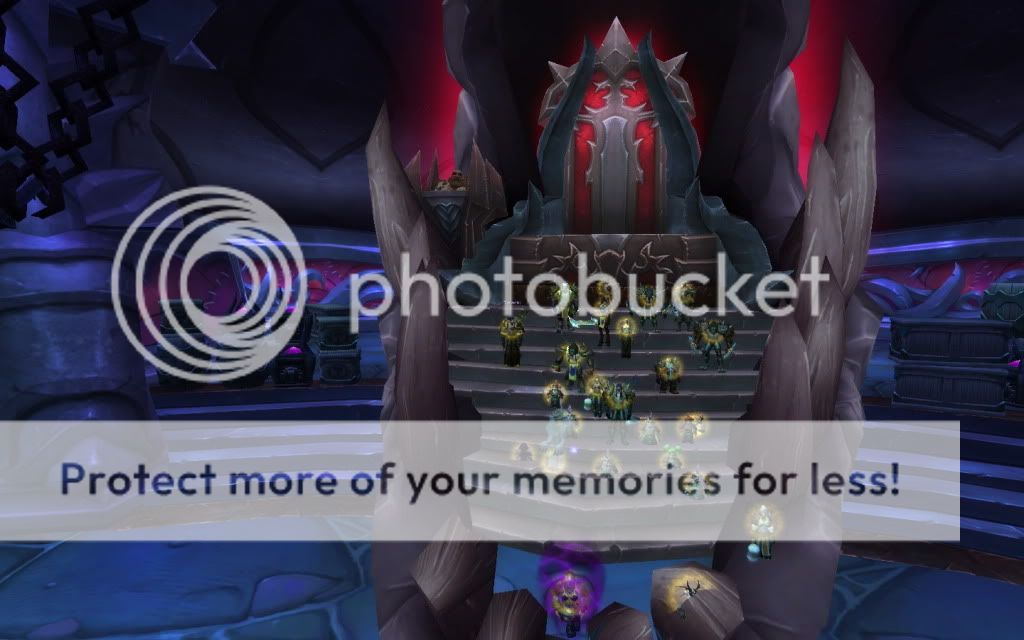
Ascendant Council
The trash in this room just before the bosses were... interesting. There were lots of elementals, Earth, Wind, Water/Frost and Fire (how many times will people be yelling 'Heart! By your powers combined... I am CAPTAIN PLANET!!' on this boss :D ). The earth and wind elementals did not feel too difficult to deal with, but the fire and frost adds hit a lot harder. We found that pulling a fire and frost together helped immensely - the fire add had a fire shield up which dealt damage to attackers, and it seemed like the frost add destroyed that shield. The frost had does an AoE frostbolt attack which hits very hard and should be interrupted if possible, as it's a lot of damage to the entire raid.
This boss was a very interesting fight with some creative use of buffs and debuffs. It's a bit difficult to see in that screenshot, but there are four members of the council around the room, two straight ahead by the columns and two more up on platforms. You will only fight two at a time in the first two phases. I can't remember the names of each one and unfortunately wowwiki doesn't seem to be updated for this fight yet, so I can't fall back on that to double check. They each represent a different element, though, and their names are fairly obvious - Fire, Frost, Wind, Earth. The Fire boss was called Ignaceous I think, the Earth boss had 'Terra' in its name and the Wind boss had 'Ara' in its name. I'll just refer to them by the elements for now.
The two bosses on the ground will be the Fire and Frost bosses. I'm not sure if this might change each time you zone in (so that you might fight Earth and Wind first), but the pairings will remain the same.
You will only need two tanks. The phases seem to be pushed by health percentages - we chose to dps just one boss in each pairing which got us to the next phase.
Phase 1 - Fire and Frost:
There are several abilities these two do. The fire boss will lay streaks of fire on the ground and the frost boss will toss out a debuff on players called water globules - if you have this debuff, you want to walk through the fire to remove it. You don't need to stand in the fire for long (so don't), just long enough to remove it. This will spare you from getting hit with the Frost boss's next ability, Flash Freeze - if that water globule debuff is still on you when he casts this, you will be Flash Frozen in an iceblock. These two also have two AoE abilities - the Fire boss will jump to a random player, do a fire nova AoE and knock the players in the area back. This isn't too big of a deal, BUT, if you are near the Frost boss or just angled in his direction, you might get knocked into the Frost boss and get caught in his AoE, which happens at about the same time. This will kill you.
Phase 2 - Earth and Wind:
These two have big AoE abilities which you must use the debuffs around the room to mitigate them. There will be tornadoes zipping around the room and swirling spots on the floor - these two things will give and remove a debuff that helps you survive their abilities. The Earth boss will cast Quake and after that the Wind boss will cast Thundershock. There will be on-screen emotes for both abilities. As soon as the two bosses come down, you'll want to run into a Tornado. The Tornado will knock you back a bit and do a little bit of damage, but it will place a swirling winds debuff on you which is crucial. This debuff will cause you to hover a bit above the ground and will mitigate the damage from Quake and allow you to survive it.
After Quake, you will want to move to one of the swirling zones on the ground. These swirls will suck you in and 'ground' you, removing the winds debuff. You MUST do this before Thundershock is cast, as getting grounded will mitigate the Thundershock damage.
There are a couple of other abilities to be aware of. There is a big cast which must be interrupted - I believe it was by the Wind boss (someone please correct me if I'm wrong). There is also a Chain Lightning ability. Players targeted by this ability will have a yellow arrow above their head. These players MUST run out and away from the rest of the raid. If these players are clustered amongst the raid, people will take massive amounts of damage. If they run out and are alone, the damage will be significantly less.
We again burned down one of the bosses.
Final Phase - Elementium Monstrosity:
In the transition to the final phase, the entire raid will be stunned and the four bosses will merge into one, forming the Elementium Monstrosity. This final phase wasn't too difficult. The boss will drop pools on the ground (though these may be bugged or undertuned, as they weren't causing much damage for us). We kited him around the outer edge of the room. We kited him fairly slowly as the pools weren't growing too quickly and weren't too damaging.
It's a very fun fight! Overall damage isn't too bad, especially if the raid is paying attention to their buffs/debuffs and using the mechanics in the fight. It is a really interesting concept and fun to do. The big killer seemed to be chain lightning on our first couple of attempts, raid members targeted really need to ensure they move away. I enjoyed this fight a lot! It wasn't too tough to heal, though again raid awareness was key in keeping overall damage down.
The kill screenshot unfortunately isn't too fantastic for this boss, as all that remains is this belt.

Now it's time for the last boss!
Cho'gall!
The raid testing on Cho'gall was announced pretty last minute, and a ton of the guild had gone off to see Blizzcon as we were pretty much done for the week, so we ended up only having enough people to do this fight on 10 man. It was still a good fight, though, interesting and a lot of fun and still fairly challenging on 10 man. There's a lot of concern at the moment about the 10 man vs 25 man tuning, and Blizz as well has said that ensuring the fights are equally challenging on both 10 and 25 will be one of the more difficult things to get right. They mentioned in the Blizzcon Dungeons and Raids Q&A that this is a very high priority for them. I really quite enjoy 10 mans so I'd definitely like them to be as challenging as the 25 man versions.
The nice thing about doing this fight on 10 man is I can be a lot more detailed about our group makeup and things as I can remember it a lot more easily, and I can also give a nice idea of how healing feels in a 10 man.
Our group makeup was as follows: 2 tanks (Warrior and Paladin), 2 healers (Druid (myself) and Paladin), 6 DPS (DK, ShadowPriest, Mage, Lock, Warrior, Paladin).
Wowwiki does have a page on Cho'gall's Abilities which is great, as now I can be a lot more specific/accurate about his abilities.
A note at the start - you will see a graphic of a Blood Bar on your screen (though on our final attempt this seemed to bug, as none of us saw it). A lot of abilities will cause Corrupted Blood, which seem to fill up this bar, though none of us ever got very high. It looks like if you fill up your bar and reach Absolute Corruption, which will turn you into a Faceless One. Apparently this debuff will cause you to receive 100% less healing (so no healing) but inflict 100% additional damage - we didn't really see this happen so I'm not certain whether this will mind control you (and turn you against the raid) or simply increase your damage on the boss but allow you to die much more quickly. You can avoid getting corruption by avoiding damage.
Raid awareness is crucial in this fight. Interrupts and avoiding AoE damage is essential. Healer mana is crucial - the final phase has a lot of damage and healers will need to conserve mana for that final phase, and raid members avoiding taking excess damage will help immensely.
There are two phases to this fight.
Phase 1 - 100% to 25%:
This phase will primarily be alternating between DPSing the boss and the adds he summons. There are also several abilities that will need to be avoided or interrupted.
Conversion - Cho'gall will MC a player, causing them to channel Worship onto him, which causes him to gain Twisted Devotion (increasing Cho'gall's damage done by 10% for 20 seconds). This channel is interruptable, and interrupting the target will break the MC. This should be done as quickly as possible to avoid the damage buff on Cho'gall and to free the player. Dispels may be needed on the player to free them from lingering stun effects (ie HoJ).
Flame's Orders and Shadow's Orders - Cho'gall orders either Flame or Shadows to come to his aid. Flames will add fire damage to his melee swings and create fire patches on the floor, Shadows will add an AoE shadow damage to the raid and create shadow patches on the floor.
Fury of Cho'gall - This will blast the target causing damage and increasing Physical and Shadow damage by 20% each. Cast on the primary aggro target and stacks - tanks will need to taunt off each other as this stacks up. The timing on the taunts worked well for us, as generally a taunt time came as an add was spawning, freeing up a tank to pick up the add.
Summon Corrupting Adherent - These are Faceless Ones-type adds that will be summoned. On ten man he only summons one at a time. DPS should switch and kill the add immediately. We pulled the add to the back of the room, because when they die they leave a black pool called Spilled Blood of the Old God, which will cause shadow damage to anyone caught in it. They don't seem to go away so you don't want your room littered with these. The adds have an interruptable cast called Depravity - INTERRUPT THIS. It causes a large amount of shadow damage to everyone in the raid and causes Corruption. They also have a frontal cone of Sprayed Corruption, so melee should remain behind the add. They also have a shadow-crash ability called Corrupting Crash; there is an obvious swirl effect on the area of the ground it's targeted at, so move out of that spot. The add needs to be killed quickly before he can cast Festering blood.
There is also a second type of add which are lots of non-elite blobs - there seems to be two Corrupting Adherents summoned, then finally these blobs. It's best if the offtank or a DPS tries to pick up aggro on them. They don't do a huge amount of damage and they can be AoE'd/DPSd down quite quickly, but they can quickly aggro onto healers and cause a nuisance.
Keep an eye on his health - you want to be prepared for the transition to phase 2 and ensure all adds are dead before you push the phase. Damage increases significantly in phase 2 and there are more adds to deal with in the phase, so you don't want to be surprised by the transition.
Phase 2 - 25%-0%:
The tank debuff Fury of Cho'gall will still be placed on the tanks, so the tanks will still need to taunt off each other in this phase.
Healing becomes a lot more intense in this phase, so the entire raid really needs to ensure they mitigate their damage in the first phase so healers have enough mana and their cooldowns ready for this phase. Having people topped off or very close is pretty key going into this phase. Raid members should be prepared to use healthstones if they need to in this phase.
Cho'gall gains Corruption of the Old God in this phase, inflicting shadow damage every 2 seconds to everyone in the room.
You'll want to spread out just enough in this phase (healers could probably just turn to face away from the raid) due to Dark Sickness - this debuff causes you to feel sick, making you vomit and inflict shadow damage to those 5 yards in front of you.
This is not strictly a burn phase - you will be burning the boss, but he will summon adds which MUST be killed.
The adds he summons are Darkened Creations, they look like eyestalks in Naxx. They are non-elites so they can be killed fairly quickly, BUT, most crucially, they are channeling a spell called Debilitating Beam, which reduces healing and damage done by 75% and inflicts shadow damage. These adds MUST be killed and killed as soon as possible, and should be stunned or interrupted if possible. If they don't die, you will, because damage and healing will not be able to keep up. The AoE shadow damage plus these beams will be causing huge damage.
Deal with those adds and finish off the boss and you're done!
Two healing this on 10 man was definitely doable and quite fun as well. It was challenging but not too difficult, and good raid awareness to mitigate raid damage at the start is crucial as is watching your mana and timing your cooldowns. As a druid, I was timing my cooldowns and my innervate very carefully. I was being careful with my heals and ensuring I didn't waste mana by mis-targeting heals (ie a poorly placed Efflorescence or Wild Growth). I used my innervate a bit earlier than I normally would, at approximately 50-60% mana or so, to just top myself back up as much as I could and to ensure that Innervate would be available again in the final phase. I saved my Tree of Life and Tranquility cooldowns for the final phase.
The pally and I were pretty dead even with heals; on HPS, healing done, and mana levels and conservation. This was particularly nice to see as not only was our healing even, it was interesting to see that in comparison to our 25 mans, where our priest, shaman and druids were all pulling pretty equal HPS, but our pallies were disproportionately high (Holy Radiance was doing a ton in 25s).
Druid heals overall; we're feeling strong both on tank healing and on raid. Our HoTs are still excellent for raid healing. Our tank healing tools are strong as well, and the change to Empowered Touch is excellent - now both Healing Touch and Nourish will refresh our Lifebloom stacks. I'd be quite intrigued for Empowered Touch to also add stacks of Lifebloom - say you put up one stack of Lifebloom on your tank, then begin healing with Nourish or Healing Touch - those two spells would then add the second and third stacks of Lifebloom, then continue to refresh as normal. They likely won't implement that but I mentioned it in my beta feedback on this fight so maybe they'll take a peek at the idea. :) I feel like Nourish and Healing Touch could hit just a bit harder to improve our tank heals a little more as well, but we'll see. I'm not sure where their healer tuning is at the moment.
Wrap-up:
Overall, some very interesting fights! Bastion of Twilight is going to be a lot of fun. There are a lot of interesting mechanics and raid awareness and things like interrupts and CC will be very important throughout the instance.
Druid healing is doing very well at the moment! We're still excellent on raid heals and our HoTs are very strong. Two healing the 10 man gave me a good feeling of it as well, 25 mans have been good to show how all the healers are doing in comparison to each other and working together, but two healing the 10 is a bit more challenging as there's less room to fall back on. It was also good to see the druid and the pally, as pallies are seeming a bit overly strong in the 25s - you can see in the screenshot below, we both pulled around 8.5k HPS and about 37% each of the healing done, so very very even, and neither of us were having to compensate for the other.
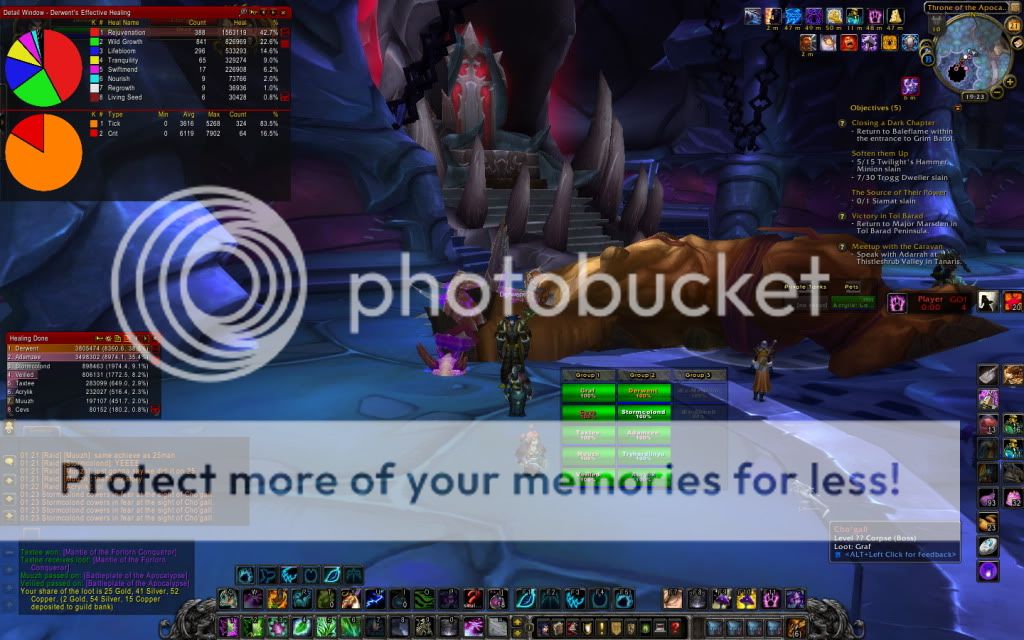
You can see on the recount window there, Rejuvs and Wild Growths are still very important in both raid healing and also on the tanks - my WGs were typically cast on the melee to hit the tanks as well. There are a lot of Swiftmends (though Efflorescence isn't showing up as it's being recognised as a 'pet heal') which I was casting mostly on the Tanks and melee to get that AE heal on them. Lifeblooms are high up there as I was always keeping a stack up on either one of the tanks. I popped Tranquility at the start of phase 2 to top people back up and heal through that initial shock of AoE damage. You can see some Nourishes on there from tank healing and there are also Healing Touches (not visible on that screenshot unfortunately) from both tank heals and a Nature's Swiftness cast. There are also some Regrowths in there, a mixture of some quick heals on the tanks that were necessary and also some instant Regrowths on raid members when I popped ToL in phase 2. I also used the extra WG HoT and was throwing Lifeblooms on many raid members in phase 2 while in ToL, and had my innervate and mana pot available for that phase so that I could really keep the heals up in that phase.
That's quite an extensive work up! I'll get more posts up soon on the additional bosses we tested in Blackwing Descent as well as the first boss in the Throne of the Four Winds and Tol Barad.
2 comments:
I really shouldn't be reading this. I'm sooooo bored in Wrath atm /sigh. Very nice review mate!
cheers :D
rofl think of it this way - something to look forward to! :P
Wrath is getting fairly tedious by this point... at least 4.0.3 should be landing fairly soon though. invasions by elementals in the major cities apparently on the horizon... o_O
Post a Comment